The following table shows the various installation methods available for enabling VM insights on supported machines. This post is discusses the deployment by using Azure Policy.

By using VM insights, you can view discovered application components on Windows and Linux virtual machines that run in Azure or your hybrid environment. You can observe the virtual machines in two ways. You can either view a map directly from the VM blade or view a map from Azure Monitor to see the components across groups of VMs.
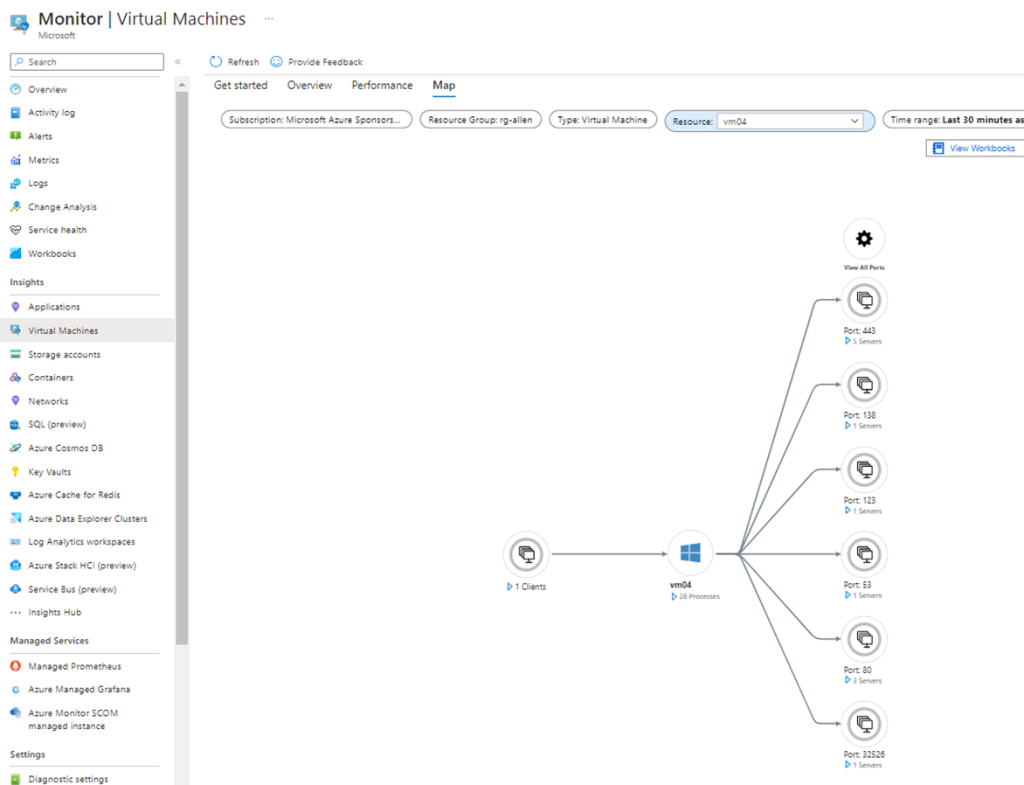
Before diving into the Map experience, you should understand how it presents and visualizes information. Whether you select the Map feature directly from a VM (vm > Insights > Map) or from Azure Monitor (Monitor > Virtual Machines > Map), the Map feature presents a consistent experience. The only difference is that from Azure Monitor, one map shows all the members of a multiple-tier application or cluster.
The Map feature visualizes the vm dependencies by discovering running processes that have:
- Active network connections between servers.
- Inbound and outbound connection latency.
- Ports across any TCP-connected architecture over a specified time range.
To better understand VM Insights, have a look at https://learn.microsoft.com/en-za/azure/azure-monitor/vm/vminsights-maps
Azure Policy Deployment method
The Azure Policy enables you set and enforce business requirements for all newly deployed resources as well as resources you modify. VM Insights Azure Policy initiatives are predefined sets of policies created for VM insights, which install the agents dependencies for VM insights and enable monitoring on all new virtual machines in your Azure environment. You have the capability of enabling VM insights on Azure virtual machines, Virtual Machine Scale Sets, and hybrid virtual machines connected with Azure Arc using predefined VM insights policy initiates.
VM insights Initiatives
VM insights Azure Policy Initiatives install the Azure Monitor Agent and Dependency Agent on new virtual machines in your Azure environment. You may choose to assign these initiatives at a management group, subscription, or resource group level to automatically install the agents on Windows or Linux Azure virtual machines in the defined scope .
The initiatives apply to both, existing and new machines you create and machines you modify. The existing vms will require a remediation task to be run.
There are 5 different options of VM insights Azure Policy implementations:
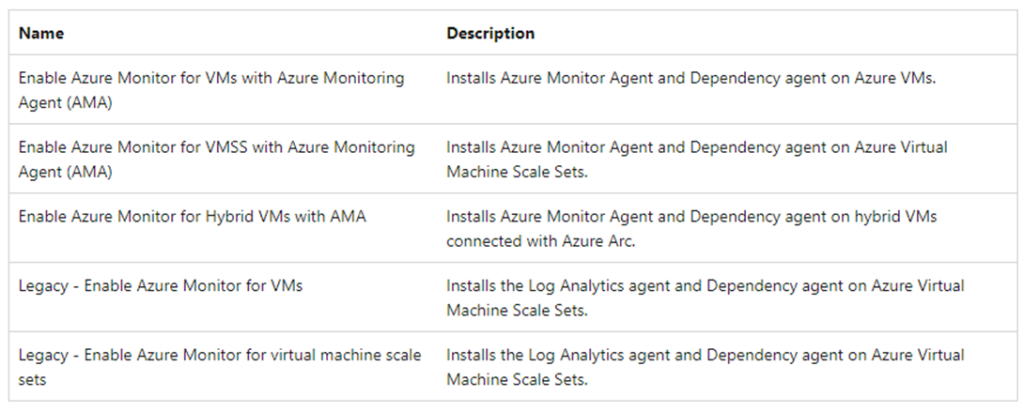
Assigning the VM insights policy initiatives
Determine and then assign a VM Insights Azure Policy Initiative at a management group, subscription, or resource group level from the Azure portal:
- In the Azure Portal > find and open Policy >
- Go to Assignments > Assign initiative >
- Select the initiative scope and exclusion >
- Initiative assignment > select one of the VM insights initiatives eg > [Preview]: Enable Azure Monitor for VMs with Azure Monitoring Agent(AMA)

Advanced Tab >
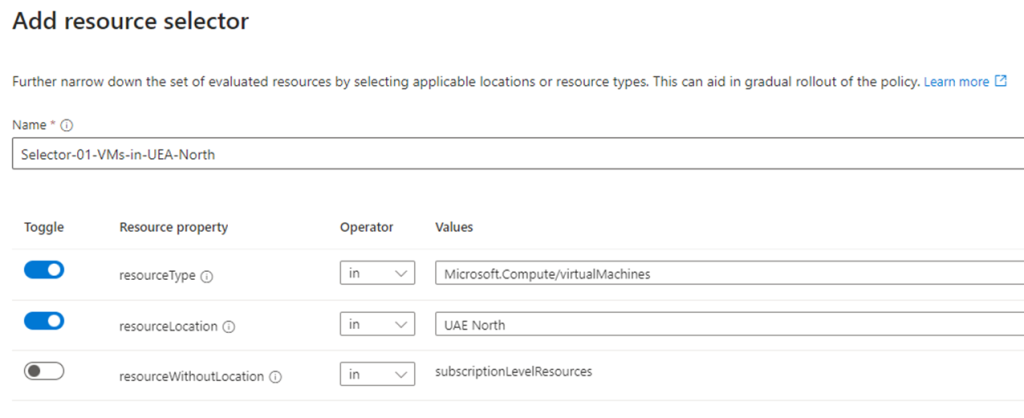
Resource Selector > Provides an optional but fantastic feature for filtering / limiting your graduated deployment at-scale, based on resource location and / or resourceType
You may add multiple selectors / filters if required to assist in a more focused / precise deployment.
Overrides > this is another optional item you may use to override any other existing conflicting definitions and thus force AMA deployments, with the policyEffect which provides multiple options as per below.

Parameters Tab >
Select your target / destination Log Analytics Workspace. (If you require virtual machines to send data to multiple destination workspaces, then you will need to create multiple assignments, as only one Log Analytics Workspace can be added per assignment.
The option exists to either use your “bring your own” user-assigned Managed Identity or using the default built-in user-assigned Managed Identity for authentication depending on your organizational processes / policies.
I suggest unchecking the tickbox and performing some bespoke customization:
#1 Customize your destination LAW
#2 Create a uniquely named bespoke name for your DCR.
This will only customize the “inner” name of DCR, the fully provisioned name will have additional conventions added MSVMI-ama-vmi-default-allen-dcr (as you will notice later when the DCR is created).
#3 Enable Process and Dependencies – make sure you enable this to TRUE!
I skipped this and had to redeploy from scratch!
You have the option of using a custom “bring your own” user-assigned Managed Identity or going with the default MI.
If so, then Insert the custom “bring your own” user-assigned Managed Identity Name and Resource Group location here, else leave these edit blocks blank.

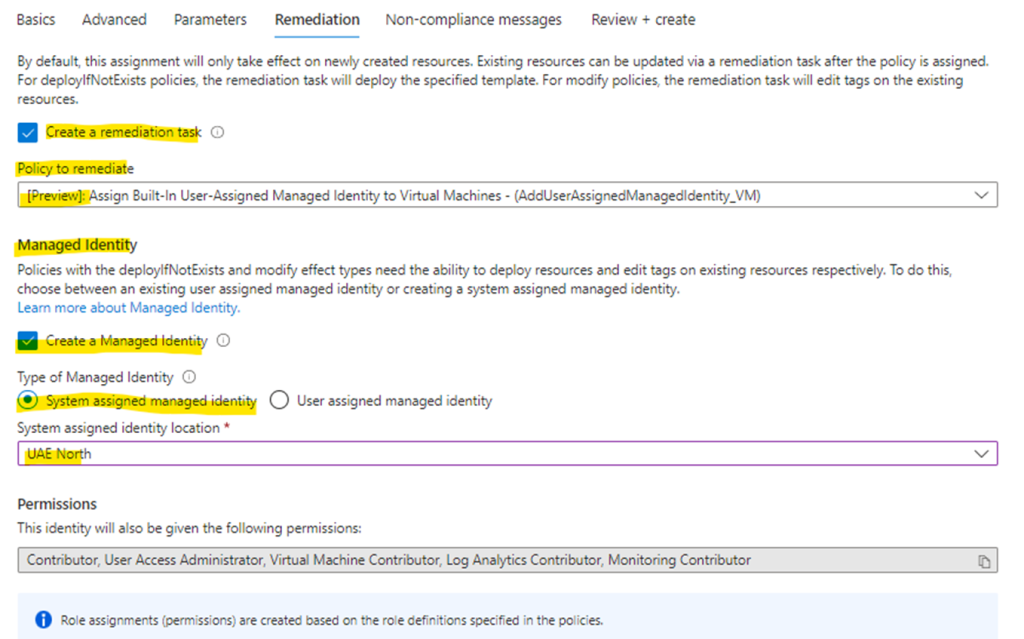
Create a remediation Task
If you have existing virtual machines that will need to have the newly provisioned VM insights Azure Policy applied to, then you will need to provision the remediation task, either during the initial Azure Policy provisioning or post Azure Policy deployment assignment.
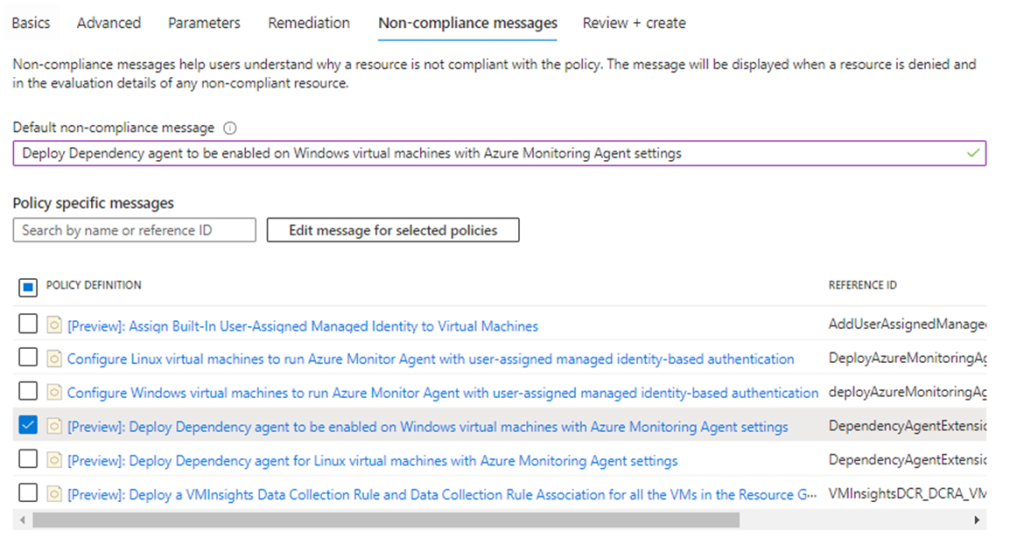
Non-compliant Messages
You have the option of configuring custom non-compliant messages per policy failure, or else skip this step > Create the Azure Policy Initiative.
Verification
- Verify the DCR creation
- Verify the Monitor Map is working
- Verify that the Dependency Agent and the AMA agent is installed
Verify the DCR creation
The following resources are deployed upon the successful provisioning of the VM insights Azure Policy:
#1 Azure Monitor > Data Collection Rules
(You will notice the prefix and suffix added to your customized unique name that you created in the Azure Policy Parameters tab)
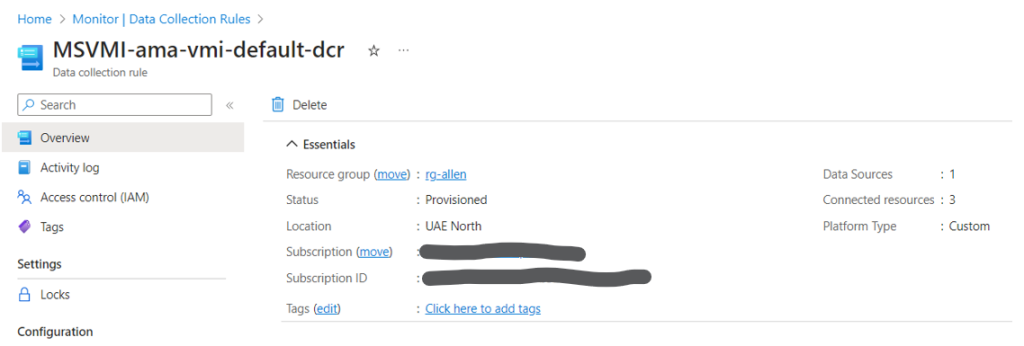
#2 The DCR should automatically be populated with the source (resources) virtual machines contained inside the management group / subscription / resource group scope applied to the VM insights Azure Policy.

#3 The Data Sources are automatically provisioned in the DCR by the VM insights Azure Policy.
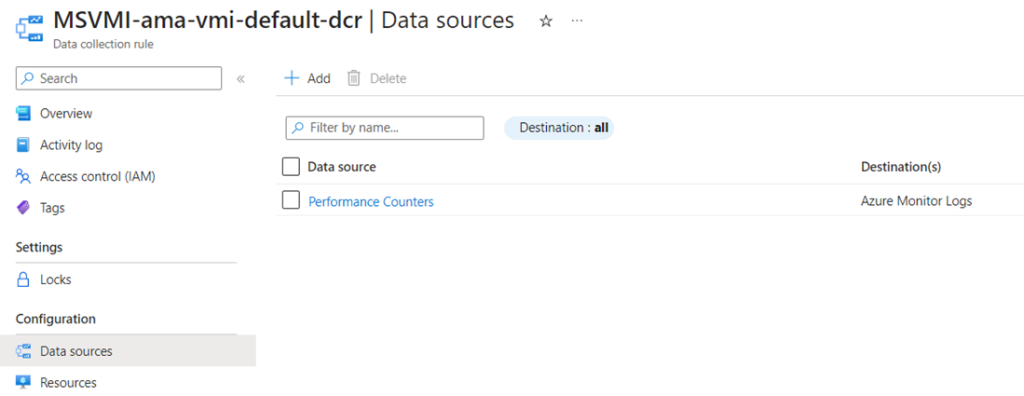
#4 The data source Performance Counters metrics and Destination Log Analytics Workspaces are automatically provisioned by the VM insights Azure Policy.

Verify the Monitor Map is working
Go to Portal > Monitor > Virtual Machines > Map > view the Map
Verify that the Dependency Agent and the AMA agent is installed
After provisioning the VM Insights Azure Policy the virtual machines will have both agents installed on the target virtual machines as an end-state:
#1 Dependency Agent
#2 Azure Monitor Agent

Remediation
If your VM Insights Azure Policy assignment doesn’t show 100% compliance, create remediation tasks to evaluate and enable existing VMs. You’ll most likely need to create multiple remediation tasks, one for each policy definition. You can’t create one remediation task at an initiative level.
To create a remediation task:
Open the target Azure Policy Assignment > select Create Remediation Task and select the target policy to remediate.
If your remediation task fails, then go to Azure Policy > Remediation > Remediation Tasks > and select the failed task
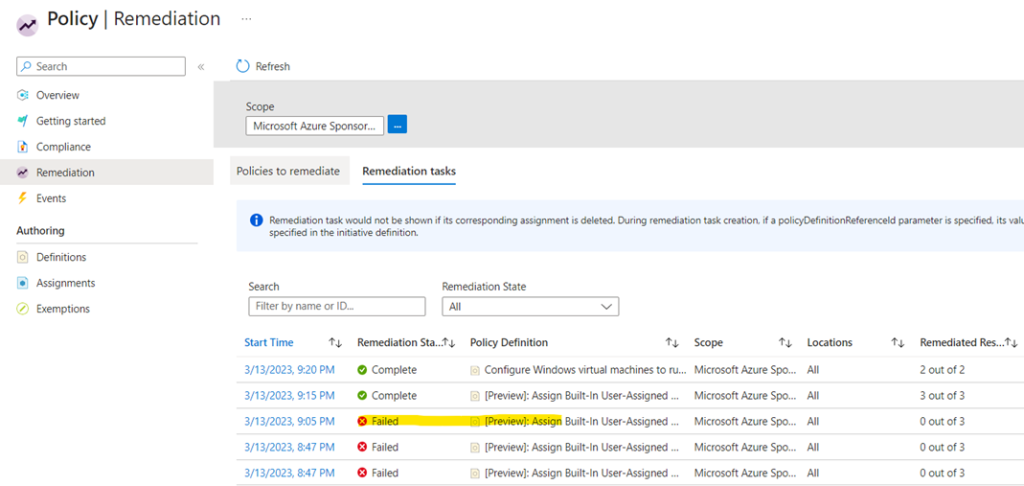
Troubleshooting:
If after your deployment, you are still getting no map and find that your Process and dependencies are missing, then you have left the Processes and dependencies default value on False while provisioning your Azure Policy.
Delete the Azure Policy Assignment and re-provision. Go through my Parameters Tab section again carefully.

Microsoft references
https://learn.microsoft.com/en-us/azure/azure-monitor/vm/vminsights-enable-policy