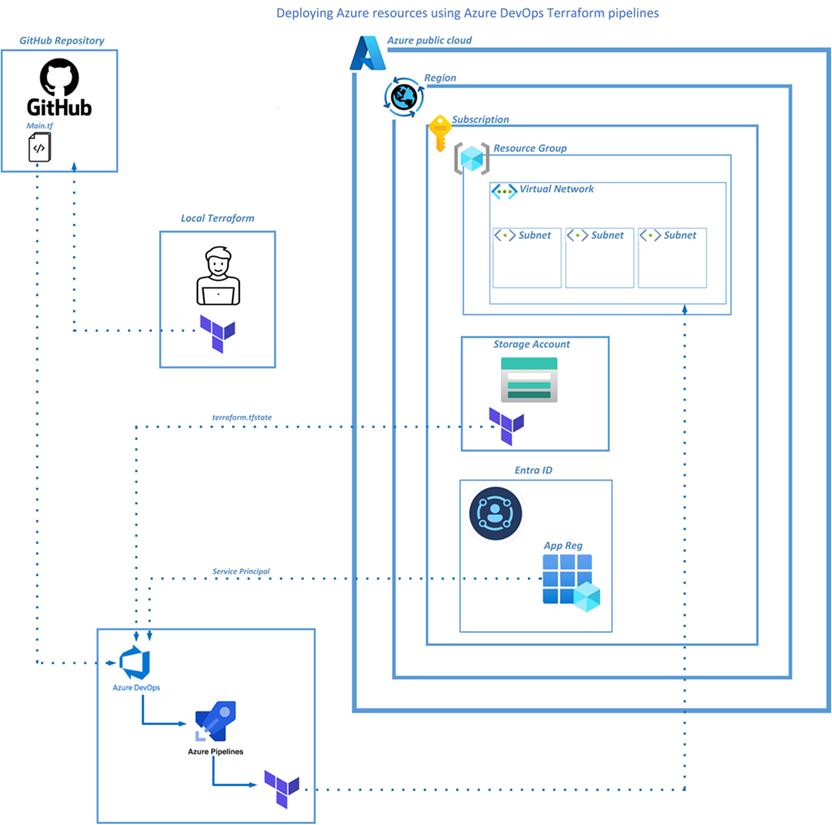
This blog is written on a level 100 to explain how to use the most simplistic tooling to deploy Azure resources using Terraform scripts, GitHub and deployed via Azure DevOps pipelines with continuous integration.
Deployment Plan
Step 2 – Create a Storage Account
Step 3 – Update Terraform file
Step 5 – Github.com remote repository
Step 6 – Azure DevOps Organization
Step 7 – Creating the Azure DevOps Pipeline
Step 8 – Service Principal RBAC
Step 9 – Trigger the Azure DevOps Pipeline
Deplment Steps
Step 1 - Terraform code
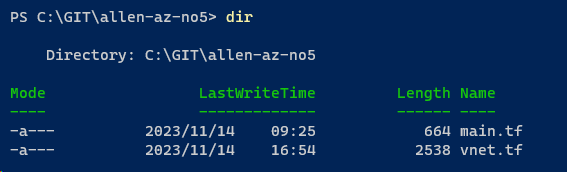
Begin by creating your Terraform code on your local machine,
(My sandbox example contains a simple main.tf and a vnet.tf file)
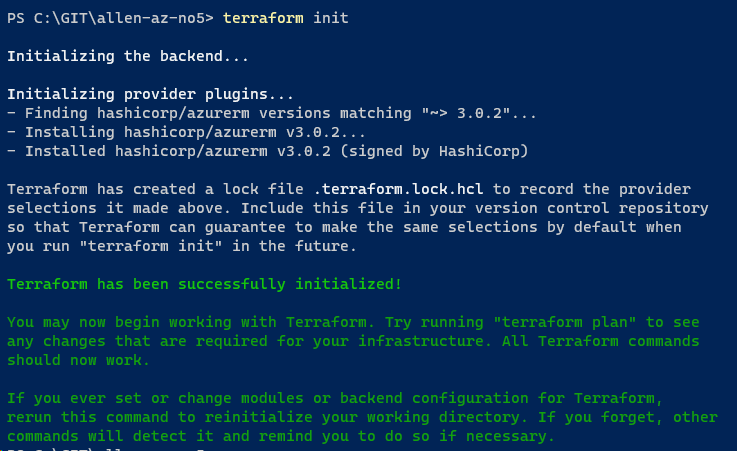
Once your Terraform code is compiled, test your local machine code via terraform init
Once the terraform init is successful, run the terraform apply which produces a terraform.tfstate file on your local machine. This is going to be our focus point.
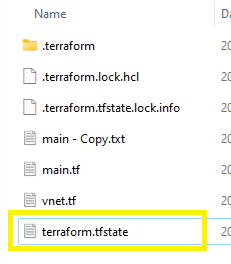
The terraform.tfstate file is the centralized file required in a collaborative environment and will be used for the functioning of your DevOps pipeline.
Thus, this file needs to be generated and stored in an accessible, centralized location such as a storage account, along with the required credentials as part of our DevOps implementation.
Step 2 - Create a Storage Account
Create a storage account as the central storage location for your Terraform terraform.tfstate file to which all your team members and DevOps will connect when running Terraform deployments.
##The resource group for the storage account will become the single / centralized resource group into which your DevOps service principal will also be provisioned later.
You can use this powershell script to:
#1 deploy your storage account,
#2 deploy a container into which your terraform.tfstate file will be deployed, and
#3 retrieve the storage account primary key
Step 1 – Deploy the storage account
Connect-AzAccount

##st.acc variables##
$StorageAccName = '<st.acc.name>'
$StorageType = 'Standard_LRS'
$ResourceGroupName = "<rg.name>"
$location = "<location.name>"


###create your storage account
New-AzStorageAccount `
-ResourceGroupName $ResourceGroupName `
-Name $StorageAccName `
-Type $StorageType `
-Location $location `
-Tag @{CustomerName="Customer01"; `
AutoShutdownSchedule="None"; `
Environment="sandbox";}}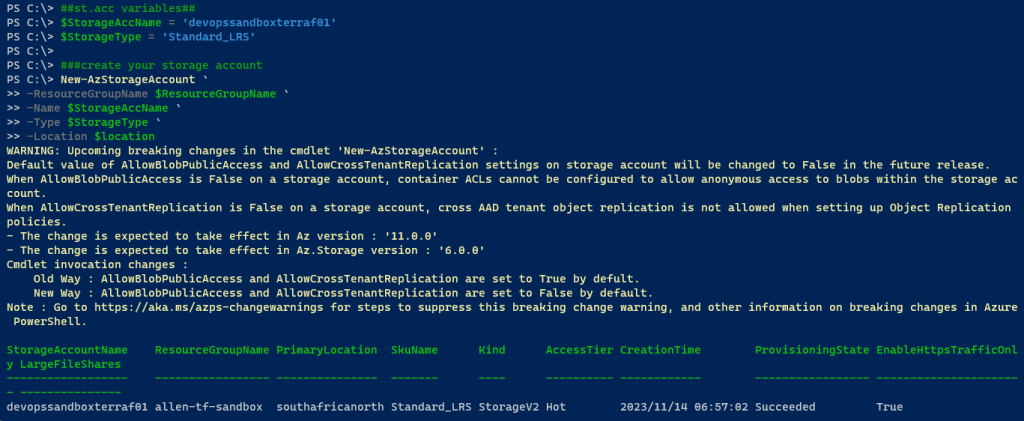
Step 2 – Create a container
###create your container

$azstorageacc = Get-AzStorageAccount -ResourceGroupName $ResourceGroupName -Name $StorageAccName
$NewContainerName = '<containername>'
$CTX = $azstorageacc.Context

New-AzStorageContainer -Name $NewContainerName `
-Context $ctx

Step 3 – Grab the storage account key
Run this script to view and copy the Key1 for use in your Terraform backend configuration.
###Get the storage account access keys###
Get-AzStorageAccountKey `
-ResourceGroupName $ResourceGroupName `
-Name $StorageAccName

Step 3 - Update Terraform file
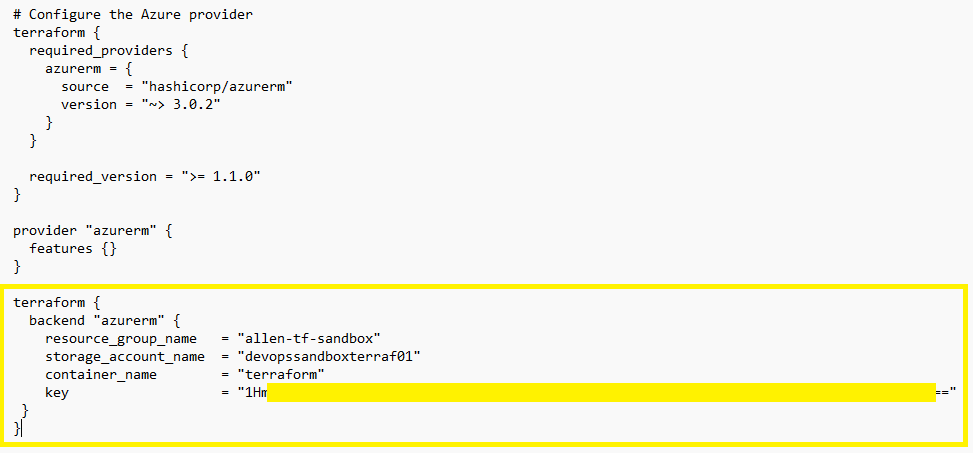
Update your Terraform file to point to your new storage account container by inserting these new values into your respective .tf file.
This will seed the terraform.tfstate file into the storage account container when Terraform is next initiated (instead of onto your local machine),
terraform {
  backend "azurerm" {
    resource_group_name   = "<your.resource.group>"
    storage_account_name  = "<your.st.acc.name>"
    container_name        = "<your.container.name>"
    key                   = "<your.st.account.primary.key.1>"
 }
}
The end result needs to look like this:
Step 4 - Terraform state
After updating the your Terraform main.tf file:
#1 – Run the terraform init again,
#2 – Run Terraform plan,
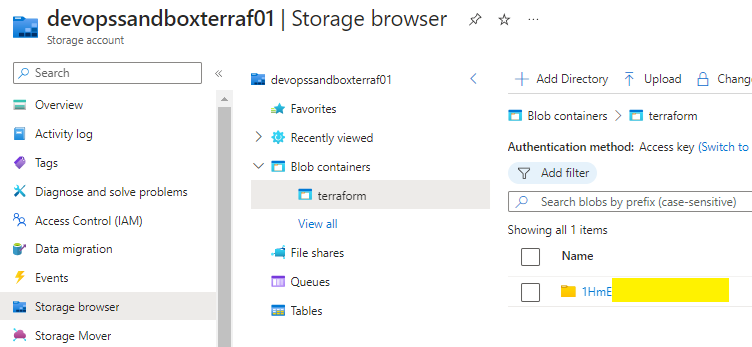
Confirm that the terraform.tfstate file has been created in your storage account container under the name of your primary key up to the / embedded inside your storage account PK1.
Go to your storage account container and you should find a new sub-folder created, named to the first part of your primary key up to the /.
This is the new location where your terraform.ftstate file will be located,
#4 – Delete the terraform.tfstate file on your local machine,
Step 5 - Github.com remote repository
Lets create a new GitHub.com remote repository,
Log into your Github.com account,
On the main page, go to New repository,

Select your unique repo name,
Select public / private visibility,
Add a readme file,
Create a repo,
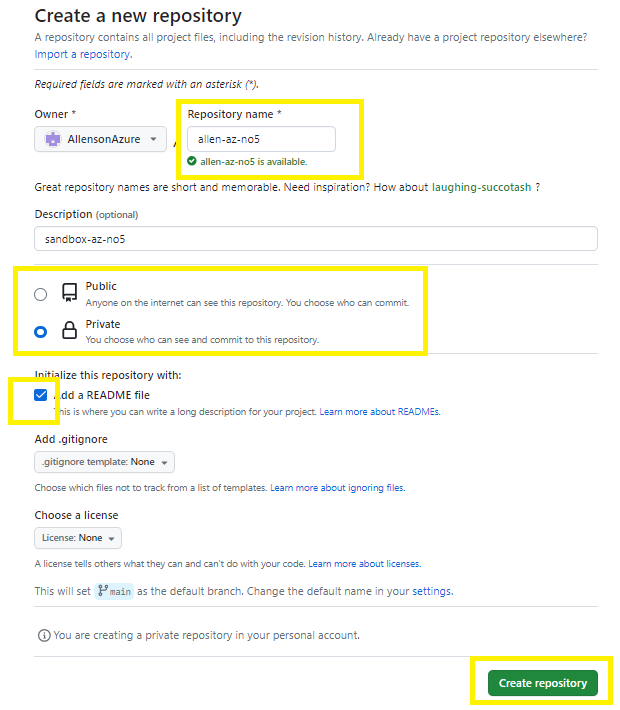
End result,
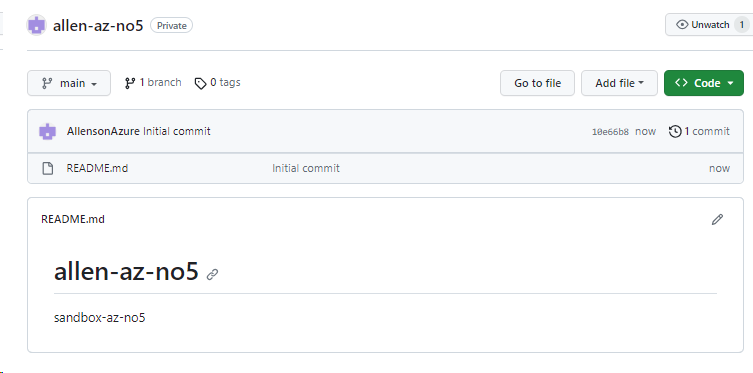
Add / Upload your local Terraform files to your new remote GitHub.com repository,
Commit changes
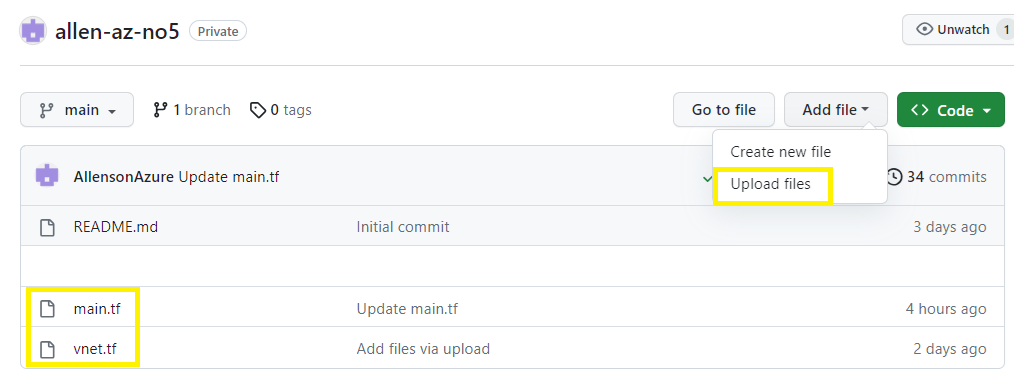
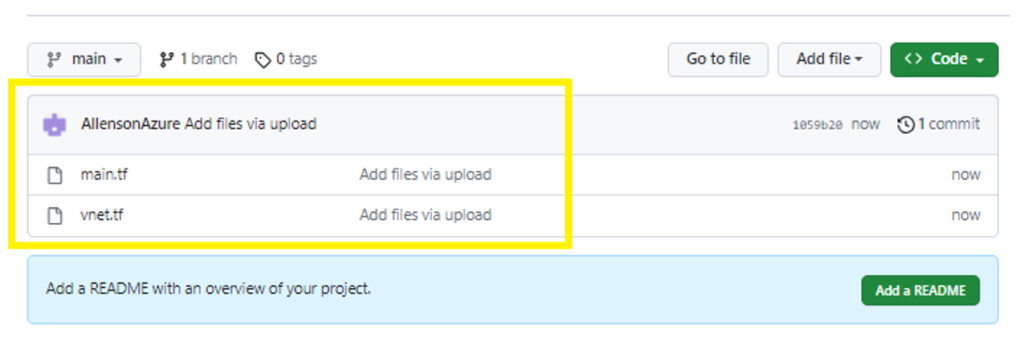
End result:
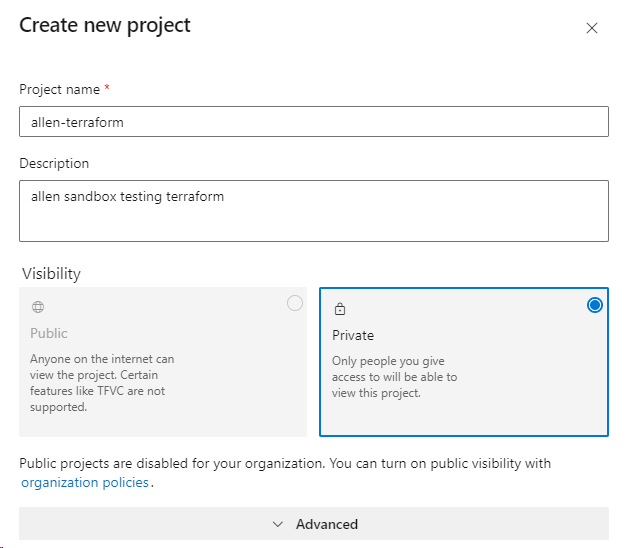
Step 6 - Azure DevOps Organization
Go to your Azure DevOps organization,
Setup a DevOps Project,
Create,
Step 7 - Creating the Azure DevOps Pipeline
##Make sure your PIM is enabled at this point
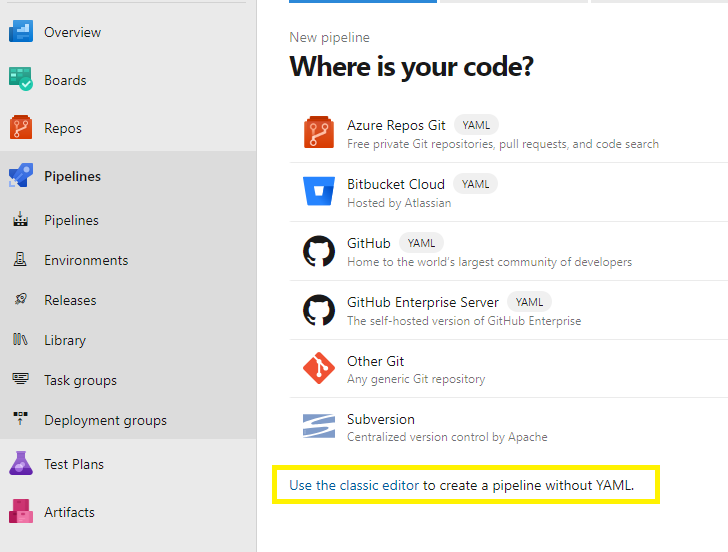
Select your project > Pipelines > Create Pipeline,
Inside the Where is your code? window:
If you not great with YAML, then select the simplified use the classic editor,
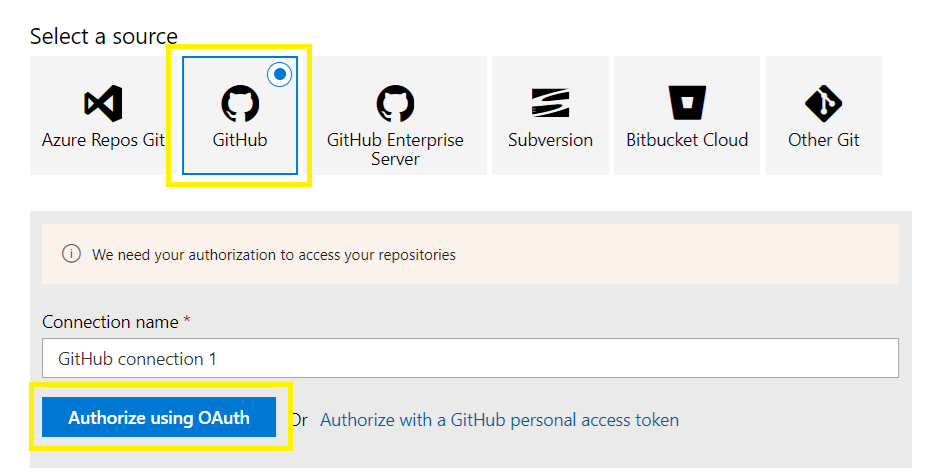
Select GitHub,
Select a custom connection name,
Authorize using OAuth,
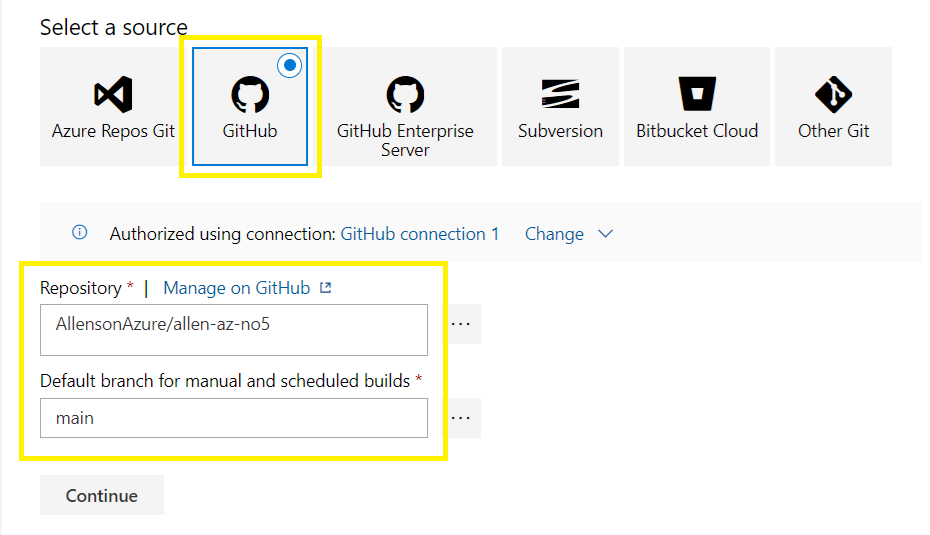
Browse and select your repository,
Browse and select your branch,
Continue,
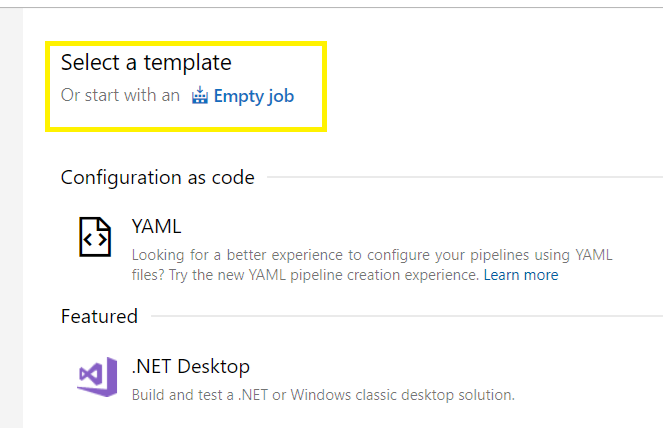
Select a template:
Select an Empty job to start creating your pipeline,
Create a descriptive pipeline name,
Select your agent version,

Adding Terraform tasks:
#1 Add Terraform installer task:
Click on Agent job 1 +
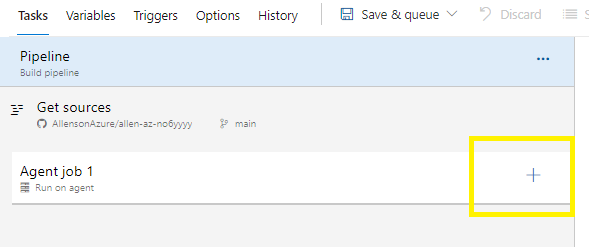
Search for Terraform,
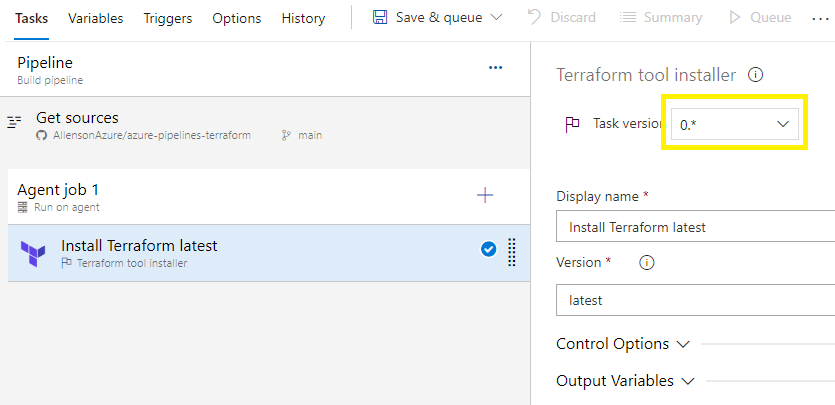
Select Terraform tool installer > Add

Select Install Terraform latest,
Change version to 0.*
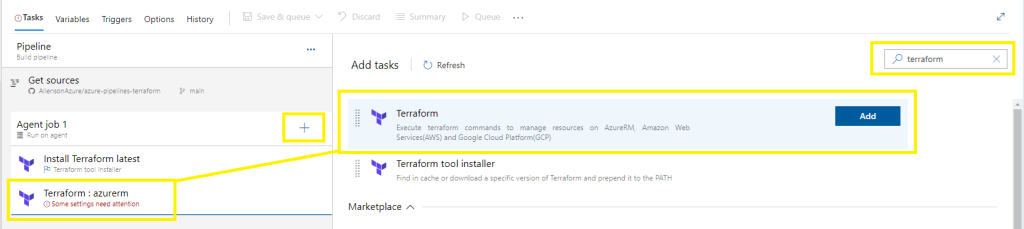
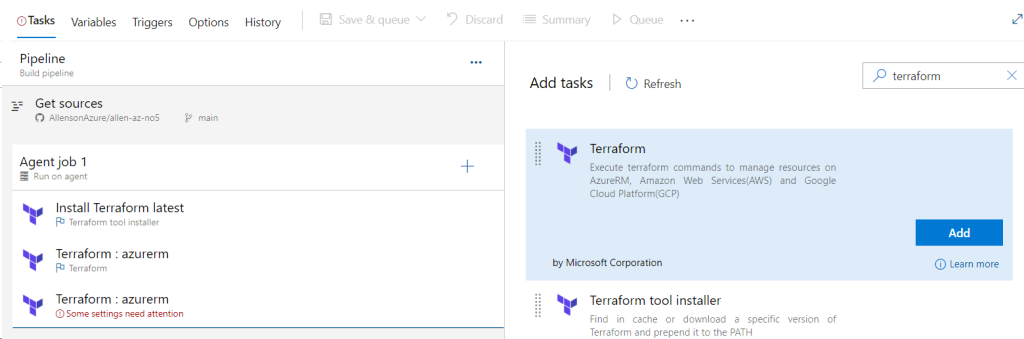
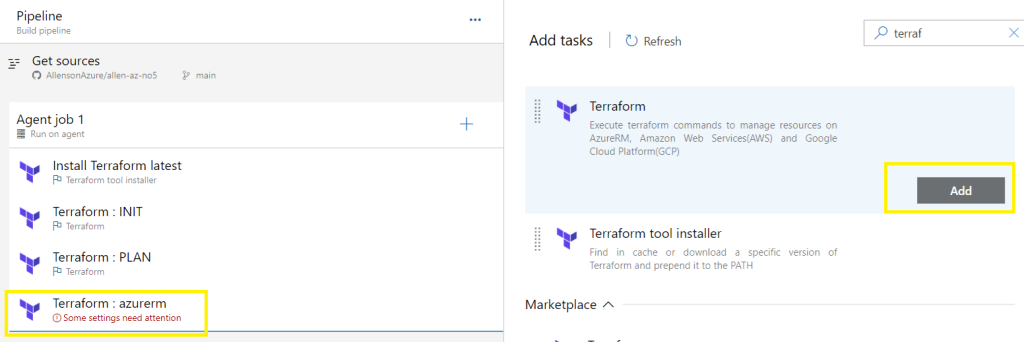
Click on +
Search for Terraform,
Select Add on Terraform,
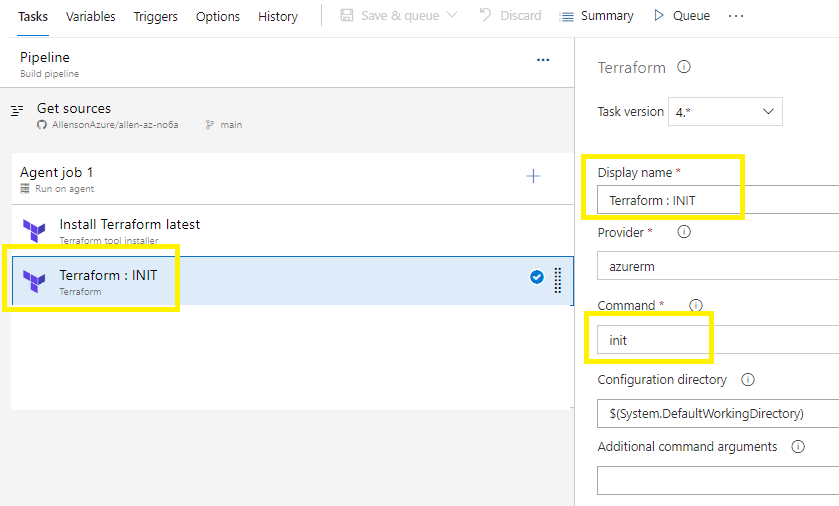
Terraform INIT:
Click on the new task:
The 1st section of the INIT section:
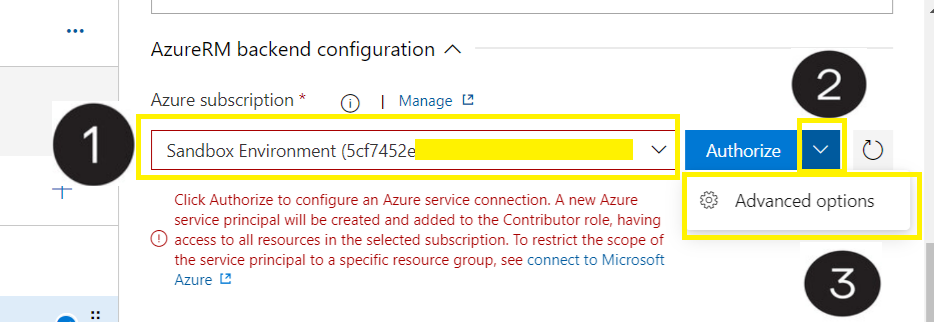
AzureRM backend configuration:
Scroll down to the 2nd section of the INIT section refers to the AzureRM backend configuration:
Provision this Terraform Backend with the same values as we inserted into the main.tf

Select your target subscription,
Select Authorize and select Advanced options, (#This will create the service principal)
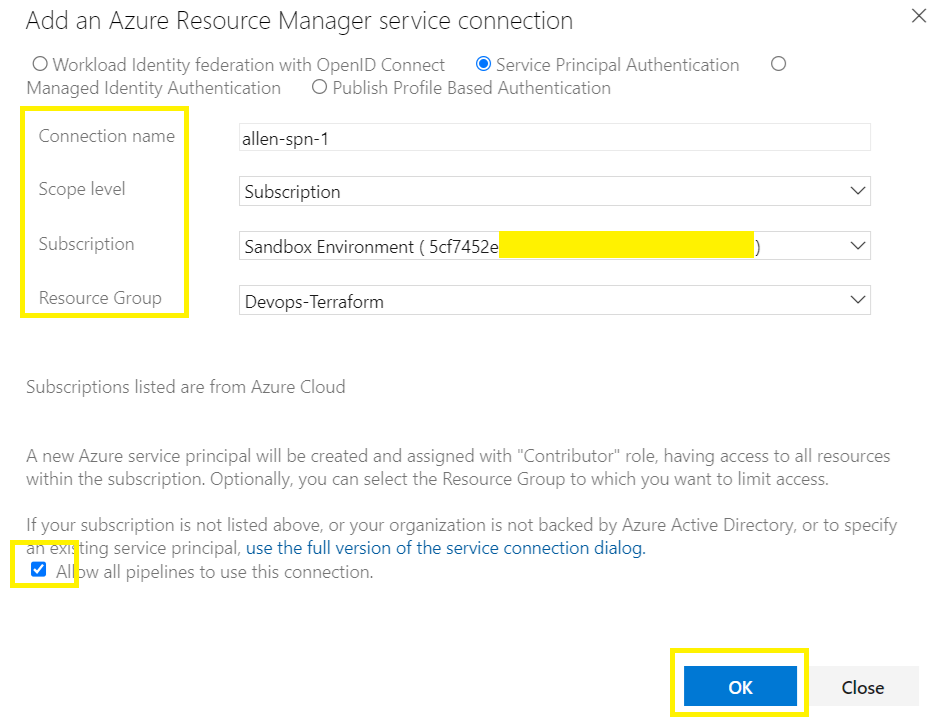
Select the Service Principal Authentication,
Connection name: insert a custom identifiable name,
Scope level,
Target subscription,
Resource group into which the service principal will be placed (#This will be the same resource group into which you placed the storage account earlier),
Allow all pipelines to use this connection,
Ok
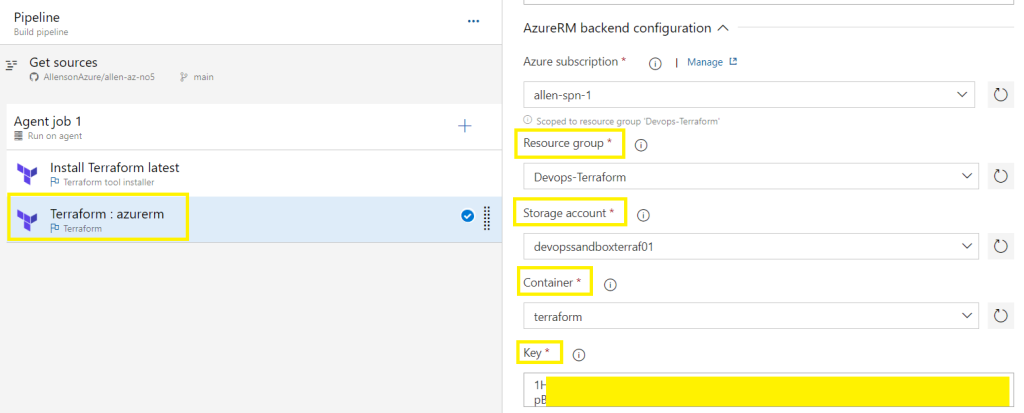
Take note of your service principal name as you will be granting the SP IAM RBAC role permissions later.
Select the pre-created resource group into which you deployed the storage account earlier (this is the information that you updated the Terraform main.tf file),
Select the pre-created storage account,
Select the pre-created container,
Select the storage account key,
Terraform PLAN:
Click on +
Search for Terraform,
Select Add on Terraform,
Display name: update with PLAN,
Command: change to plan,
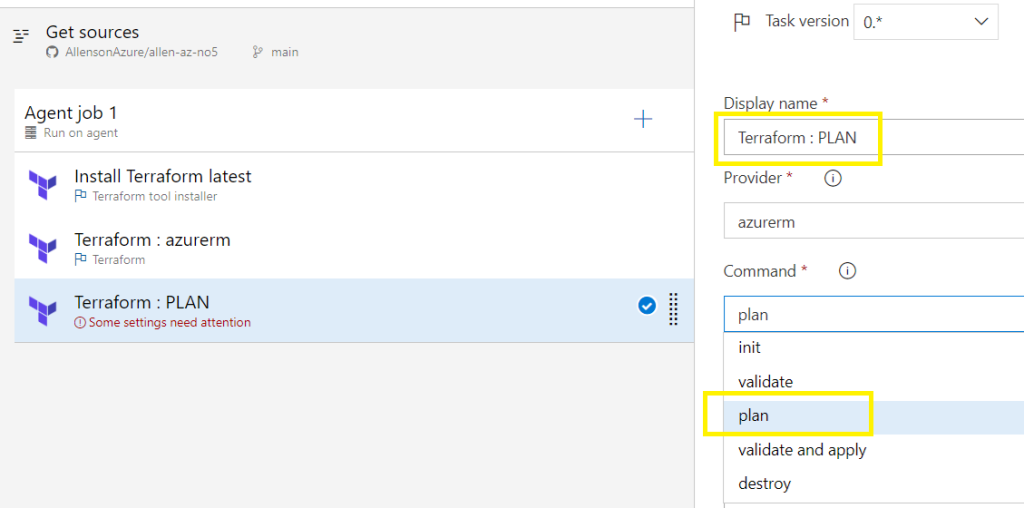
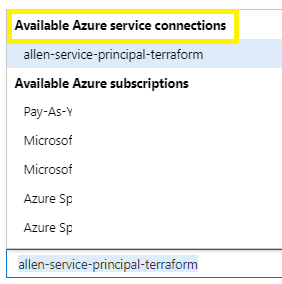
Under Azure subscription select your precreated service principal
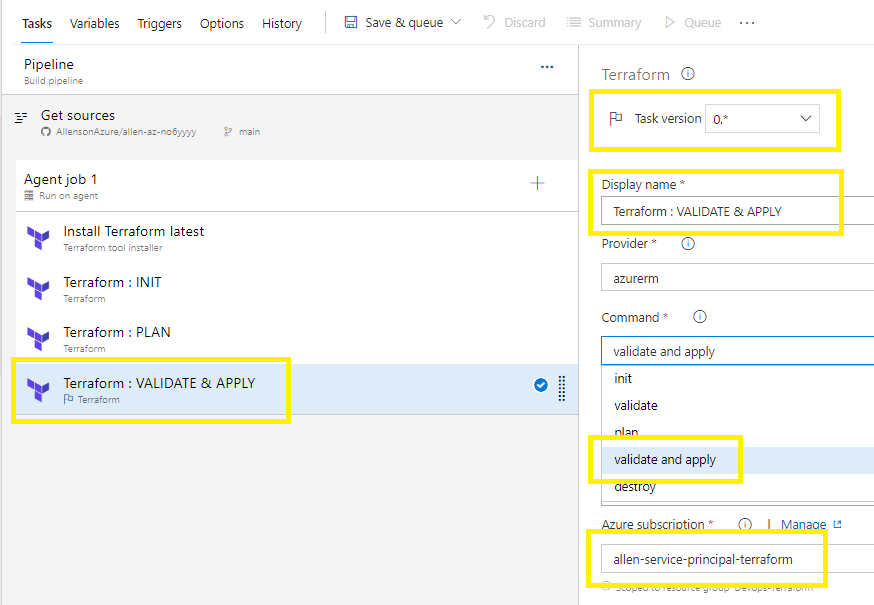
Terraform VALIDATE & APPLY:
Click on +
Search for Terraform,
Select Add on Terraform,
Select version 0 – to enable the validate & apply combo feature
Display name: update with VALIDATE & APPLY,
Command: change to validate & apply,
Under Azure subscription select your precreated service principal,
Save > Save
Click back on pipelines in the left column,
Save > Save
Step 8 - Service Principal RBAC
Grant your DevOps service principal the correct RBAC role permissions (PoLP) , to the correct scope / blast radius based on the Zero Trust Model.
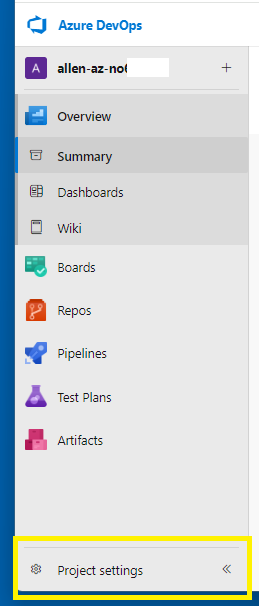
In DevOps > Projects > select Project Settings,
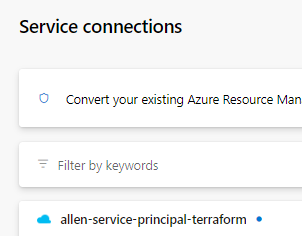
Scroll down to Service connections >
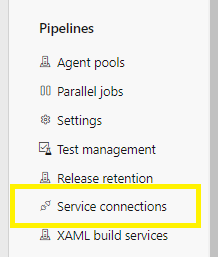
Find the service principal you created earlier during the Terraform INIT pipeline,
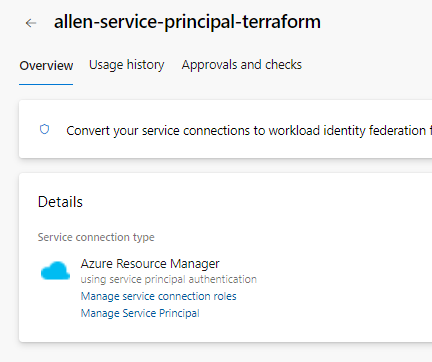
Click on the service principal,
Click on the Manage Service Principal link
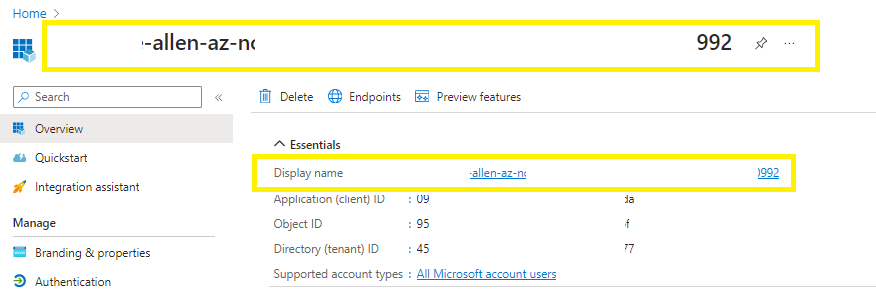
Copy the display name of your registered app,
Now to go to Subscriptions > Select your subscription,
Access control (IAM) > + Add,
Add role assignment,
Role tab:
Privileged administrator roles,
select Contributor,
Members tab:
User, group, or service principal, + Select members,
select your devops service principal display name,
Select,
Next,
Review & Assign,
Step 9 - Trigger the Azure DevOps Pipeline
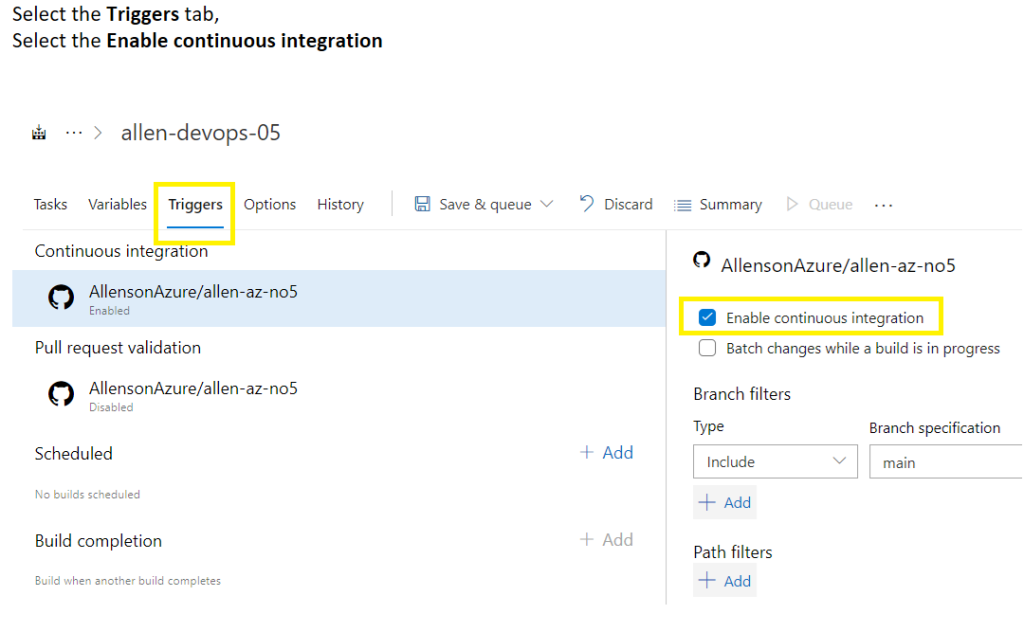
Go back to your Github.com repository, select edit and immediately press Commit Changes to a Terraform file – which should trigger the Azure DevOps pipeline,
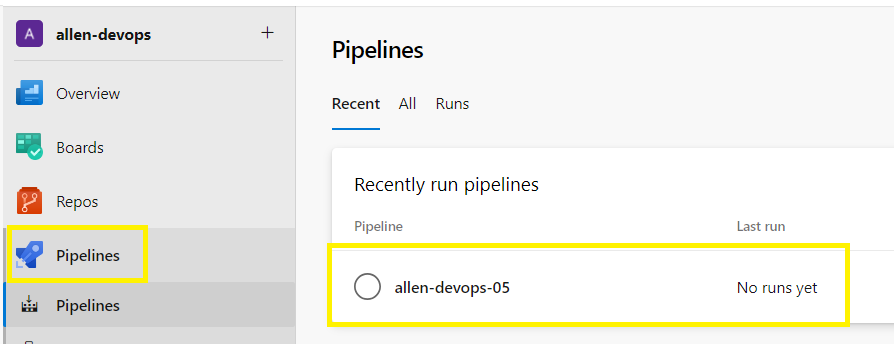
If you now monitor your DevOps pipeline, you should see the pipeline triggered and running.
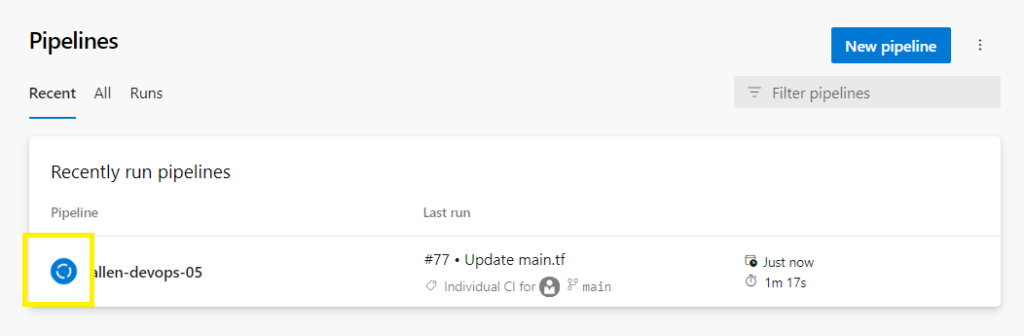
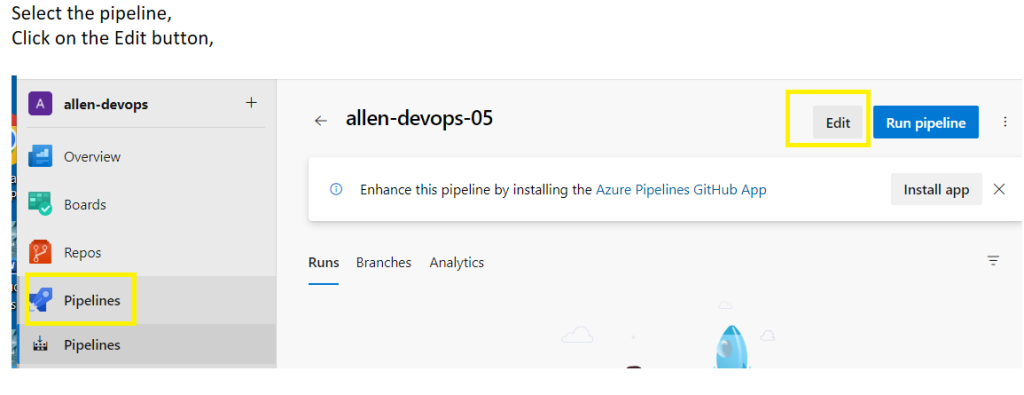
Click on the pipeline,
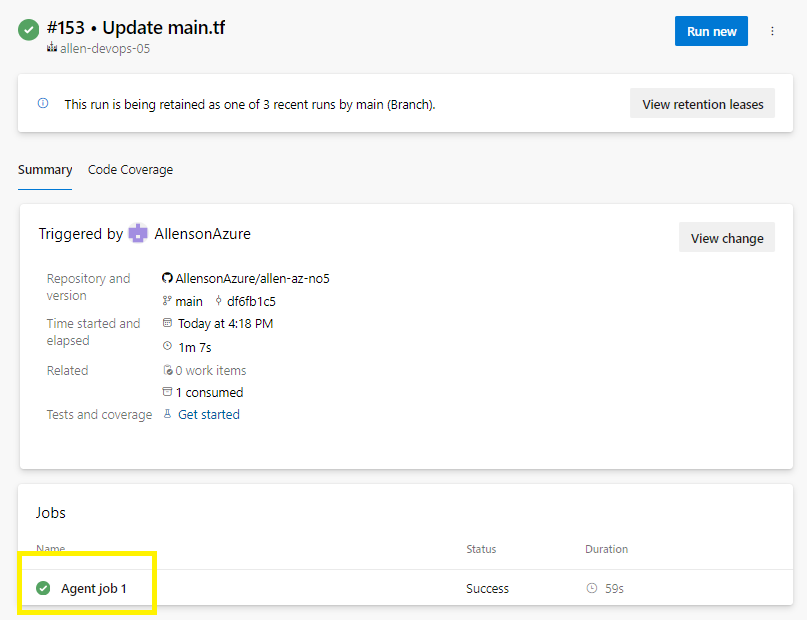
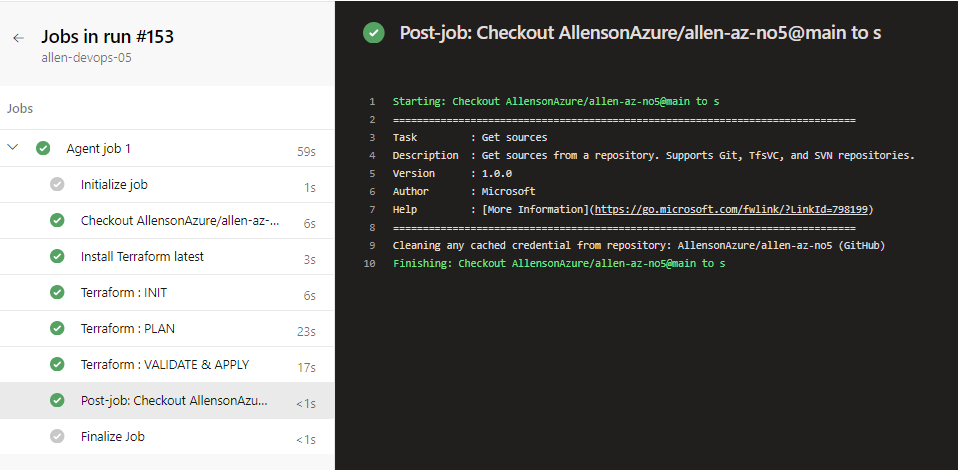
Drilling into your Agent, you should see the results of your pipeline activities:
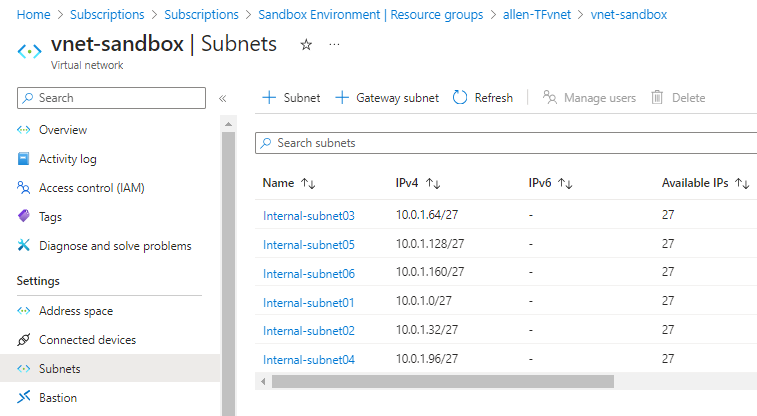
Verify that the Azure resources have been deployed,
My Terraform script created a new resource group, a virtual network with 6 subnets, which have successfully deployed in my Azure sandbox subscription.
— I hope this simplistic approach to deploying Terraform based Azure DevOps pipelines expedited your Azure resource deployments–
Hello. fantastic job. I did not expect this. This is a excellent story. Thanks!
Wow, superb weblog layout! How long have you been blogging for? you make running a blog look easy. The overall look of your web site is fantastic, let alone the content!
You really make it seem so easy with your presentation but I find this topic to be really something that I think I would never understand. It seems too complex and extremely broad for me. I’m looking forward for your next post, I’ll try to get the hang of it!
very good post, i definitely adore this site, persist in it
Great post, you have pointed out some great points, I too believe this s a very excellent website.
I’m impressed, I have to admit. Seldom do I encounter a blog that’s both equally educative and engaging, and
let me tell you, you’ve hit the nail on the head. The problem is
something not enough men and women are speaking intelligently
about. I am very happy I found this during my hunt for something regarding this.
I’ve recently been thinking the very same factor personally lately. Delighted to see a person on the same wavelength! Nice article.
Excellent share it is without doubt. We’ve been awaiting for this information.
I just love to read new topics from you blog.,’,.-
You have good command on this topic and have explained in a very pleasant way. Thanks for sharing.
Really informative article.Really thank you! Really Cool.
Merely wanna remark on few general things, The website pattern is perfect, the subject matter is really excellent : D.
Hey you. I do not know whether it’s acceptable, but this blog is really well designed.
I envy your piece of work, thanks for all the useful blog posts.
Hiya, I’m really glad I’ve found this info. Today bloggers publish only about gossips and net and this is really annoying. A good website with interesting content, that’s what I need. Thanks for keeping this web site, I will be visiting it. Do you do newsletters? Can not find it.
You seem to be very professional in the way you write.*;,`.
Yo!. Certainly liked reading your post. It was very informative and helpful. I hope you do not mind me blogging concerning this post on my personal blog. Will definitely link back to you. Nice site theme! Salamat.
I constantly emailed this blog post psge to alll my associates,
since if like to read itt newxt my friends will too.
Also visit myy page :: affordable cheap seo
It’s awesome in support of me tto have a web page, which is valuable for my knowledge.
thanks admin
Here is my web page bitutainer
light and make it fundamental. More many people really need to read this and have an understanding of this side of the story. I cant believe youre not more
After exploring a handful of the articcles on your web page, I truly like
your way oof blogging. I added it to my bookmark
site list and wwill be checking back soon. Please
visit my web site ttoo and tell me how you feel.
Have a look at my web page; fine art photography
I’ve learn several just right stuff here. Certainly value bookmarking for revisiting. I surprise how much effort you put to create the sort of excellent informative web site.
Some truly interesting information, well written and generally user friendly .
I love gathering useful info, this post has got me even more info! .