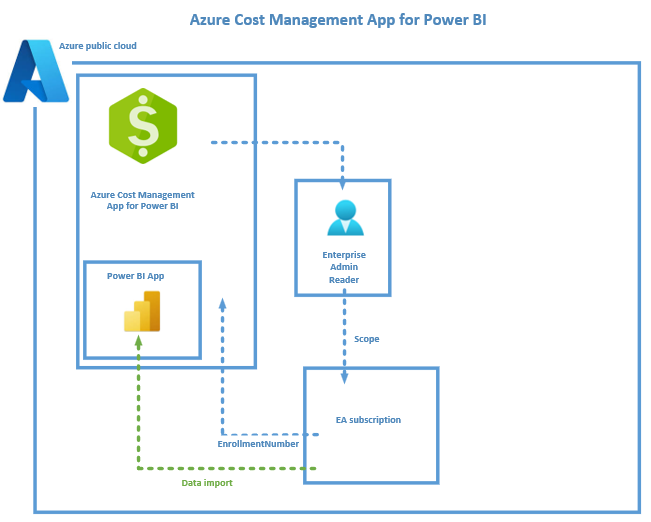
Analyse your multi-cloud cost with the Cost Management Power BI App. This app will allow you to analyse your Azure and AWS costs all in a single pane of glass.
This article is to written to configure cost analysis for Azure Enterprise Agreements (EA) subscriptions.
This blog will explain how to easily install and use the Cost Management Power BI app.
The app helps you to analyse and manage your Azure Enterprise Agreements (EA) costs using Power BI.
You can use the app to monitor costs, usage trends, and identify cost optimization options to reduce your cloud expenditures.
Target Subscriptions:
The Cost Management Power BI app (without the connector), currently supports only customers using Enterprise Agreement subscriptions.
A Cost Management connector integration can be used to enable you to ingest data from multiple sources, to create further customized reports. Using the connector enables the ingestion from Microsoft Customer Agreements subscriptions.
Customization:
The Power BI App has limited customization.
If you require additional customization to extend your filters, views, and visualizations, then consider using the Cost Management connector in Power BI Desktop version.
Deployment Prerequisites:
– Power BI Pro license is required,
– Enterprise Administrator, or Enterprise Administrator (read only) account
https://learn.microsoft.com/en-us/azure/cost-management-billing/manage/ea-portal-administration
Step 1 - Install Cost Management Power BI app
To install the Cost Management Power BI app:
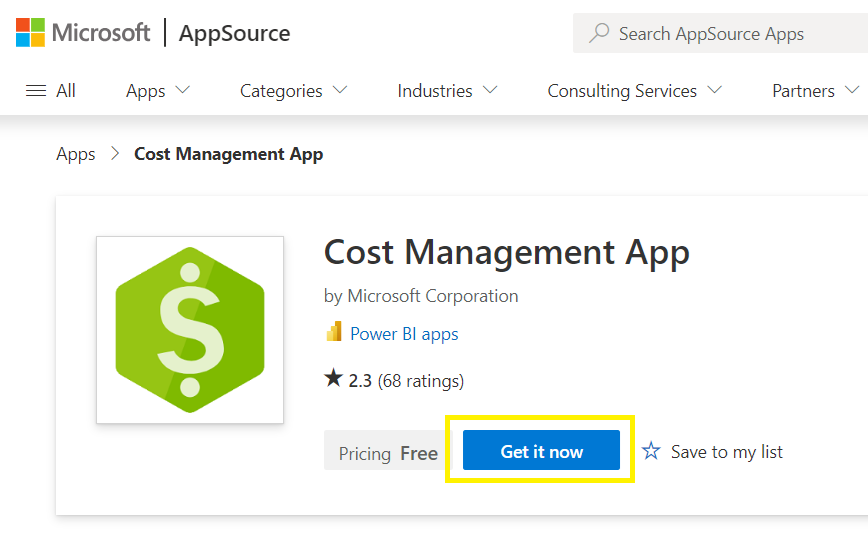
- Go to Cost Management Power BI App
- On the Power BI AppSource page, select the Get it now button
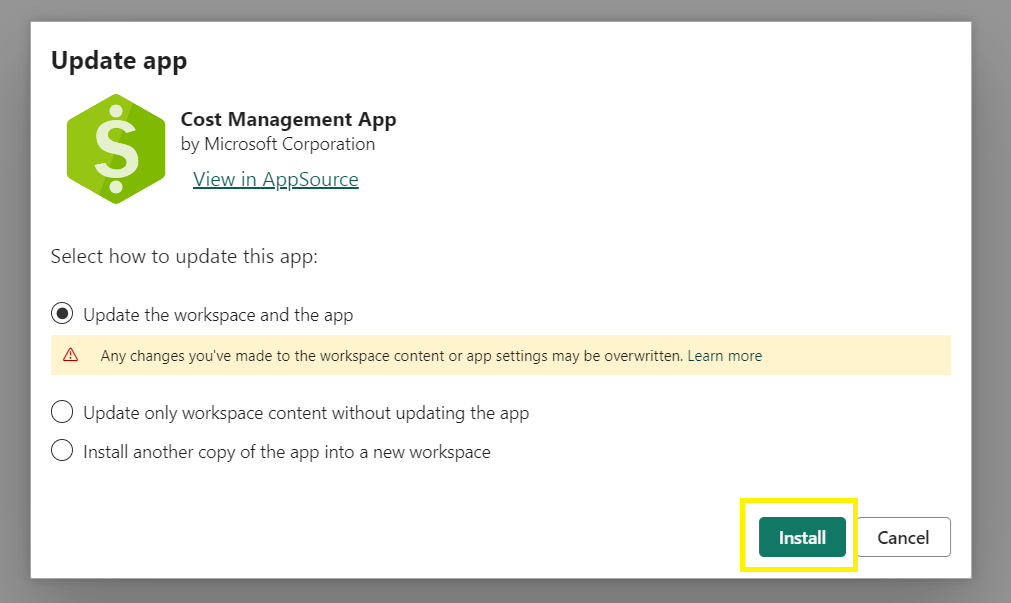
3. Select Continue to agree to the terms of use and privacy policy.
In the Install this Power BI app box, select Install.
4. If needed, create a workspace and select Continue.
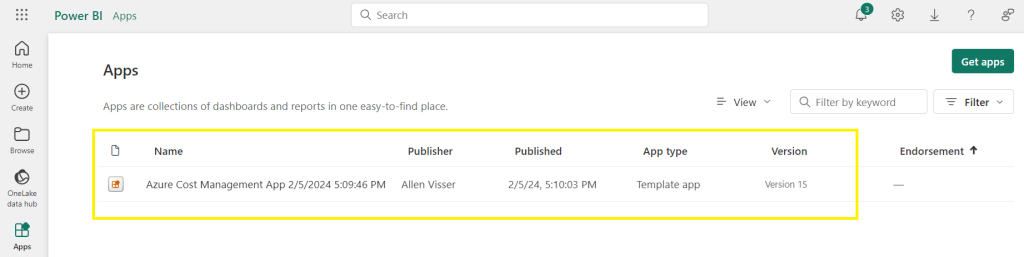
When the installation completes, a notification appears saying that your new app is ready.
Select the app that you installed.
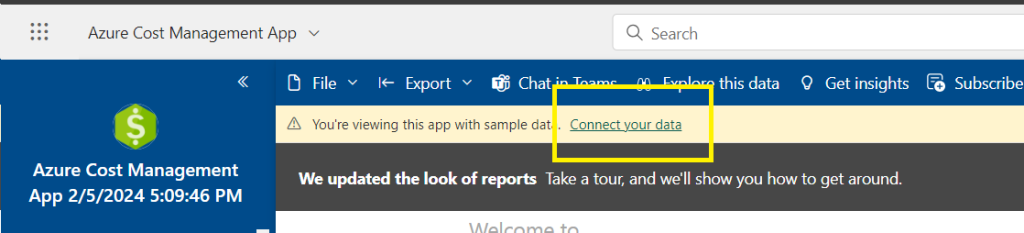
5. On the Getting started page, select Connect your data
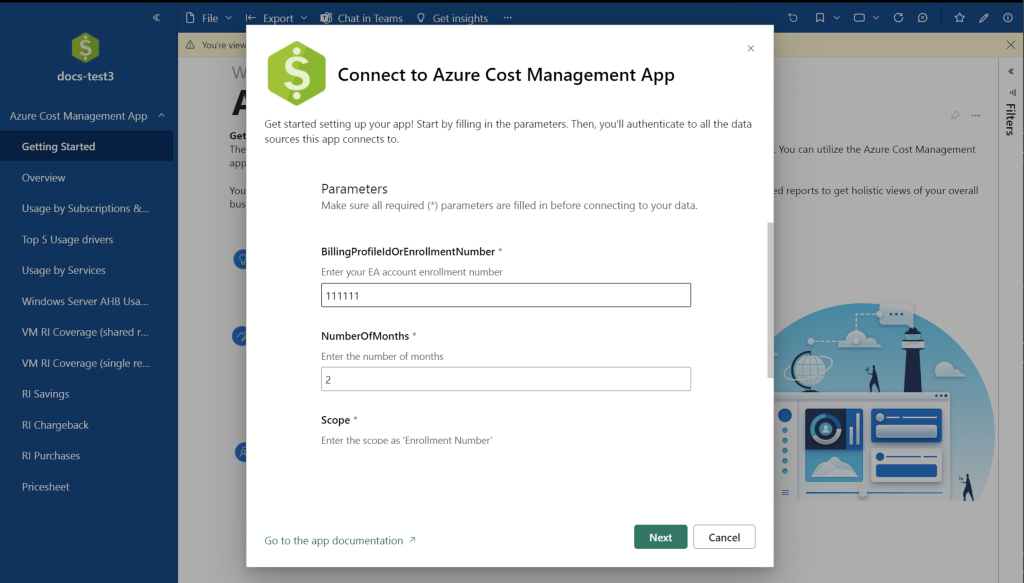
In the dialog that appears:
#1 Enter your EA enrollment number for BillingProfileIdOrEnrollmentNumber
#2 Specify the number of months of data to get,
#3 Enter “Enrollment Number” to define your Scope,
Select Next
The next installation step connects to your EA enrollment and requires your Enterprise Administrator or Enterprise Administrator (Reader) account.
Leave all the default values.
Select Sign in and continue.

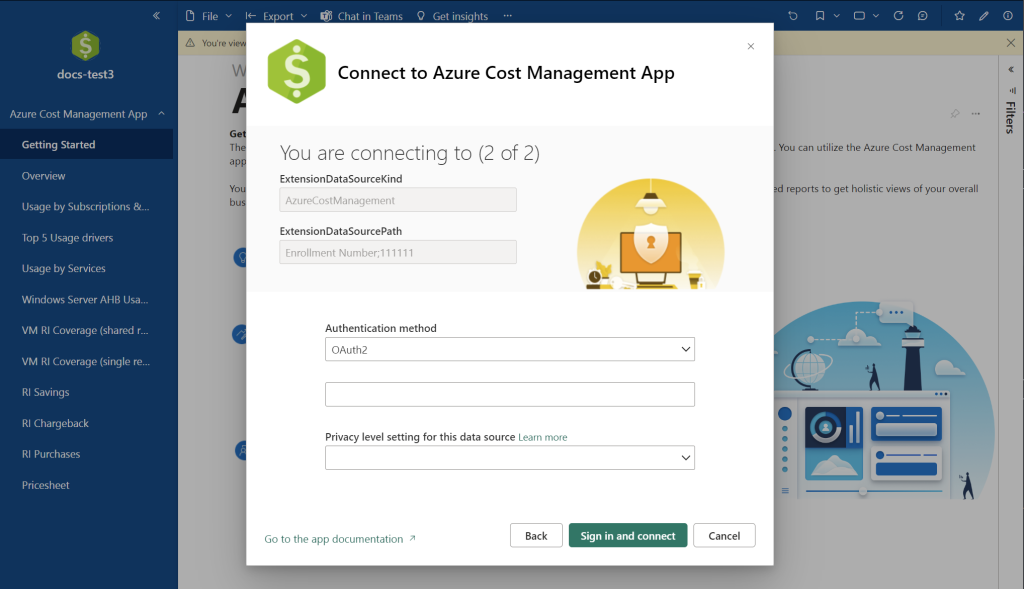
The final dialog connects to Azure and gets data.
Leave the default values as configured and
Select Sign in and connect.
You are prompted to authenticate with your EA enrollment,
Authenticate with Power BI,
Once the authentication is complete, a Power BI data refresh starts.
After the data refresh is complete,
Select the Cost Management App to view the pre-created reports.
**The data import / refresh period is determined by the timeline you chose to import as well as the volume of data associated with this timeline. Be patient 🙂 **
Step 2 - Reporting
The following reports are available in the Cost Management App:
The reports show the current billing month summary of information, including:
Charges against credits
New purchases
Azure Marketplace charges
Overages and total charges
The Billing account overview page might show costs that differ from costs shown in the EA portal.
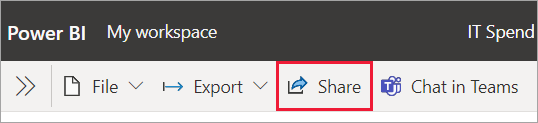
Step 3 - Sharing a Report / Dashboard
You are able to share a report or dashboard with other people inside or outside your organization, who can view and interact with dashboard, but are unable edit it. The recipients see the same data that you see in the reports and dashboards. This will depend on the necessary license or subscription.
The Power BI service offers other ways to collaborate and distribute reports and dashboards. Read Ways to collaborate and share in Power BI to see which way works best for your circumstances. This video explains the process.
Sharing prerequisites
- You need a Power BI Pro or Premium Per User (PPU) license, whether you share content inside or outside your organization.
- Your recipients also need Power BI Pro or Premium Per User (PPU) licenses, unless the content is in a Premium capacity.
- If you want to allow recipients to edit a shared report, you have to assign the user a workspace role that allows editing. To learn more about role-level permissions and how to assign roles, read Roles in workspaces.
Reference:
https://learn.microsoft.com/en-us/power-bi/collaborate-share/service-share-dashboards
Good web site! I truly love how it is easy on my eyes and the data are well written. I am wondering how I could be notified whenever a new post has been made. I’ve subscribed to your RSS which must do the trick! Have a nice day!
The articles you write help me a lot and I like the topic
You’ve the most impressive websites.