When provisioning App Registrations, their secrets are set to a maximum of 24 months. Currently, Azure does not provide a notification platform to proactively alert you when secrets are nearing expiration, which can result in business disruption.
We are often asked by clients to implement automated monitoring and alerting platforms especially with regards to secrets expirations which have the potential to disrupt business if not caught in time.
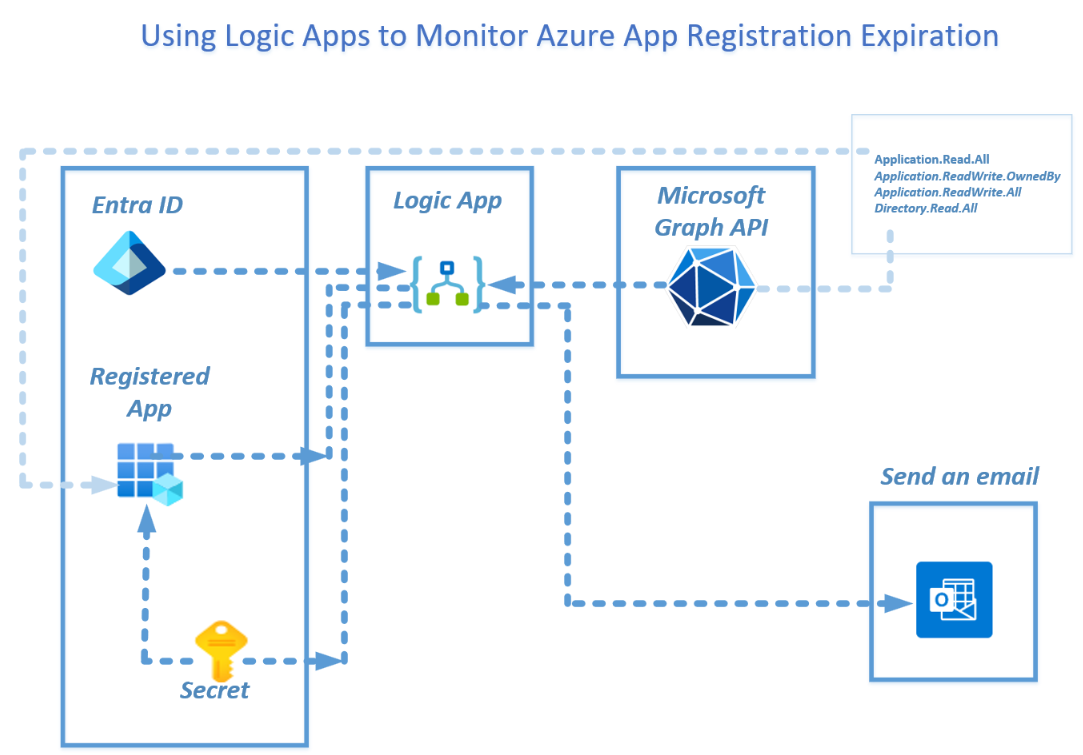
This blog demonstrates the deployment of a Logic App to automate the monitoring of all the Registered Apps secrets and sends a proactive email or Teams notification when the secret is about to expire.
Step 1 – Provision an App Registration
Step 2 – Provision App Registration Secret
Step 3 – Configure App Registration API Permission
Deployment Steps
Step 1 - Provision an App Registration
In this step we are going to provision a new Registered App in order to provide Microsoft Graph permissions to access a Registered App API in order to read the secrets expiration dates by creating an API connection for a Logic App connector using ARM REST API.
#(This Registered App will be created specifically for this is Logic App and will not be used for any other service).
Provision your new dedicated Registered App:
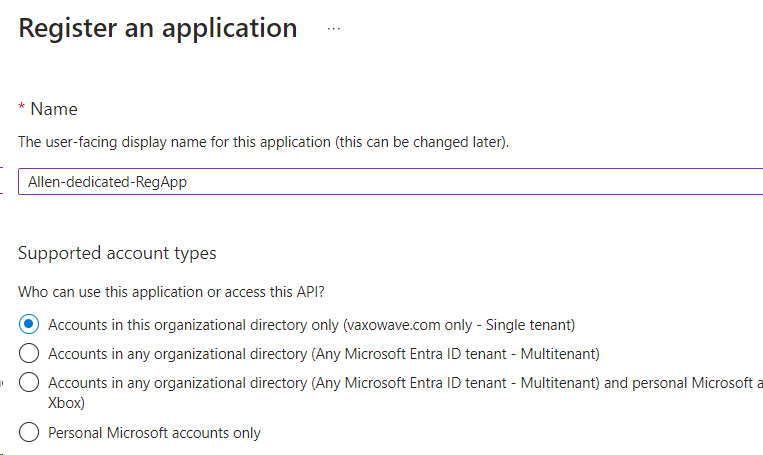
In Azure Portal > search for App Registration > + New registration >
Select a descriptive name,
Select the single tenant,
Register,
Step 2 - Provision App Registration Secret
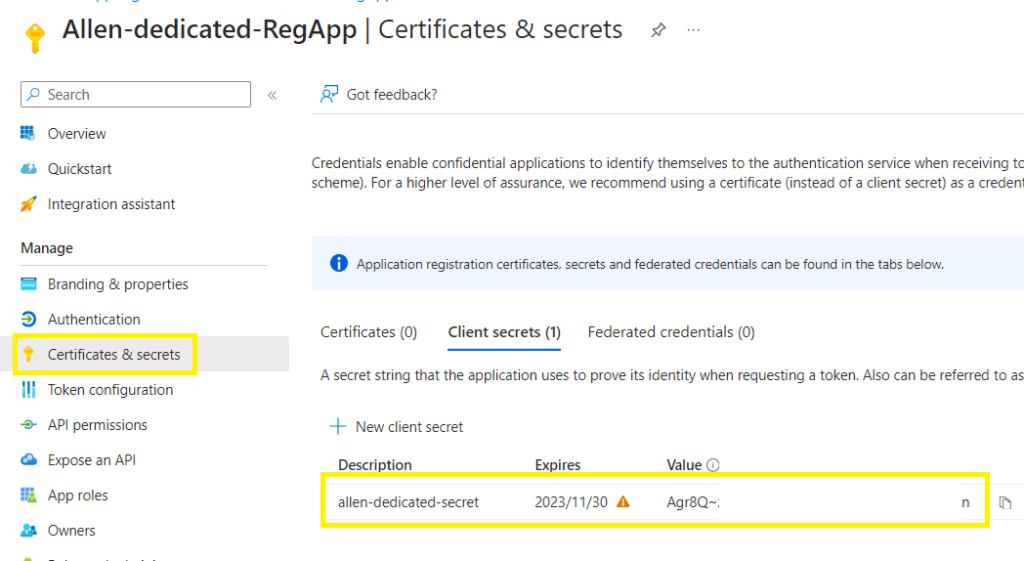
Go to your new App Registration > Select Certificates & secrets,
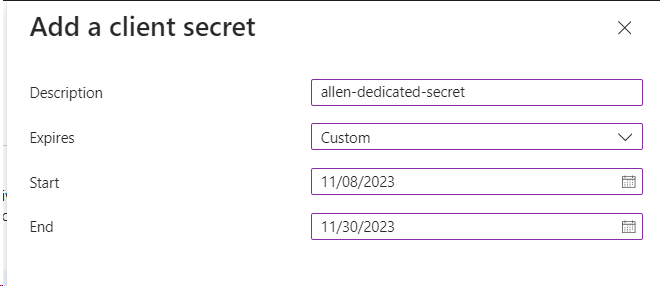
+ New client secret >
#(Im creating a sandbox secret that will expire in < 30 days for testing later on)
Add,
Copy the secret value into notepad before you change windows!
Step 3 - Configure App Registration API Permission
Go to API permissions and add 4 RBAC roles:
+Add a permission > Microsoft APIs tab > select Microsoft Graph,
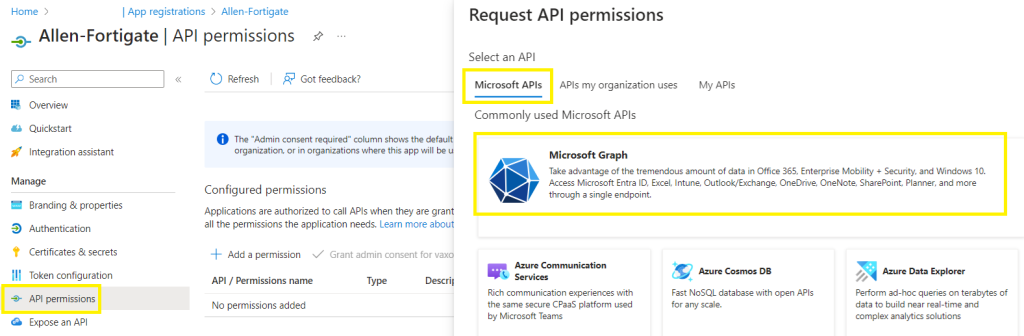
**You need to add all 4 of these permissions by following the steps below:
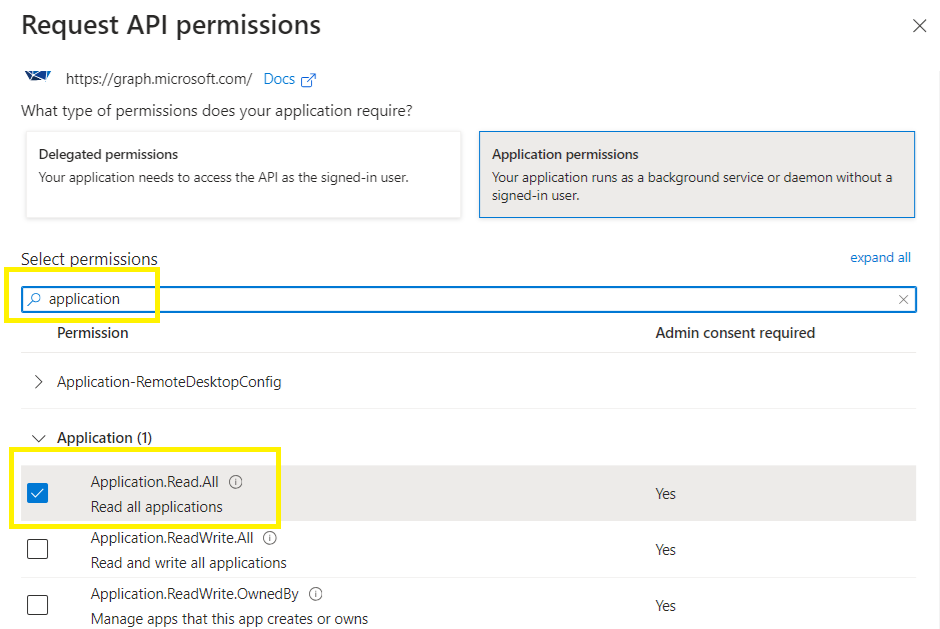
Application.Read.All
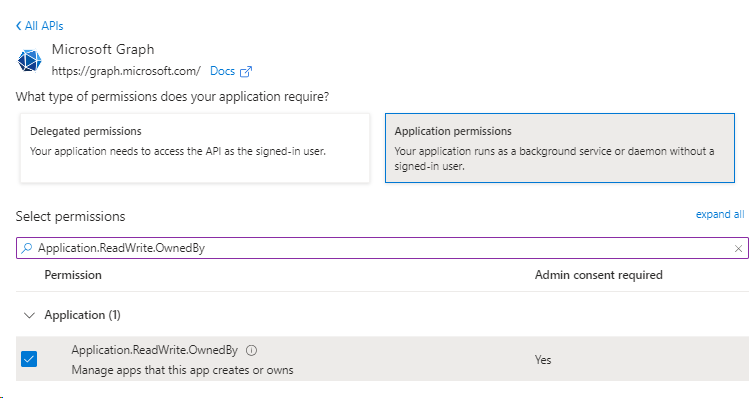
Application.ReadWrite.OwnedBy
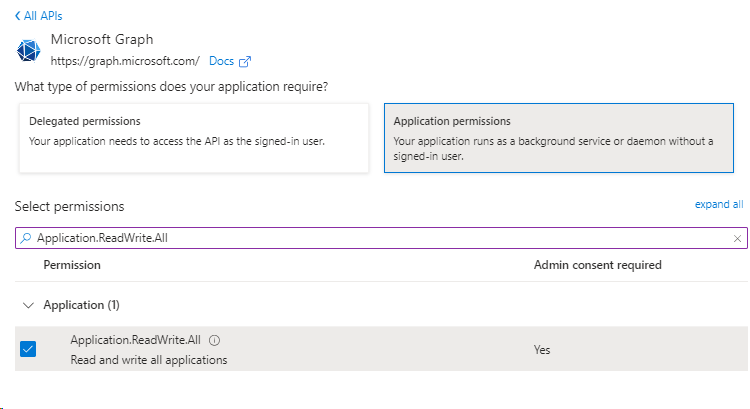
Application.ReadWrite.All
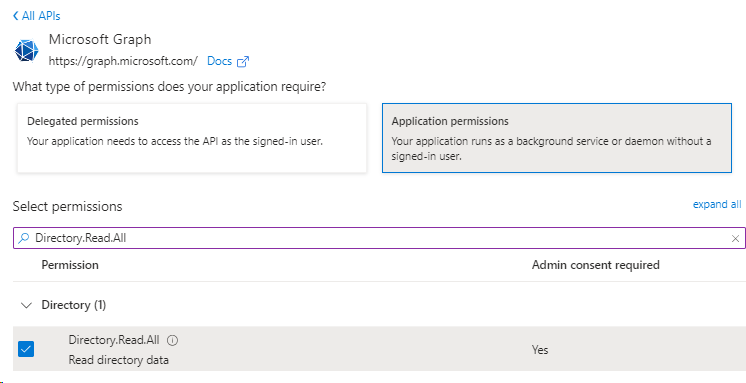
Directory.Read.All
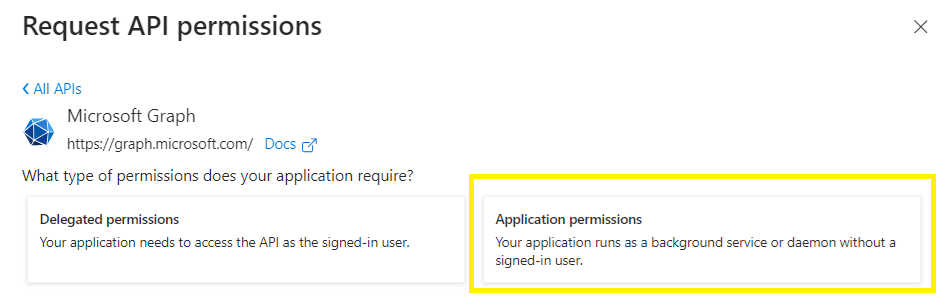
Select Application permissions (which does not require a signed-in user account),
Search for Application and select Application.Read.All > Add Permissions
Close
+Add a permission > Microsoft APIs tab > select Microsoft Graph,
Select Application permissions,
Search for Application.ReadWrite.OwnedBy > Add Permissions > Close
+Add a permission > Microsoft APIs tab > select Microsoft Graph,
Select Application permissions,
Search for Application.ReadWrite.All > Add Permissions > Close
+Add a permission > Microsoft APIs tab > select Microsoft Graph,
Select Application permissions,
Search for Directory.Read.All > Add Permissions
Verification – your permissions list should like look the list below.
You will notice that the permissions are not yet granted for your domain,
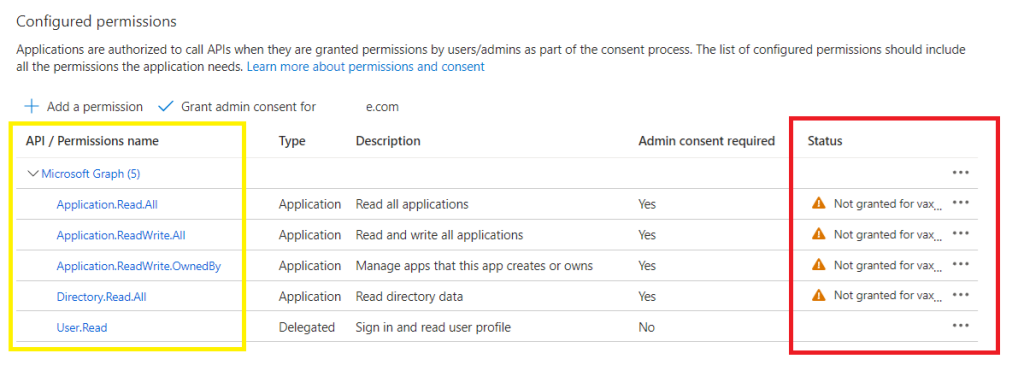
Now click on Grant admin consent for your domain (if the option is greyed out, you may need to enable PIM),

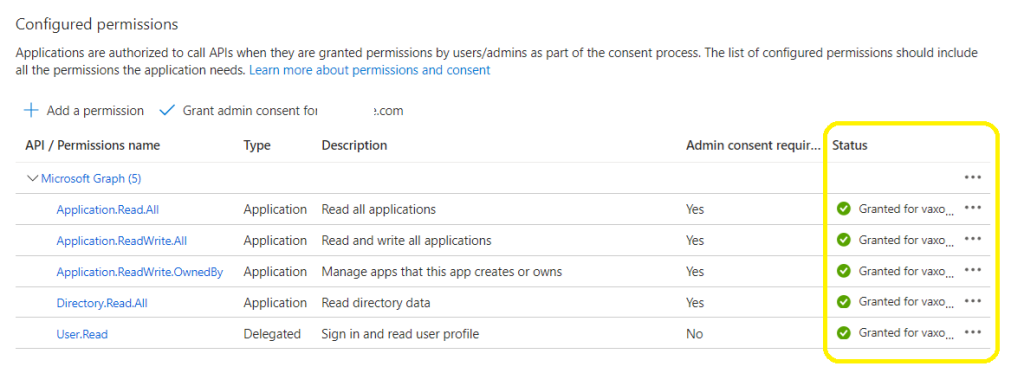
Once granted permission, your status must all turn green / consented:
Step 4 - Deploy Logic App
Create and deploy a consumption based Logic App,
Step 5 - Logic App Designer
Go to your Logic App > open your Designer >
Select a blank logic app >
Part 1 – Adding a trigger >
Search for recurrence schedule and select >
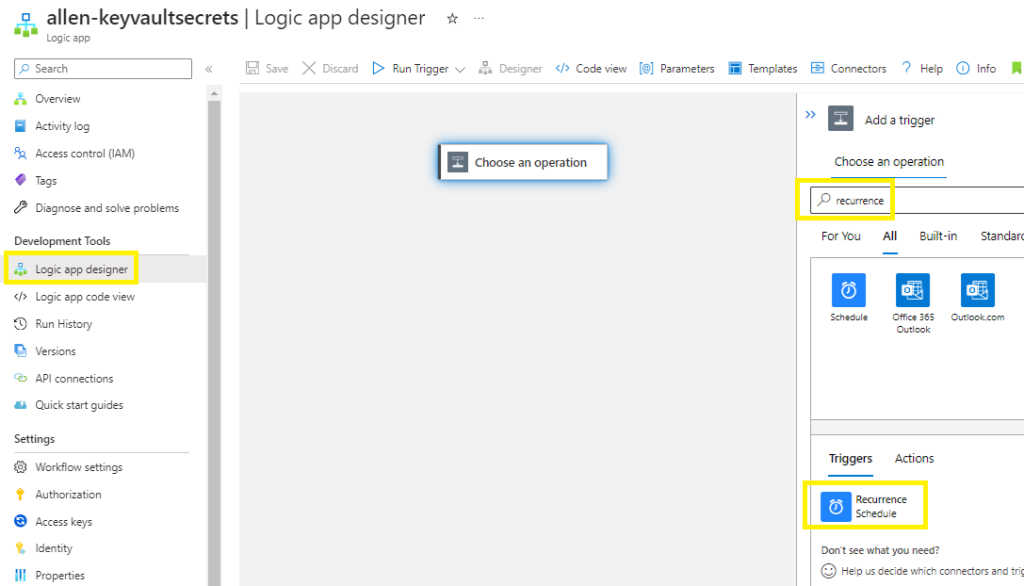
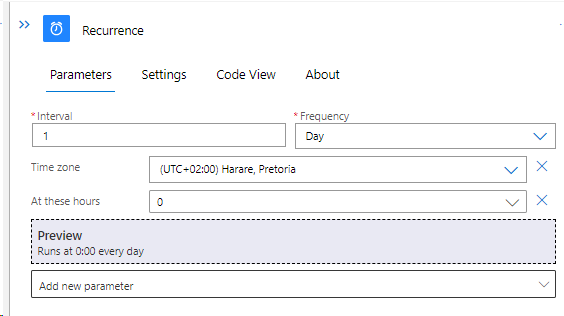
Select the interval and frequency of how often you want the Logic App to run (I want the Logic App to check the key vaults daily),
Add optional parameters,
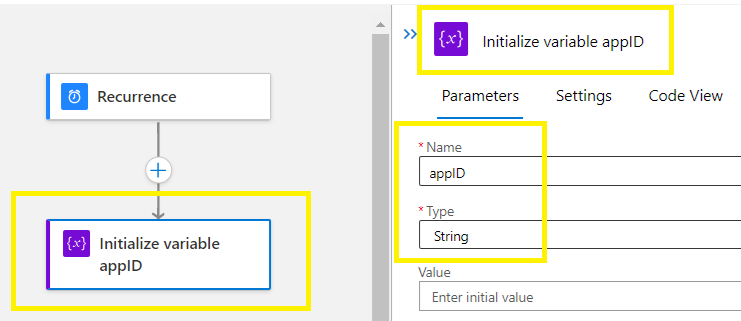
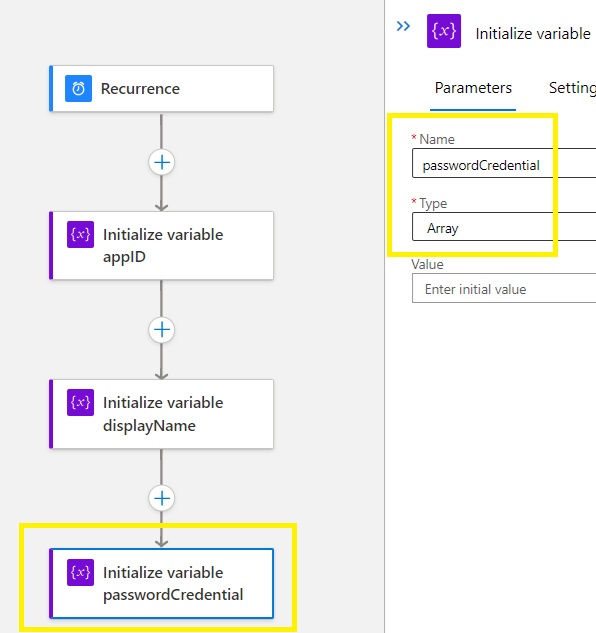
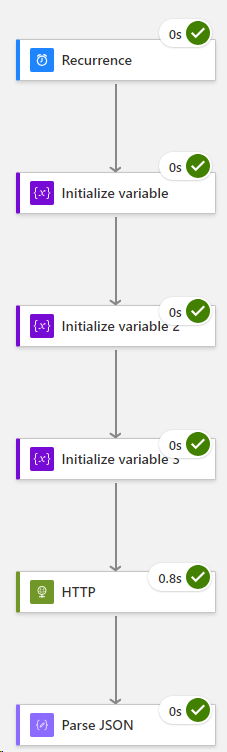
Part 2 – Now create 3 variables
Add an Action >
#1 – Search for initialize variable >

Create the 1st init variable > Name AppID with the value of string,
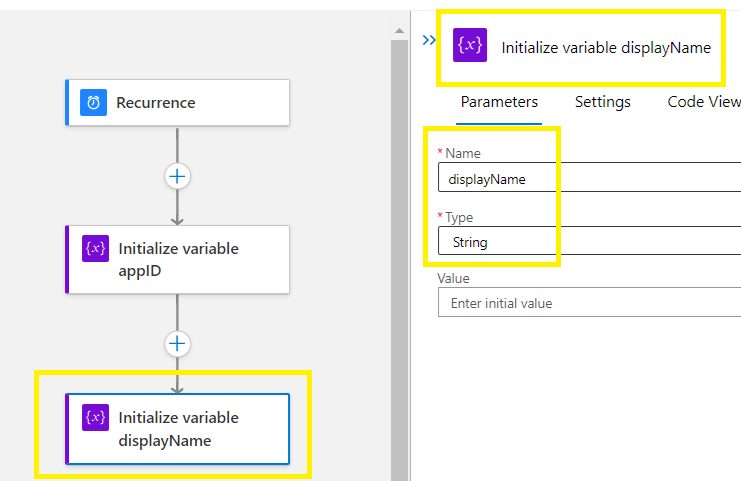
Add an Action >
Create the 2nd init variable > Name displayName with the value of string,
Add an Action >
Create the 3rd init variable > Name passwordCredential with the value of array,
Click on Save to make sure everything is configure correctly,
For verification > Run Trigger > Run

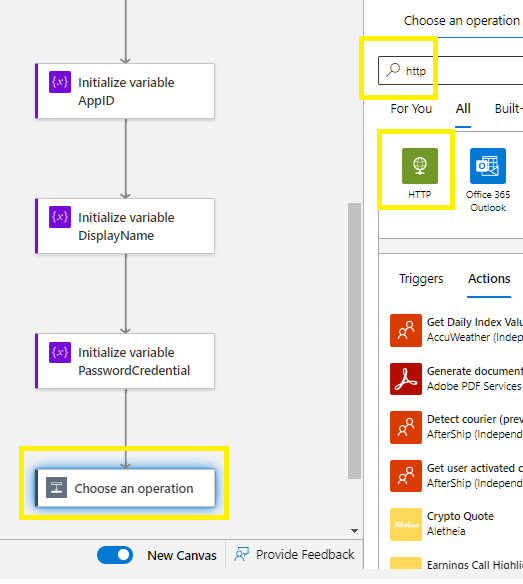
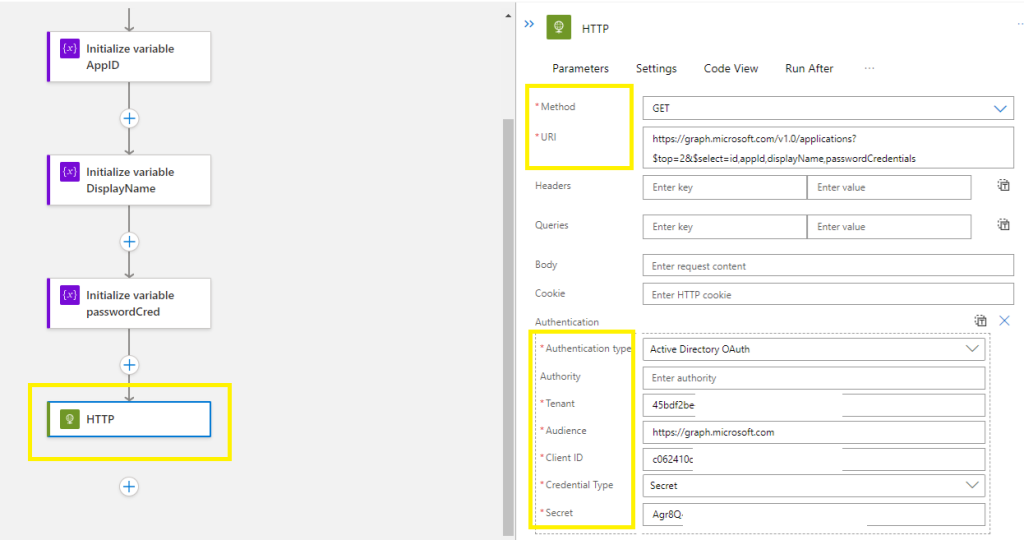
Part 3 – Create the HTTP GET
Add an Action >
Search for HTTP >
Method = GET
URI =
(dont edit the URL!)
Add new parameter > select Authentication
Authentication Type = Active Directory Oauth
Tenant ID = <your tenant ID>
Audience = https://graph.microsoft.com
Client ID = <your reg app ID>
Credential Type = secret
Secret = <your secret value>
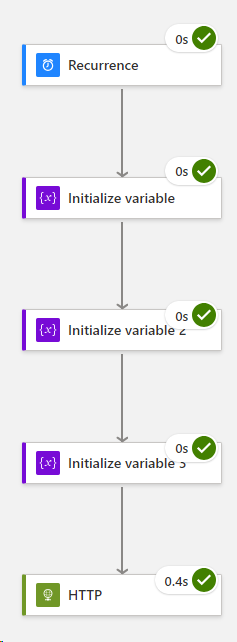
Click on Save to make sure everything is configure correctly,
For verification > Run Trigger > Run
Stay in Run mode for the next step,
Part 4 – Parse JSON
To continue building the Logic app, we need to populate the body of the HTTP function,
Staying in Run mode, or
Click on Run Trigger > Run,
You should end up with this result,

Stay in Run mode > select your HTTP function and copy the entire contents of the HTTP body and paste into a notepad,

Go back to Designer mode,
Now click on the + Add an action and choose the next operation:
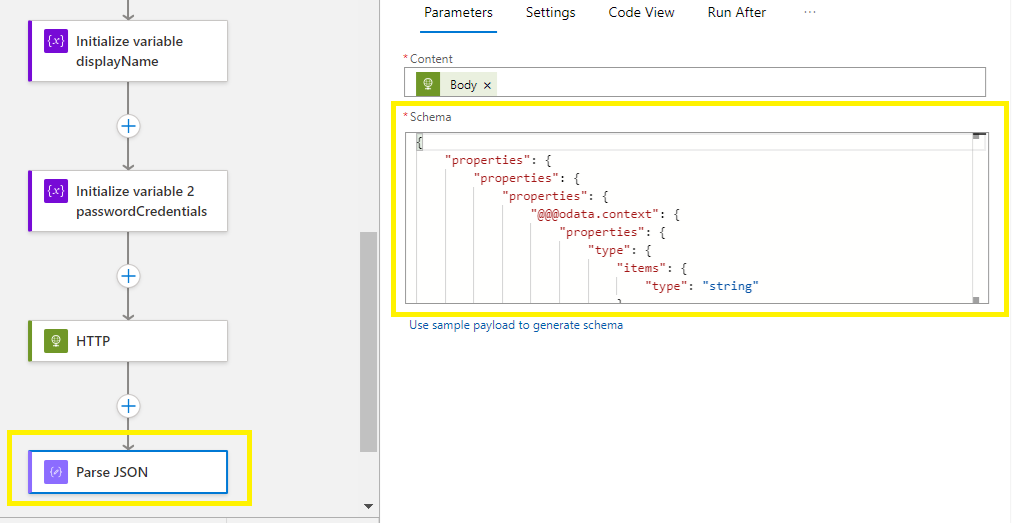
Search for and Parse Json and select,

Inside your function > click on the Content bar and select body >

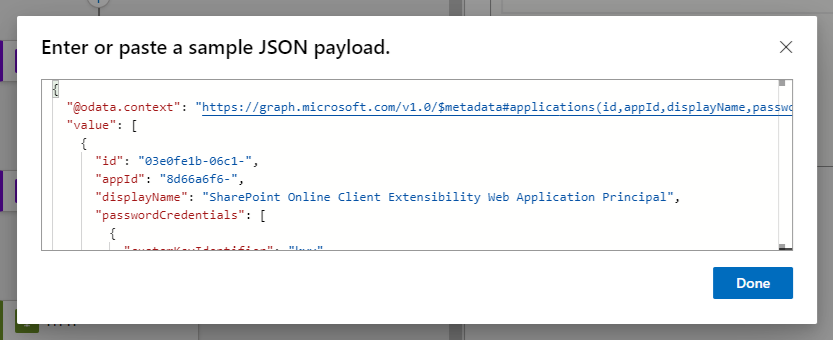
Now click on Use sample payload to generate schema link

Paste the HTTP body code (that you copied into your notepad) into the JSON payload screen,
Done,
Click on Save to make sure everything is configure correctly,
For verification > Run Trigger > Run
Expected output:
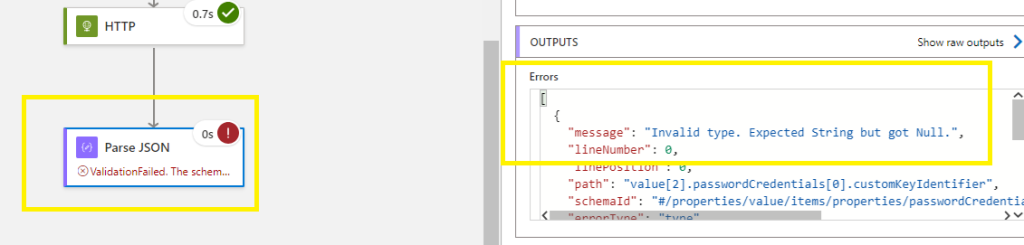
##This is an error section, if you don’t get this error, proceed to the next step###
If you run into errors with your Parse JSON function and get a Null error:
Go back into Designer mode,
Go to your Parse Json and copy the code into a notepad,
Now run an update on the entire notepad by replacing all the
“type”: “string”
With
“type”: [“string”, “null”]
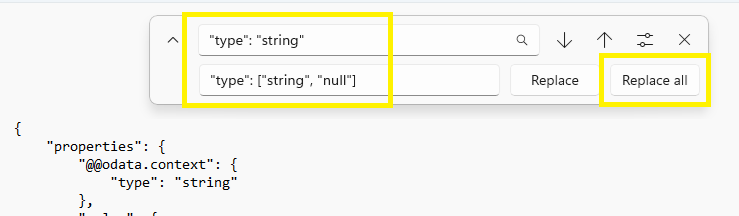
Copy the updated notepad contents back into the Use sample payload to generate schema link,
Done,
Run Trigger > Run again and all should work

****
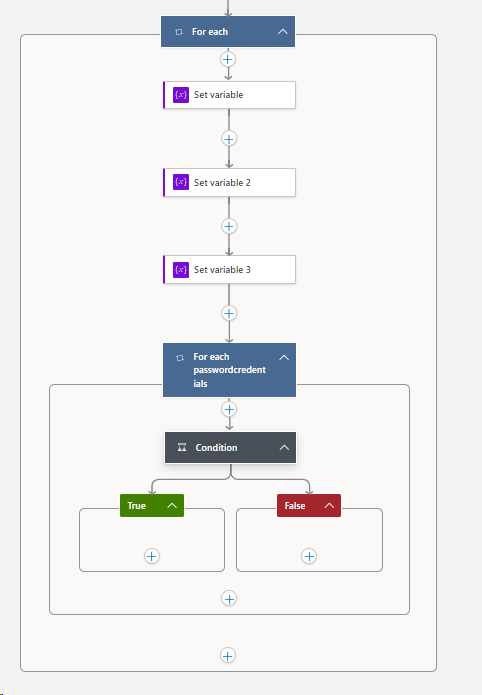
Part 5 – Create a For Each Loop:
Add an Action >
Control > For Each >

select Parse JSON – value

Save before continuing!
###Staying inside your For Each Loop > you are now going to add 3 x set variables:
Add an Action >
Control > Set variable >
Select parse JSON > appID
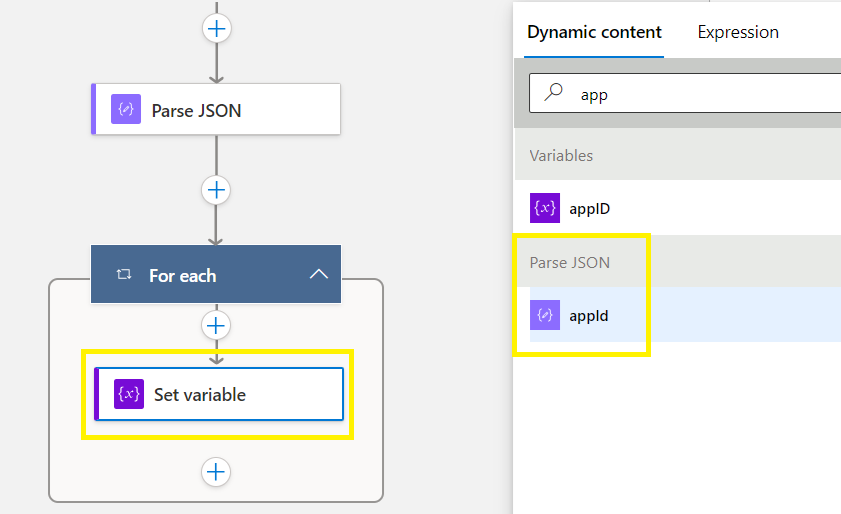
Save before continuing!
Still inside the For Each loop:
Add an Action > Control > add a 2nd Set variable >
Select parse JSON > displayName

Save before continuing!
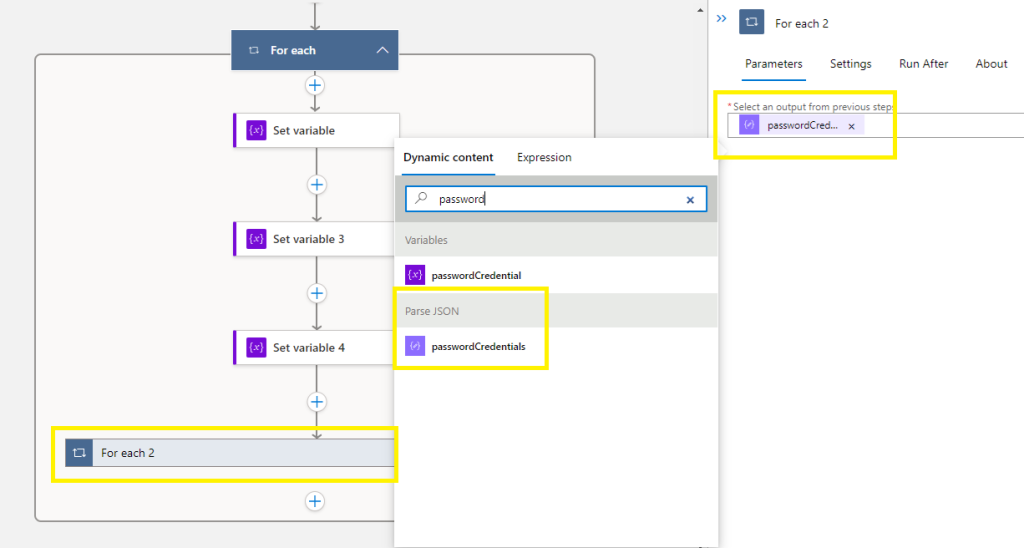
Still inside the For Each loop:
Add an Action > Control > add a 3rd Set variable >
Select parse JSON > passwordCredentials
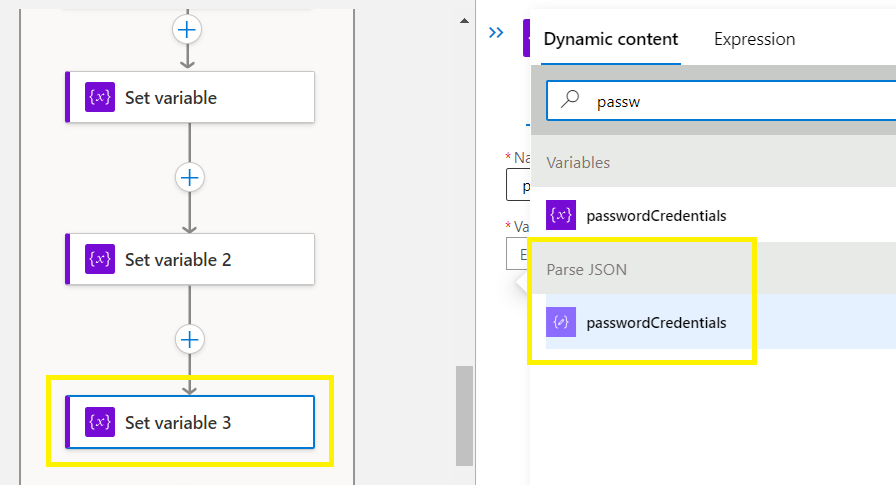
Save before continuing!
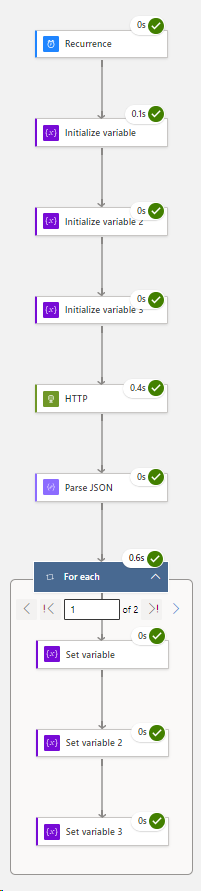
End result:
###Staying inside your 1st For Each Loop > you are now going to embed a 2nd For Each Loop:
Add an Action > Control > For Each >
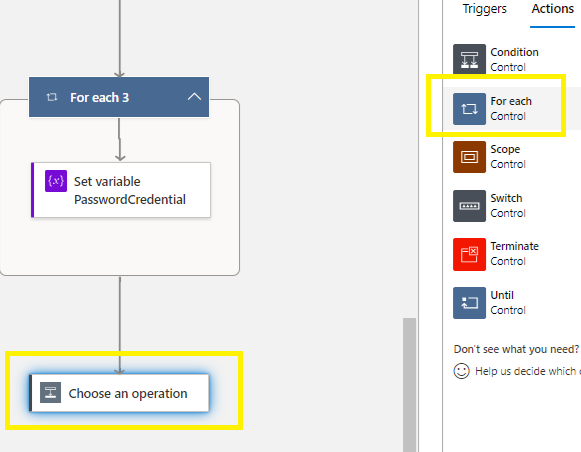
select Parse JSON – passwordCredentials
Save before continuing!
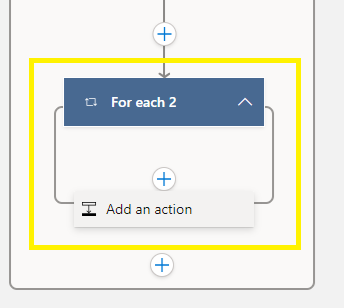
This next step is important! Rename this embedded loop carefully!
Rename this 2nd For Each loop to a unique name as this is going to be referenced in your condition that will be created later!

Save before continuing!
You may need to refresh the window for a refreshed view,
Click on Save to make sure everything is configure correctly,
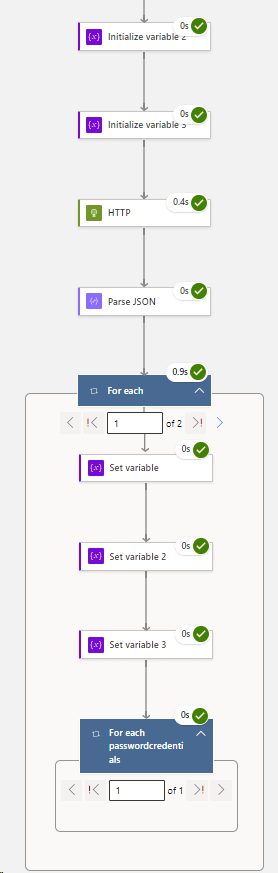
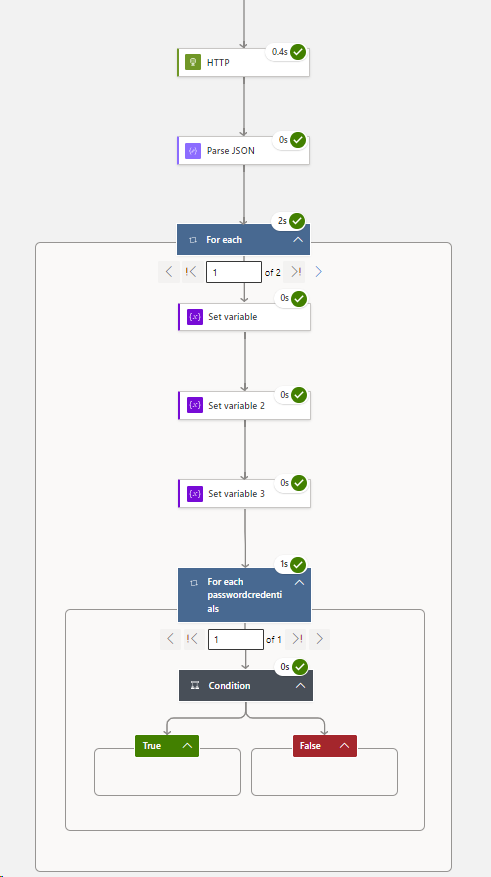
For verification > Run Trigger > Run
Expected output:
Staying inside your new 2nd For Each passwordCredentials Loop > you are now going to embed a Condition:
Add an Action > Control > Condition >
Save before continuing!
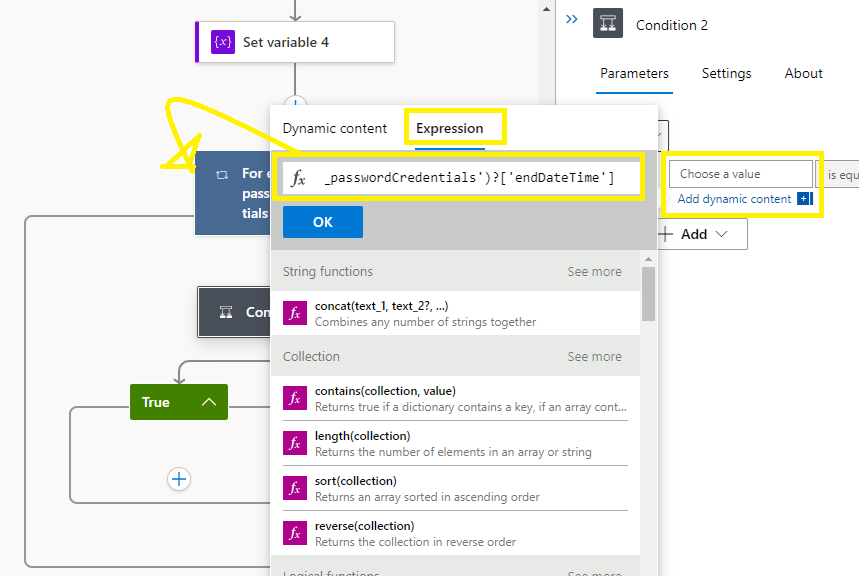
Condition >
Select the value bar:
click on Expression and paste in
items(‘For_each_passwordCredentials’)?[‘endDateTime’]
OK
Select the centre value box and select your option:
Is less than or equal to
Select the 3rd value box and define how many days you want to be alerted on secret expirations:
addToTime(utcNow(),30,’day’)
OK

Save before continuing!
Click on Save to make sure everything is configure correctly,
For verification > Run Trigger > Run
Expected output:
Let’s create a notification event when the condition is True:
Click on the True block > + Add an action
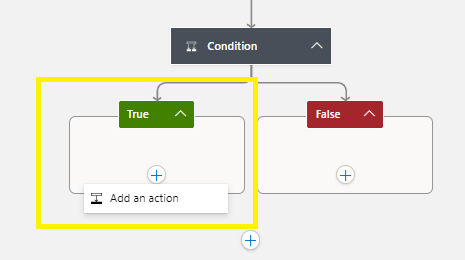
Search mail > select Office 365 Outlook >
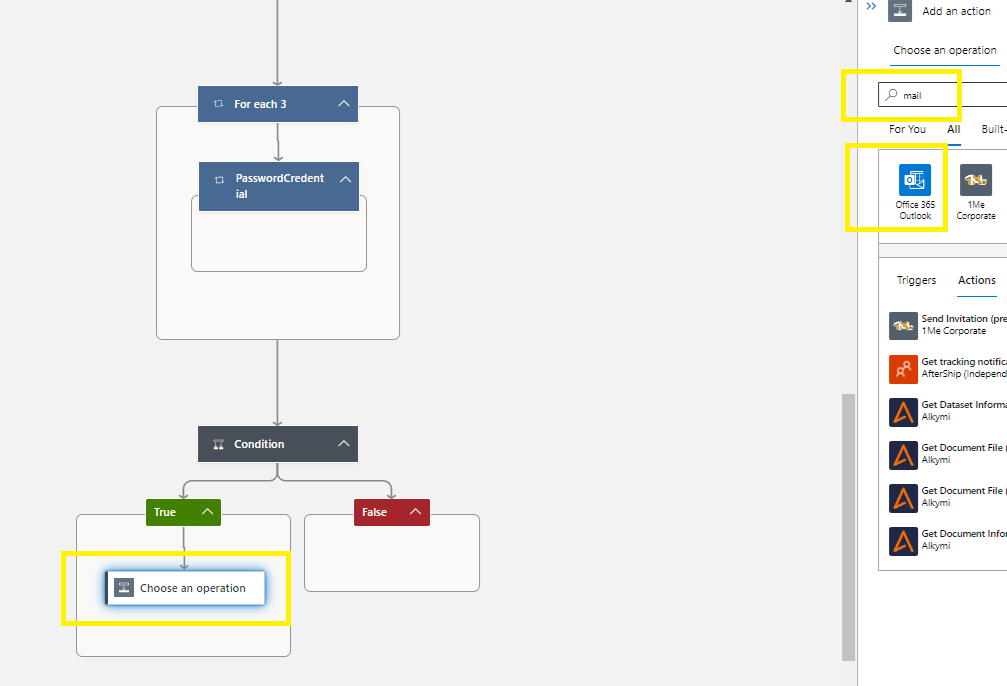
Search and Select Send an email (v2) icon

Click on Sign in,
Sign in with a domain system email account that doesn’t required MFA,

In the To field: enter the distribution group email address,
In the email Subject field: enter the email subject line, and add the AppID or DisplayName from the variables section,

Populate the body of the email that your distribution group audience will receive:
My example:
Good day,
This email serves to notify that the following Registered App secret is about to expire.
Registered Application: (add the appID from the Parse JSON section)
Secret Expiration Date: (endDateTime from the Parse JSON section)

Save
Run & Trigger > Run
Once provisioned, the Logic App will take about 20/30 minutes to start sending emails.
— I hope this blog provided a clear explanation on how to configure an automated monitoring and alerting solution for your Registered App secrets —
Great content! Super high-quality! Keep it up!
I enjoy, lead to I discovered exactly what I was having a look for. You’ve ended my 4 day lengthy hunt! God Bless you man. Have a nice day. Bye
Greetings! This is my first comment here so I just wanted to give a quick shout out and tell you I genuinely enjoy reading your articles. Can you suggest any other blogs/websites/forums that go over the same subjects? Many thanks!
Hi my family member! I want to say that this post is awesome, nice written and include almost all important infos. I would like to look extra posts like this .
Someone essentially help to make seriously articles I would state. This is the very first time I frequented your web page and thus far? I amazed with the research you made to create this particular publish amazing. Great job!
Normally I do not read article on blogs, but I would like to say that this write-up very forced me to try and do so! Your writing style has been amazed me. Thanks, quite nice article.