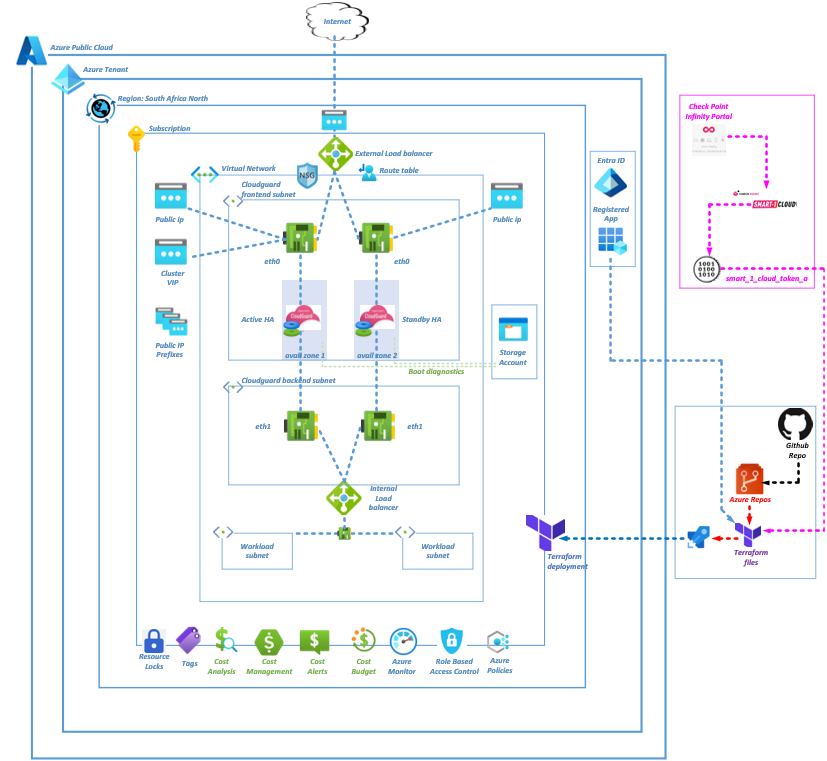
One of our clients has requested a Check Point CloudGuard IaaS High Availability deployment in Azure. As per current limitations, CloudGuard can host a maximum of 2 members in a cluster, with each member deployed in a separate availability zone. Only High Availability Mode (Active/Standby) is supported. Load Sharing Mode is not supported.
I have written this blog to demonstrate the Terraform deployment of Cloudguard IaaS HA deployment into an existing virtual network using Azure DevOps.
If you want to keep updated on the latest known limitations.
Deployment Plan
Step 1 – Virtual network and subnet
Step 3 – Network Security Group
Step 4 – Create a Check Point Infinity Portal
Step 5 – Enabling the Smart-1 Cloud Application
Step 7 – Create a Storage Account
Step 8 – Create a new Azure DevOps Repository
Step 9 – Create a Service Principal
Step 10 – Grant the Service Principal permissions and scope
Step 11 – Store Service Principal credentials into terraform.tfvars
Step 12 – Marketplace enablement
Step 13 – Azure DevOps Classic pipelines
Step 14 – DevOps Service Connection
Step 15 – Terraform INIT pipeline
Step 16 – Updating the main.tf file
Deployment Steps
Step 1 - Virtual network and subnet
Create or identify your target virtual network into which you intend to deploy your Cloudguard resources,
Create or identity your target subnets;
(There is no scaling of these resources so you can make the subnet quite small),
The subnets need to be dedicated to the CloudGuard appliances, no other resources may be deployed into this subnet,
Two pre-create subnets are required;
checkpoint-frontend
checkpoint-backend
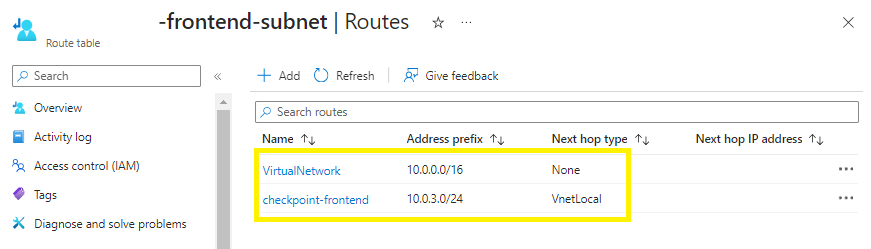
Step 2 - Route Table
Create a User Defined Routing (UDR) for the checkpoint-frontend subnet,
Associate the UDR with your checkpoint-frontend subnet,
Create 2 routes,
first route to drop all traffic to the entire virtual network,
second route to only allow traffic to the checkpoint-frontend subnet,
Step 3 - Network Security Group
Create an NSG that needs to be associated with your frontend subnet, that allows all inbound and outbound TCP and UDP traffic to connect the External Load Balancer and Cluster Members successfully.
Step 4 - Create a Check Point Infinity Portal
Check Point Infinity Portal is the Check Point cloud platform for hosting the Check Point Security-as-a-Service (SaaS) solutions. The SaaS platform needs to be configured in order to create your token
- Go to the Infinity Portal to create your user account,
- Create your Infinity account by entering your company’s name, email address, phone number, and country.
- Click Select Data Residency.
The Available Region window opens and shows available services based on region.
Click a region’s name to see services available for a specific region.
A green check mark adjacent to the service name indicates an available service for that region. - Select the account type (Customer is the default type). It is possible to change the account type after creating the account.
- Select these checkboxes:
○ Optional: Subscribe to Check Point Product News.
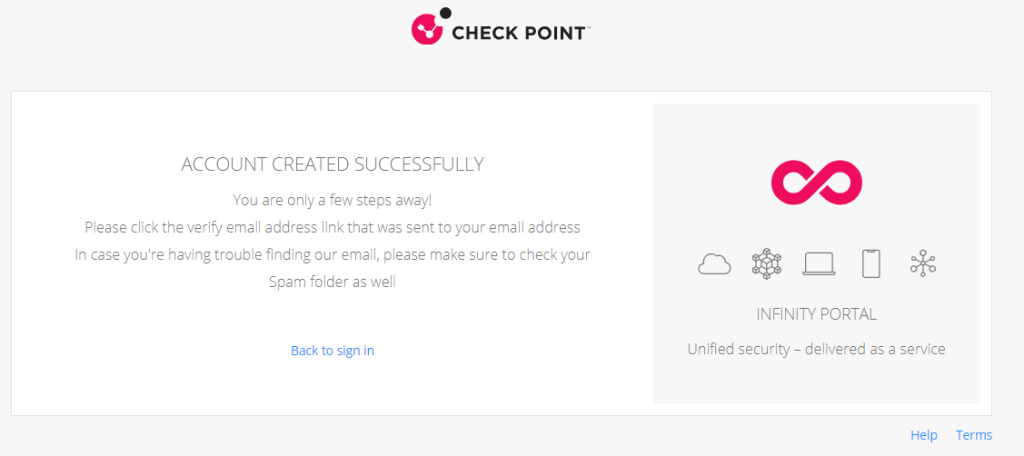
○ I accept the Infinity Portal terms of service and the Privacy Policy. - When you receive the confirmation email,
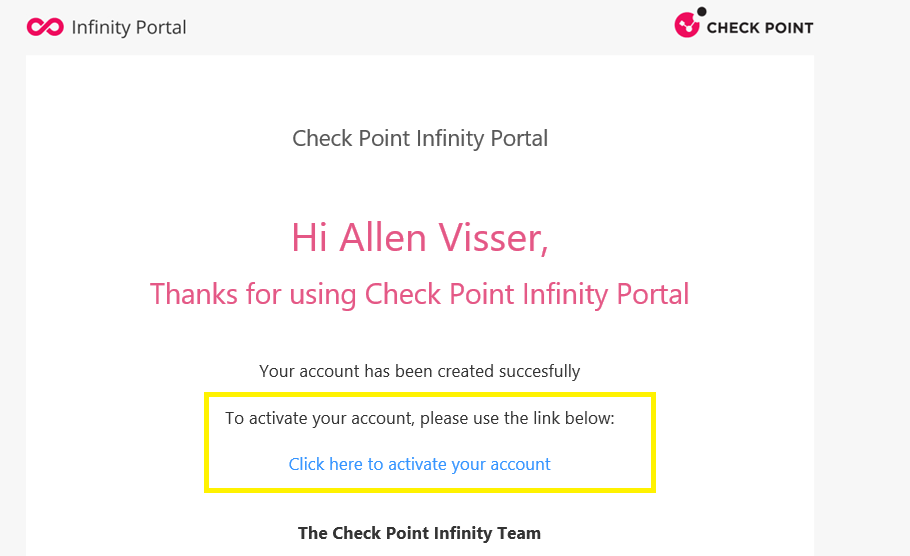
- Click on the activation instructions in the email sent to your account,
- To go back to the sign-in page, finish the process to activate your account,
9. Login to the Infinity Portal,
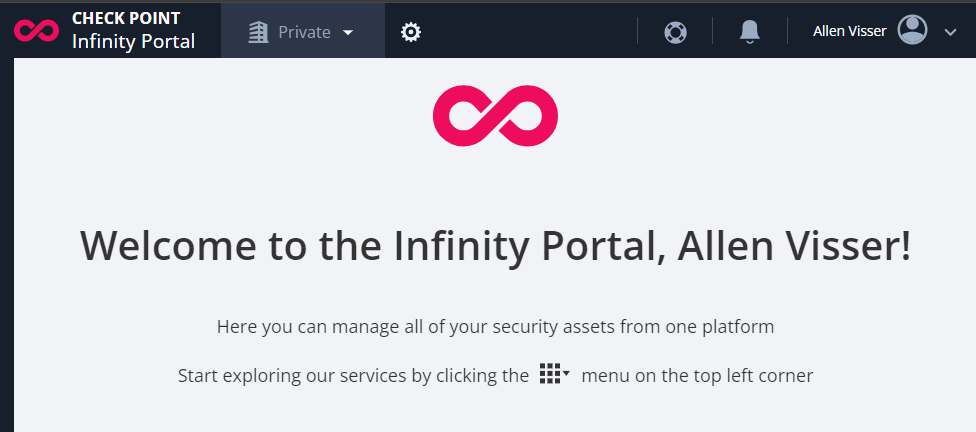
Step 5 - Enabling the Smart-1 Cloud Application
Quantum Smart-1 Cloud manages maintenance and saves time during onboarding new gateways, monitoring devices, facility power and any new updates or hotfixes automatically via the Quantum Smart-1 Cloud
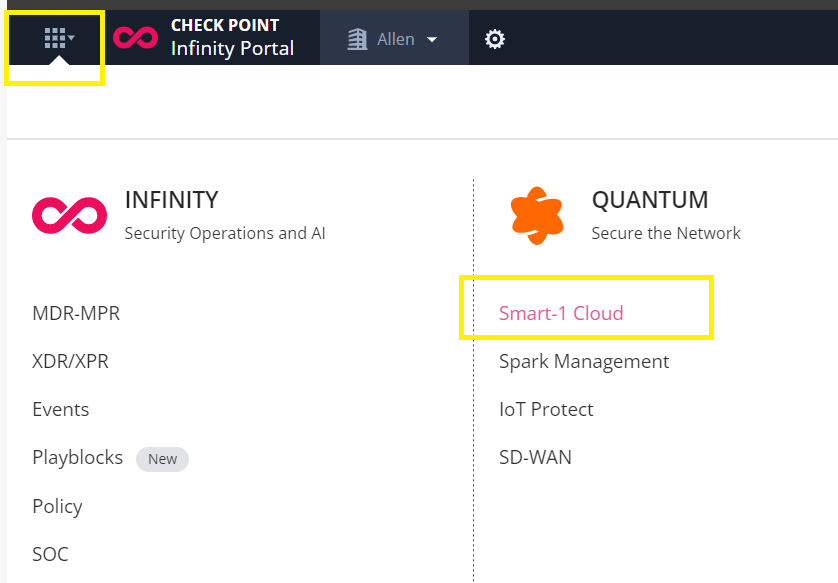
In the Infinity Portal,
Select the Menu button (top left corner),
From the drop-down menu, select Smart-1 Cloud,
Accept the service terms,
Click on Get Started,
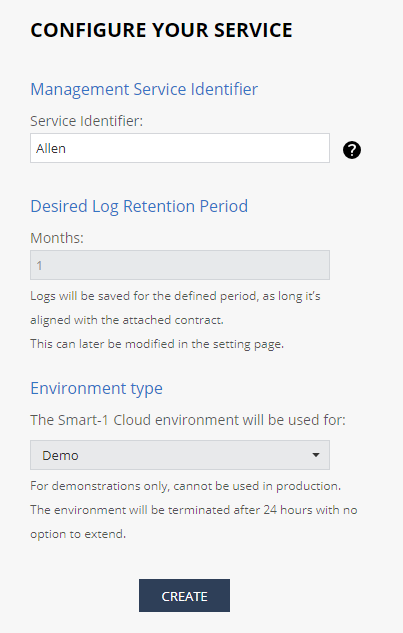
Enter the required information to configure the service:
Field
Description
Service Identifier
Desired Log Retention Period
The desired retention period to keep the logs.
Logs are deleted after the defined period.
Click Create,
The Preparing Account window opens,
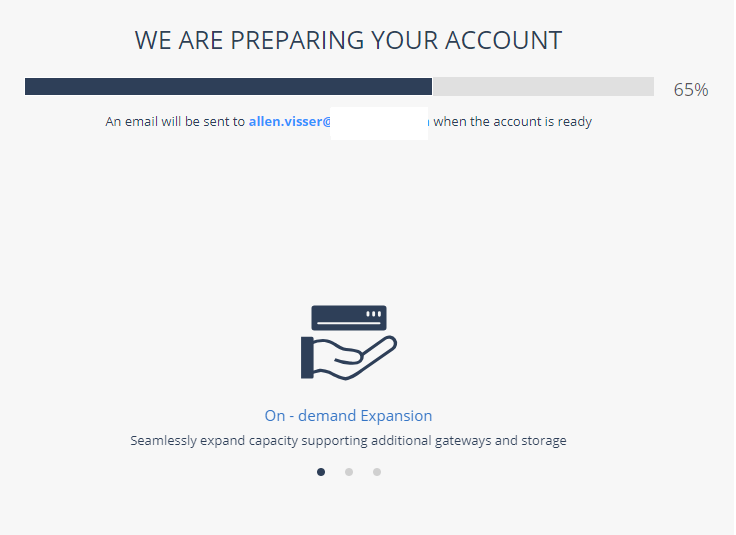
After the process is complete, an email is sent to your account.
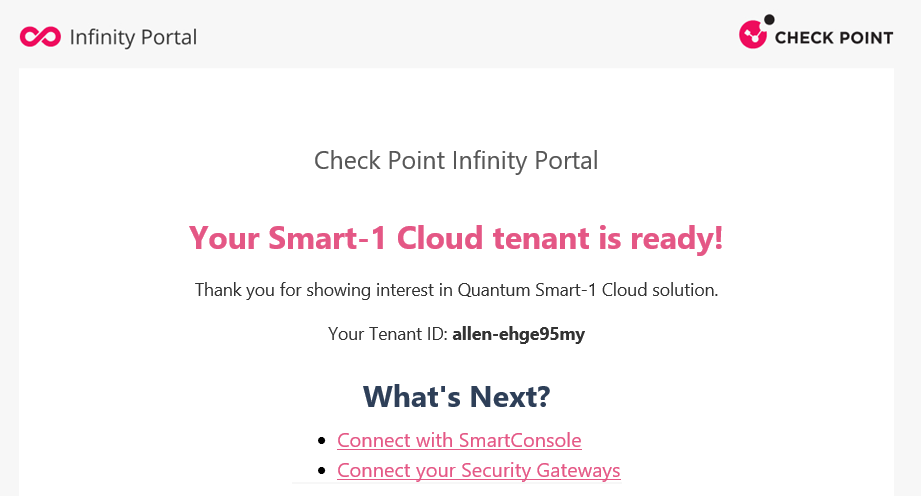
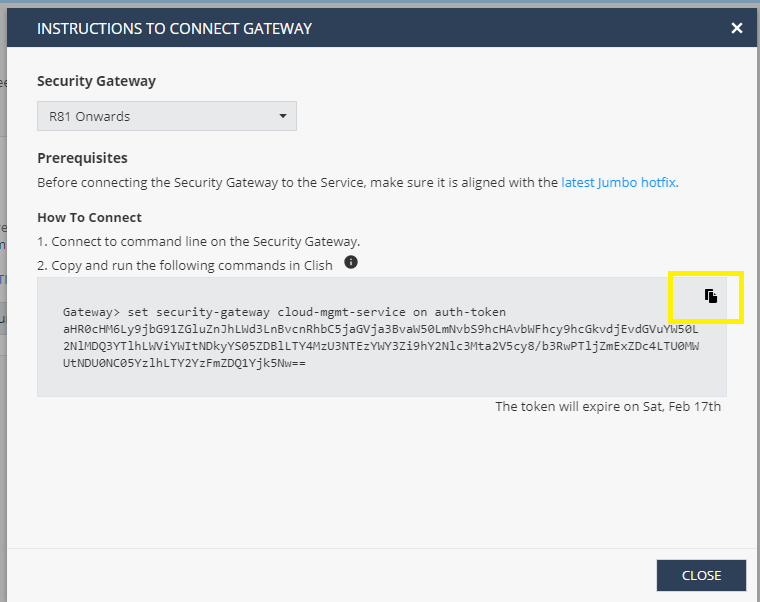
Step 6 - Smart-1 Cloud Token
In Smart-1 Cloud portal:
On the left navigation panel, click Connect Gateways,
Click the large plus icon.
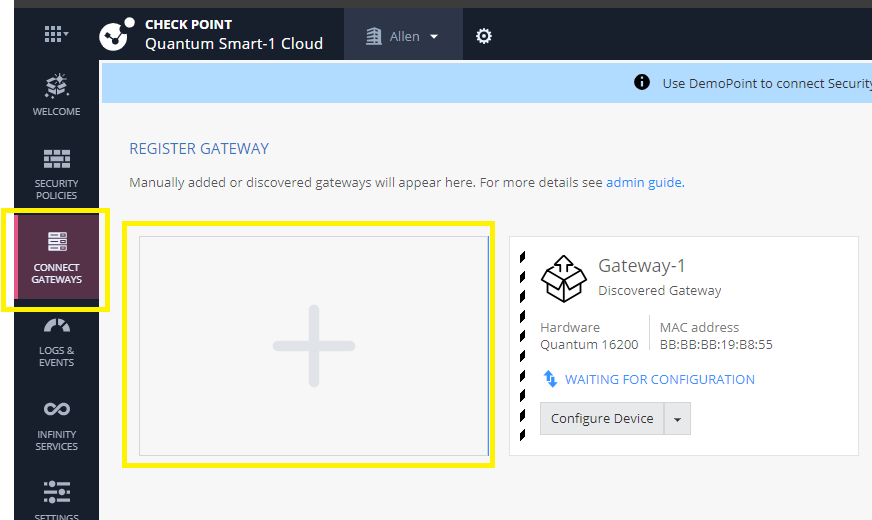
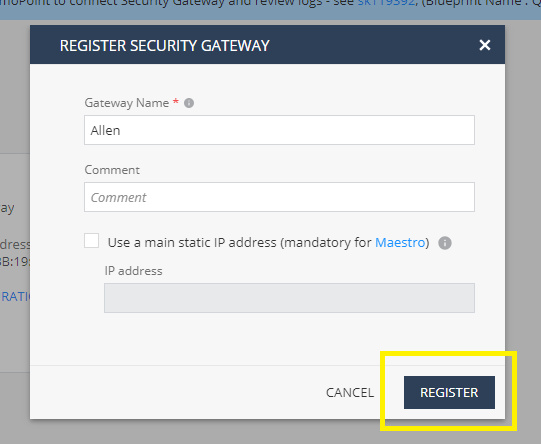
The Register a New Security Gateway window opens.
In the Gateway Name field, enter the name for this object,
Optional: In the Comment field, enter the applicable text,
Click Register,
This creates a new Security Gateway object in the Service with the name that you entered,
Click on the Connect Gateway button,
Copy the Token from the connect gateway screen,
Keep this token safe for use later.
(This token will be pasted into the CloudGuard template as smart_1_cloud_token_a)
When the CloudGuard Gateway deployment completes:
A tunnel will be established between the Security Gateway and the Smart-1 Cloud,
Step 7 - Create a Storage Account
A storage account and container is required for the provisioning of the Terraform-based DevOps pipelines. However, in this deployment, no actual data will be stored in this storage account and hence, will incur no costs.
Pre-create a resource group into which to deploy your storage account. This resource group will not be the same resource group into which your Check Point CloudGuard resources will be deployed, as that resource group will be provisioned during the template run.
You have the option to provisio the storage account via the portal or use this powershell script to:
#1 provision your storage account,
#2 provision a container.
#1 – Deploy the storage account
Connect-AzAccount
##st.acc variables##
$StorageAccName = ‘<st.acc.name>’
$StorageType = ‘Standard_LRS’
$ResourceGroupName = “<rg.name>”
$location = “<location.name>”
###create your storage account
New-AzStorageAccount `
-ResourceGroupName $ResourceGroupName `
-Name $StorageAccName `
-Type $StorageType `
-Location $location `
-Tag @{CustomerName=”Customer01″; `
AutoShutdownSchedule=”None”; `
Environment=”sandbox”;}}
#2 – Create a container
###create your container
$azstorageacc = Get-AzStorageAccount -ResourceGroupName $ResourceGroupName -Name $StorageAccName
$NewContainerName = ‘<containername>’
$CTX = $azstorageacc.Context
New-AzStorageContainer -Name $NewContainerName `
-Context $ctx
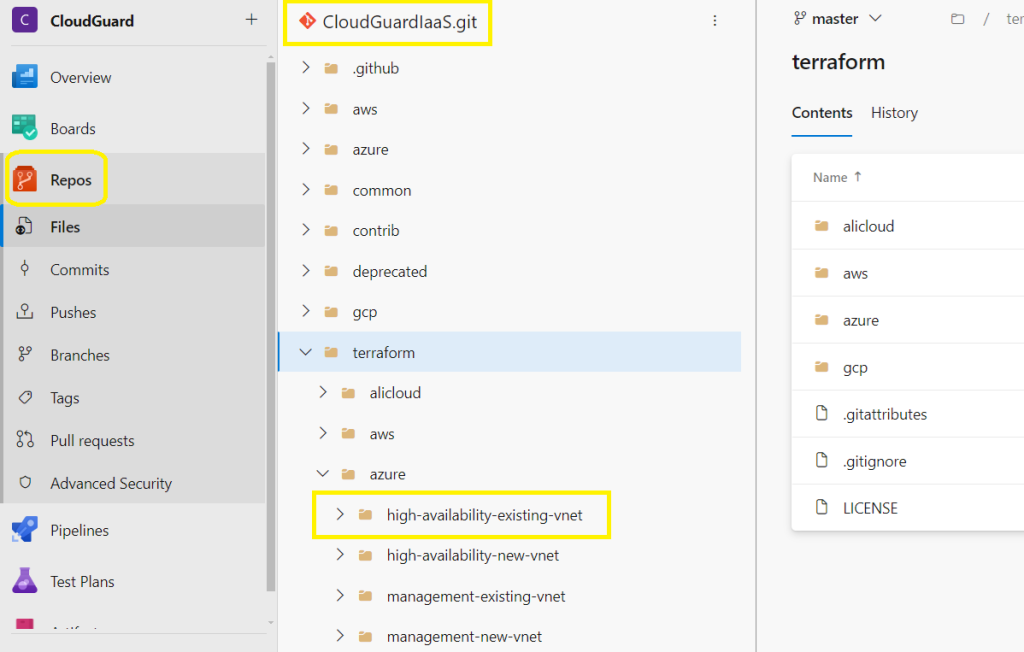
Step 8 - Create a new Azure DevOps Repository
Create a new Azure DevOps repository,
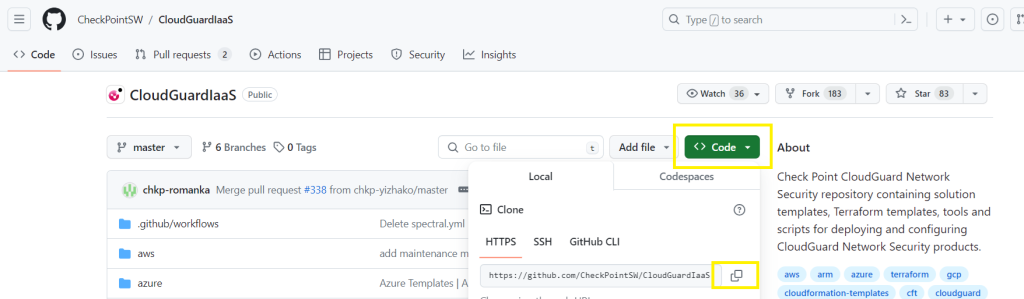
Then the next step will be to clone the Check Point CloudGuard Github repository into your new Azure DevOps repository:
#1 Copy the path of the CloudGuard Github repository,
https://github.com/CheckPointSW/CloudGuardIaaS.git
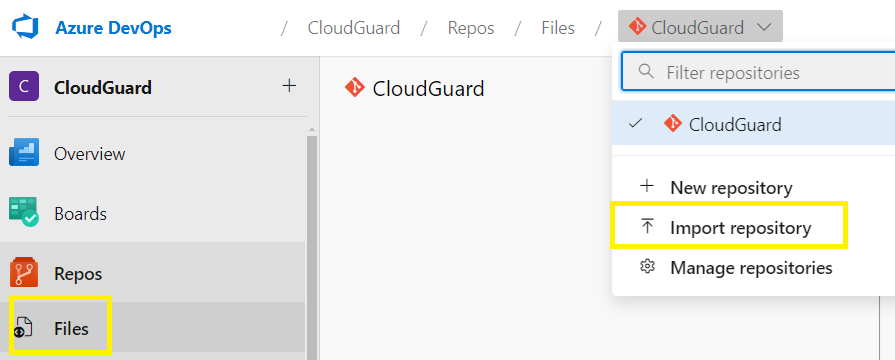
Go to your Azure DevOps repository,
Select your repository,
Select Import repository,
Paste the URL into the Clone URL box and click Import
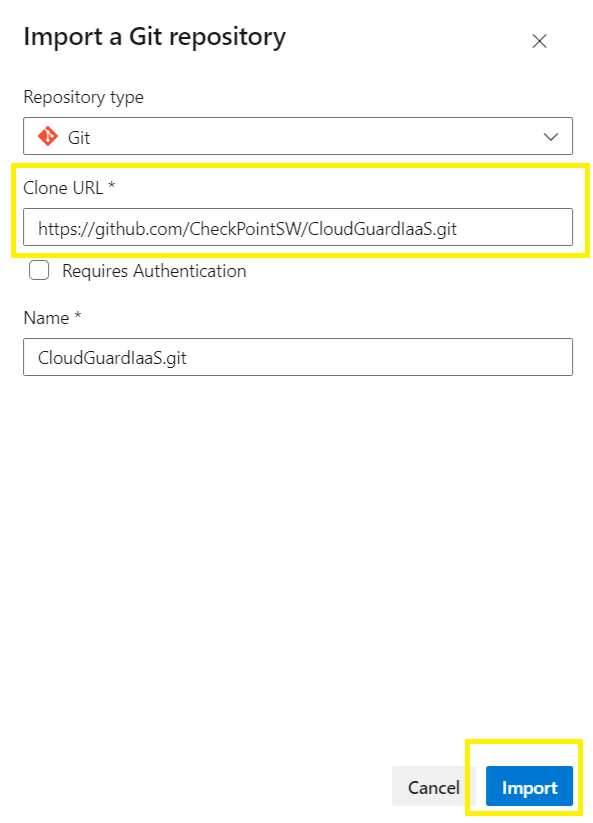
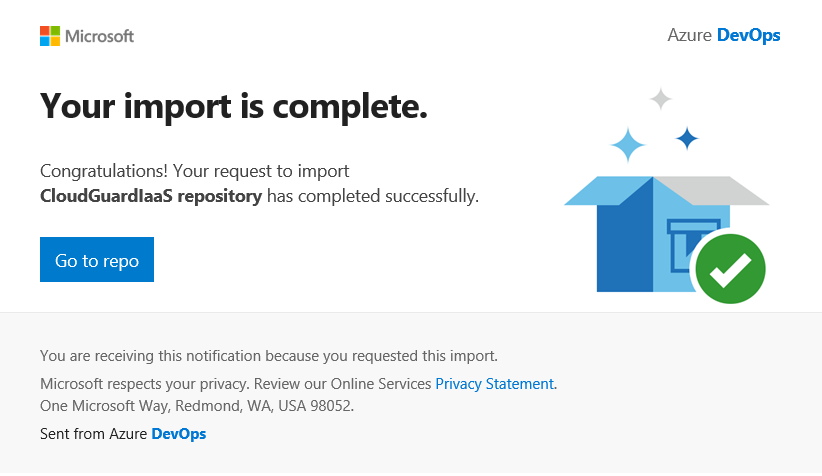
Your Azure DevOps Repo should now be seeded by the Github repo,
You will also receive an email confirming completion,
Step 9 - Create a Service Principal
By default, a service principal will be deployed by the Terraform template later on.
However, I have chosen to create my own service principal.
If you want to create your own service principal, make sure you set credentials and assign privileges to necessary resources.
Click here for PowerShell instructions to quickly and easily create a new Service Principal,
Using the simple PowerShell script:
#Step 1 - #Create a new Service Principal

$name = "cloudguard"
$sp = New-AzADServicePrincipal -DisplayName $name

#Step 2 - Export the SP secret (copy and save the password)
$sp.PasswordCredentials.SecretText

#Step 3 - Get the Service Principle ApplicationID for the next step (copy and save)
Get-AzADServicePrincipal -DisplayName $name

The output will produce the following details which you must record for future use:
The passwordsecret,
The ObjectID,
The ClientID / AppID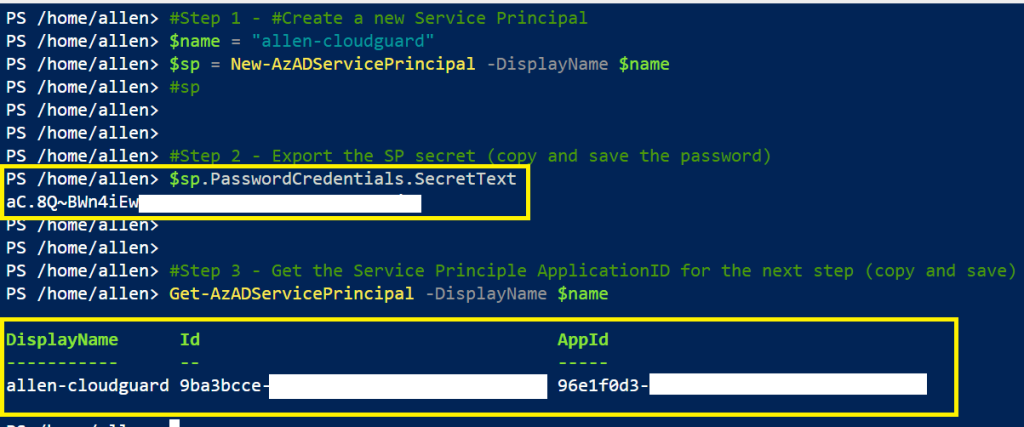
Step 10 - Grant the Service Principal permissions and scope
The Check Point Cluster template automatically creates a service principal for each Virtual Machine and assigns the Contributor role to the Cluster resource group.
Thus, you do not need to create a service principal, assign it a role, and attach it to each of your individual Cluster resources.
When you deploy the CloudGuard resources into an existing virtual network, you need to assign a Contributor role for each Cluster’s managed identity (created during the deployment ) to the destination virtual network’s resource group because they are not automatically assigned.
Copy and update the Service Principal credentials into the terraform.tfvars file,
#1 Use the following script to get the Service Principal ID
#Assign RBAC roles to the Service Principal

#Step 1: Identify the Service Principal identity
#For a Microsoft Entra service principal, you need the service principal object ID.

$name = "allen-cloudguard"
Get-AzADServicePrincipal -SearchString $name
(Get-AzADServicePrincipal -DisplayName $name).id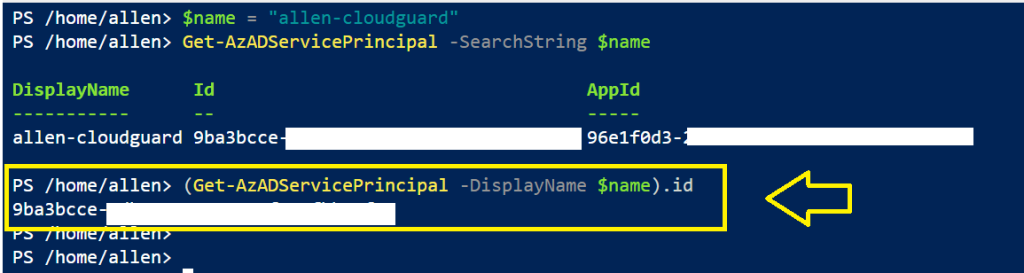
#2: Assign role according to the scope

#Contributor role:
$ObjectId = '9ba3bcce-5db4-.............'
New-AzRoleAssignment -ObjectId $ObjectId `
-RoleDefinitionName "Contributor"
Step 11 - Store Service Principal credentials into terraform.tfvars
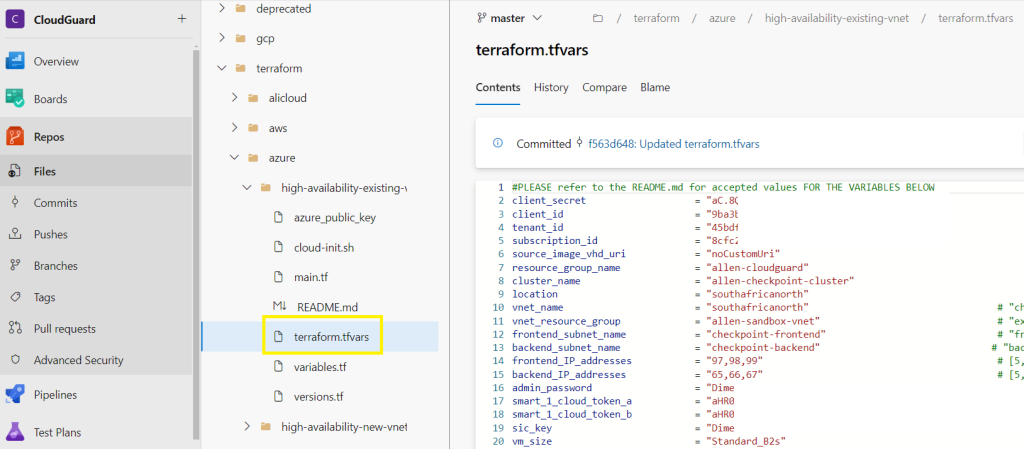
Edit the terraform.tfvars in the Azure DevOps repository,

Edit and update the following values in the terraform.tfvars file,
Step 12 - Marketplace enablement
Enable the CloudGuard HA product on your subscription,
*Without this enablement, the template deployment will fail.
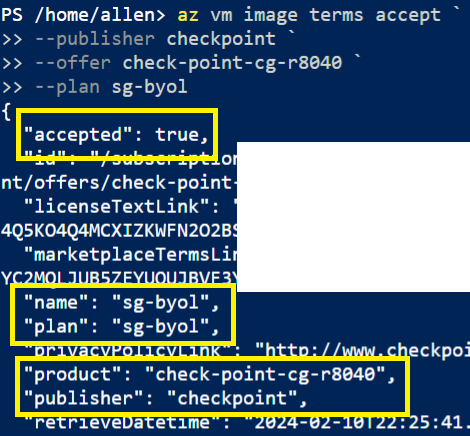
Run the following powershell to enable the product,
az vm image terms accept --publisher checkpoint
–offer check-point-cg-r8040 `
–plan sg-byol
Verification that the product has been enabled,
Step 13 - Azure DevOps Classic pipelines
Go to DevOps,
Go to Project Settings > Settings >
Disable creation of classic build pipelines = OFF
Disable creation of classic release pipelines = OFF

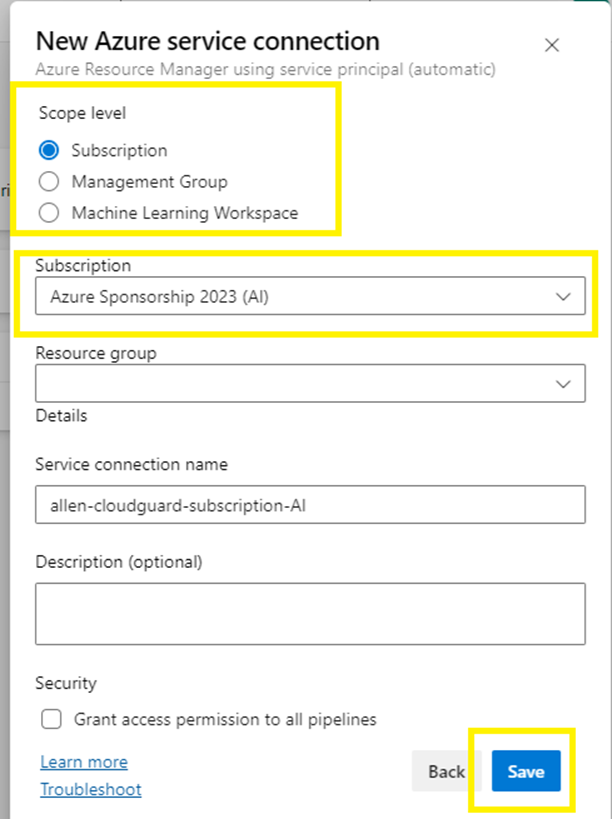
Step 14 - DevOps Service Connection
Create a new service connection in your DevOps – which will become the Registered App in Entra ID,
Assign this Registered App Contributor permissions on your target subscription IAM,
Step 15 - Terraform INIT pipeline
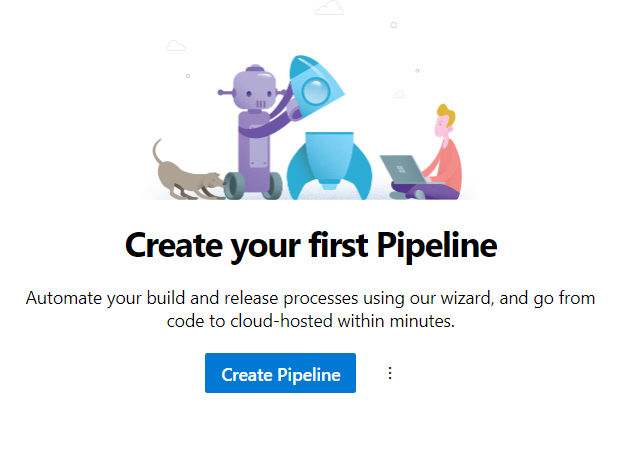
Go to DevOps Pipelines > Create Pipeline,
Select your code repository,
Select a classic editor,
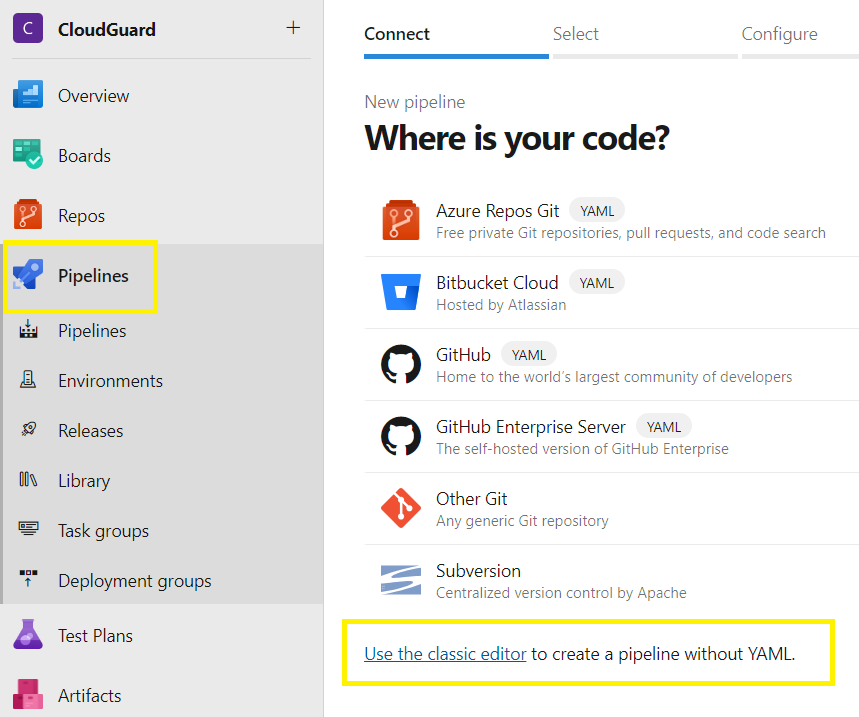
Select the Azure Repos Git,
Select the project, repository, master branch,
Continue

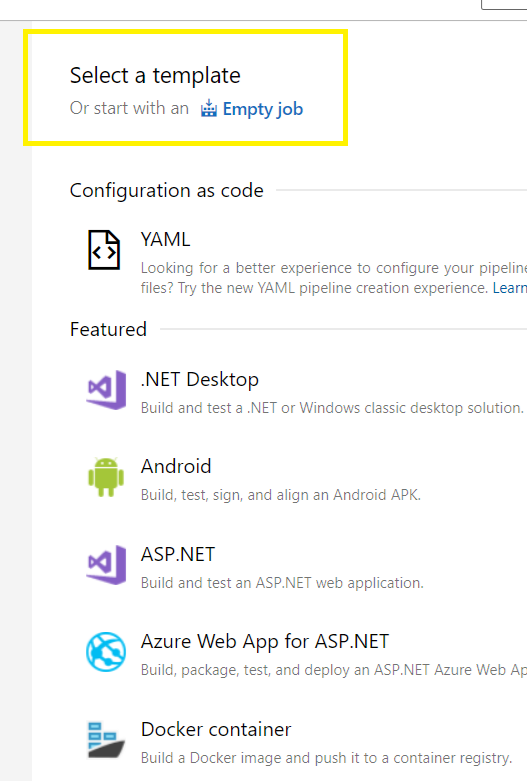
Select a template,
Select an Empty job,
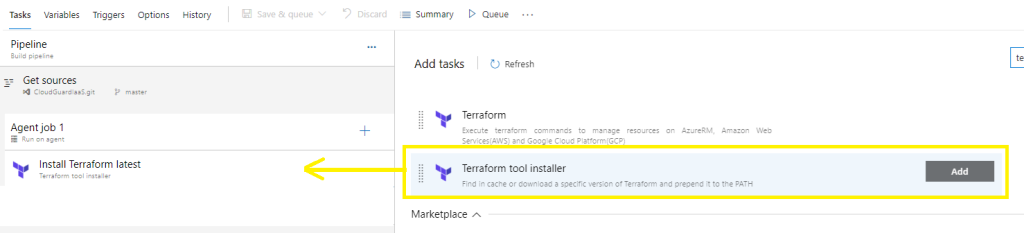
Click on +
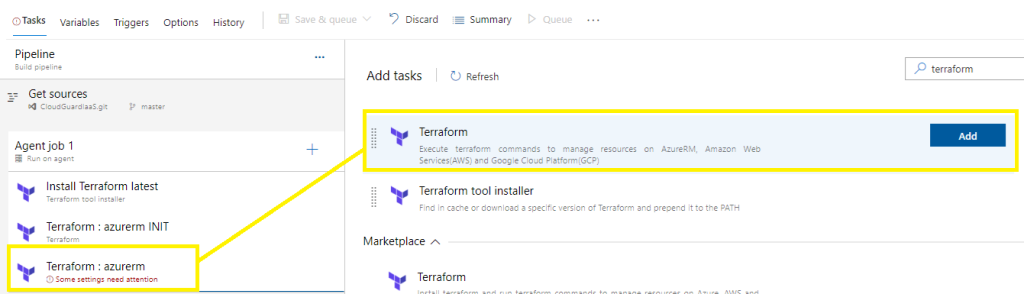
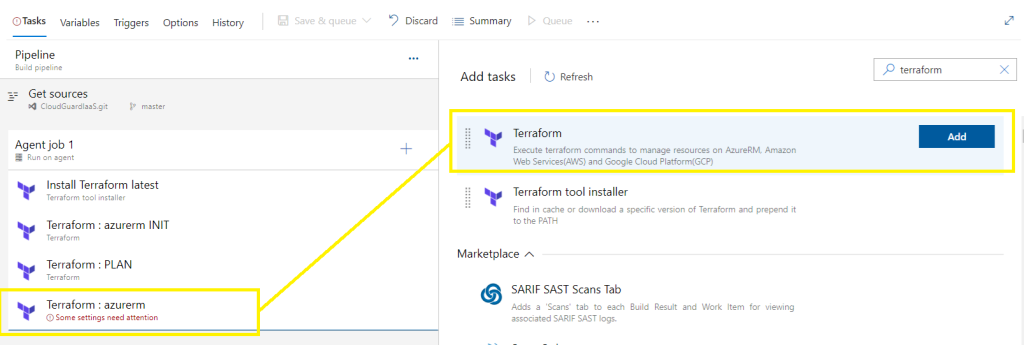
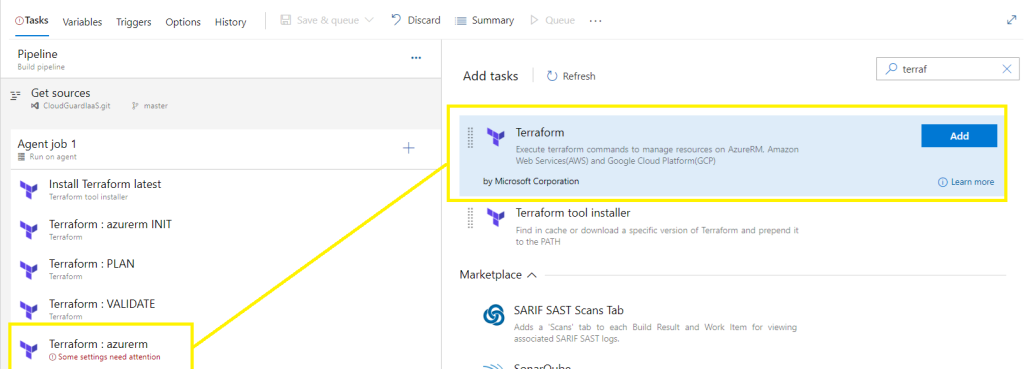
Add task, search for Terraform,
Select the Terraform tool installer > Add
Select Terraform > Add,
Click on +
Add task, search for Terraform,
Select Terraform > Add,
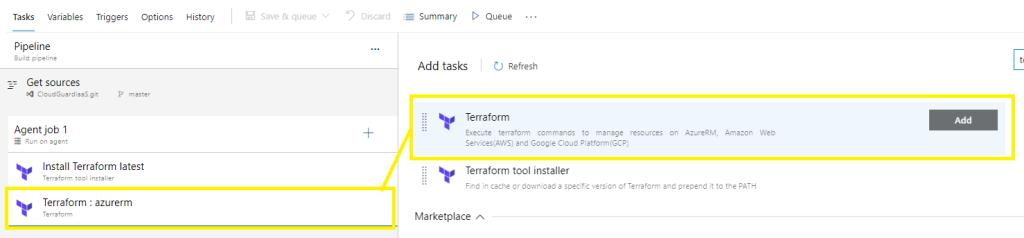
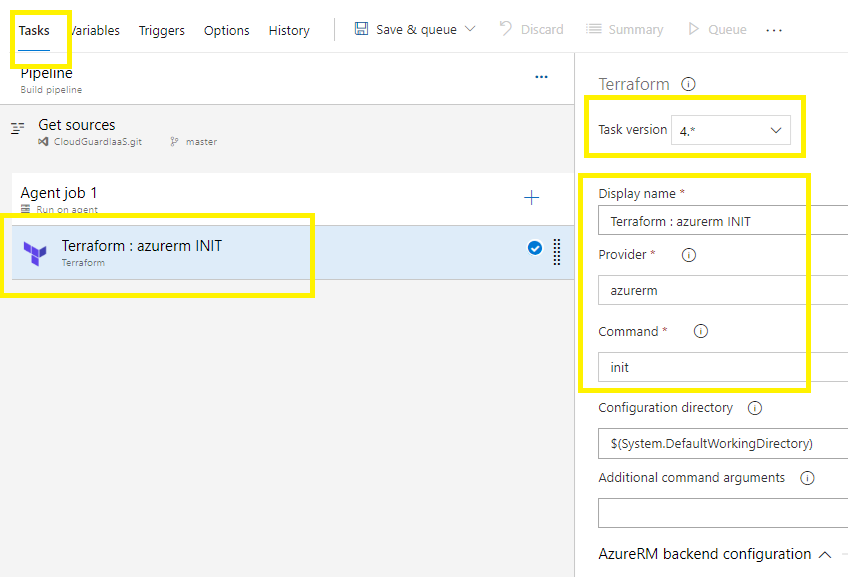
Configure task version = 4,
Customize display name,
Provider azurerm,
Command INIT,
Change and point the github configuration directory to the target folder location that contains the TF files you are working with,
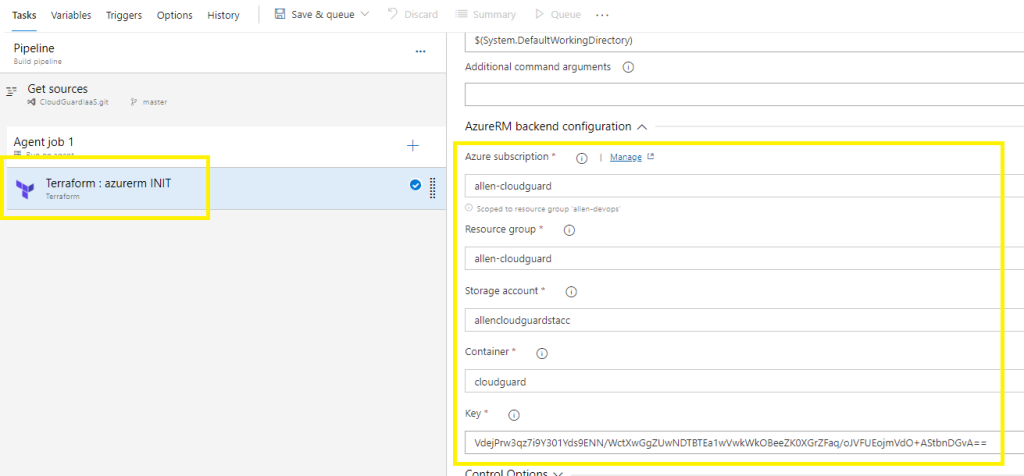
AzureRM backend configuration:
Select the service connection under subscription,
Select the resource group,
Select the storage account and container pre-created earlier,
Insert the storage account access key 1,
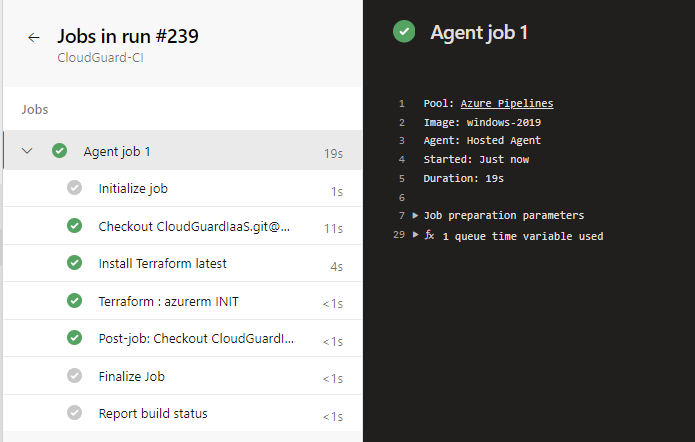
Save & Query,
Run pipeline,
Save & Run,
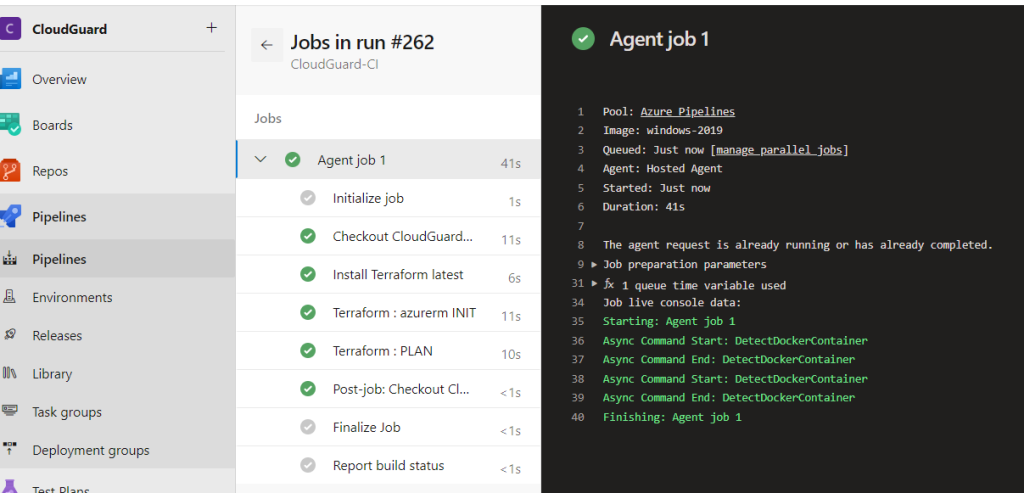
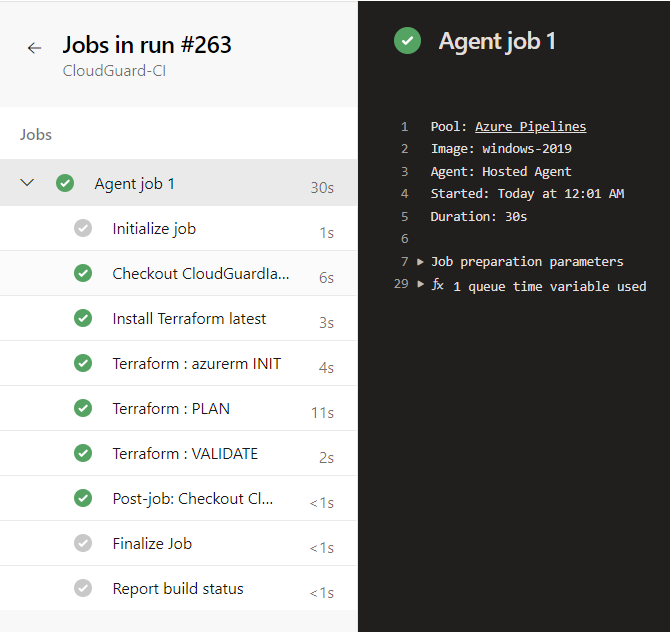
Verify that the Terraform INIT task works
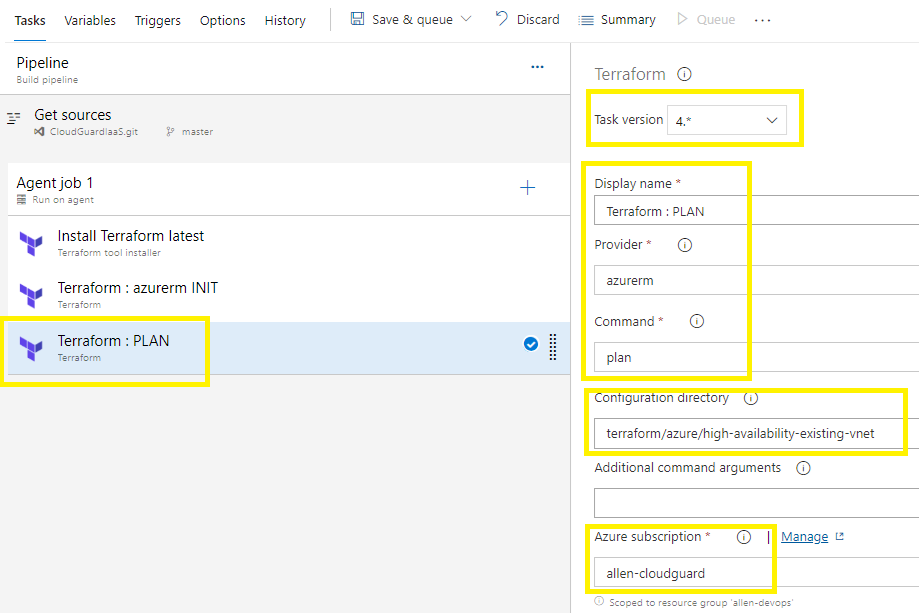
Edit pipeline,
Add another Terraform task,
Configure task version = 4,
Customize display name,
Provider azurerm,
Command PLAN,
Change and point the configuration directory to the target folder that contains the TF files you are working with,
Select subscription / service connection,
Save & Queue,
Run pipeline,
Save & Run,
The Terraform VERIFY task should complete successfully,
Edit pipeline,
Add another Terraform task,
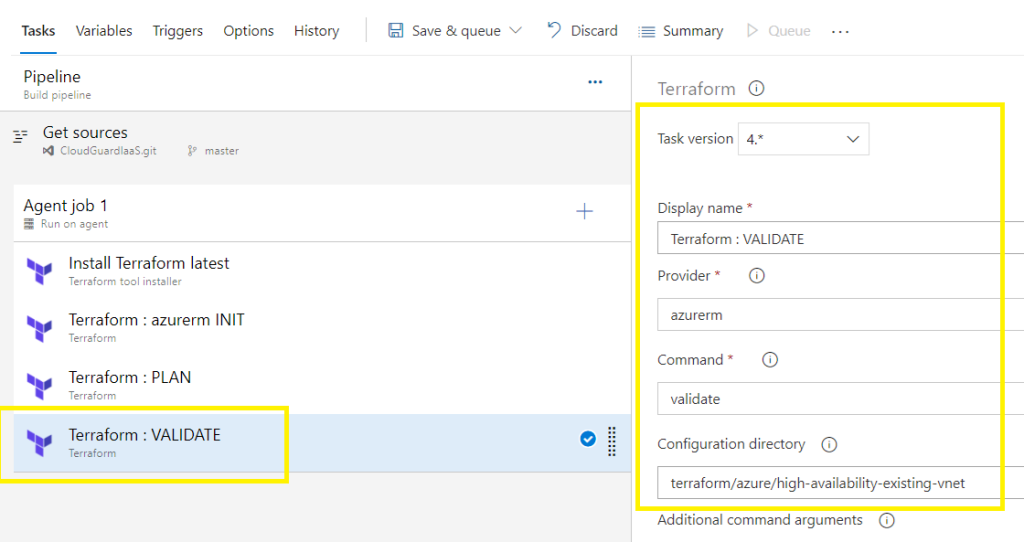
Terraform VALIDATE:
Configure task version = 4,
Customize display name,
Provider azurerm,
Command VALIDATE,
Change and point the configuration directory to the target folder that contains the TF files you are working with,
Save & Queue,
Run pipeline,
Save & Run,
The Terraform VALIDATE task should complete successfully,
Edit pipeline,
Add another Terraform task,
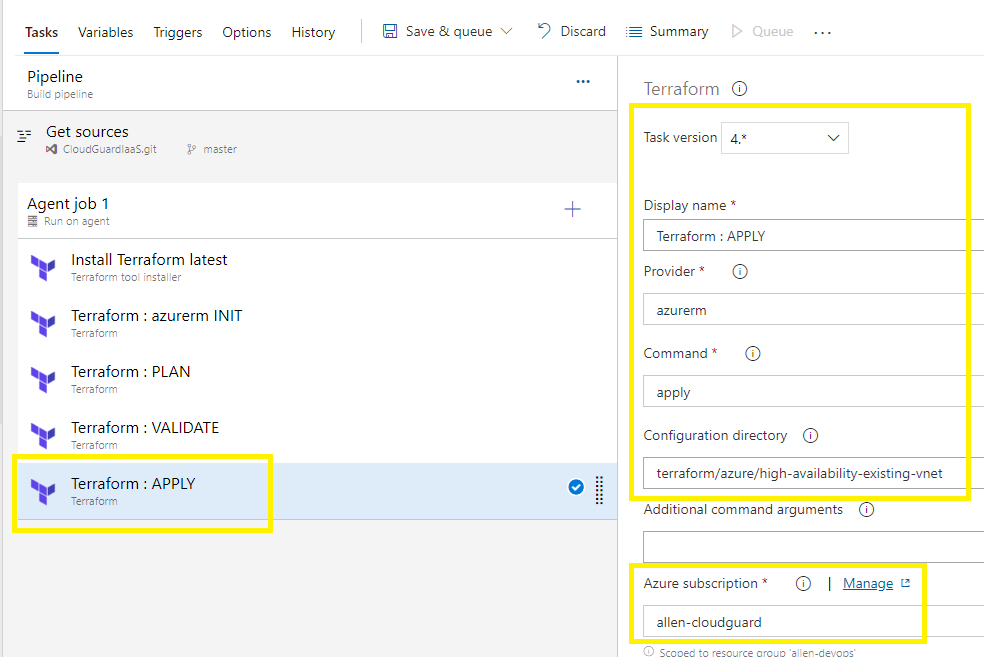
Terraform APPLY :
Configure task version = 4,
Customize display name,
Provider azurerm,
Command APPLY ,
Change and point the configuration directory to the target folder that contains the TF files you are working with,
Select a service connection,
Save & Queue,
Run pipeline,
Save & Run,
Step 16 - Updating the main.tf file
When you run the Terraform Cluster script, you may be presented with a few deprecated messages. Merely delete the afflicted lines in the main.tf file as they pop up.
Step 17 - Verification
The deployment should complete successfully.
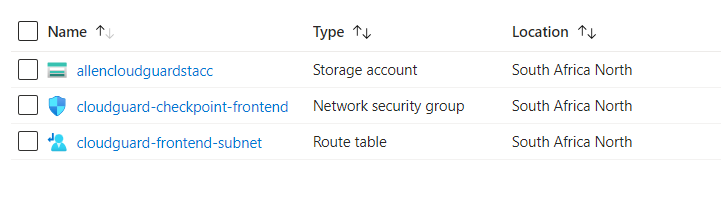
All the required resources are deployed successfully in the Azure portal:
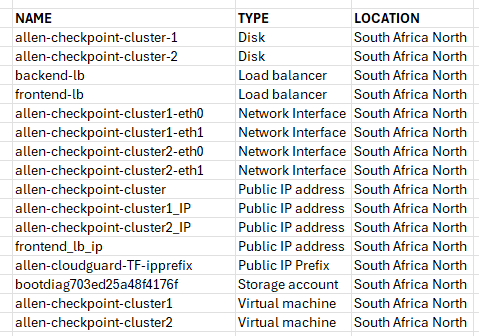
Each of the virtual machines are spread across 2 availability zones.
You will also have an additional pre-created storage account, an NSG and a bespoke UDR in a 2nd resource group that was not provisioned in the cluster template / resource group.
——–I hope this blog helped simplify a workflow for your CloudGuard deployment—
Your articles are extremely helpful to me. Please provide more information!
Thank you for writing this post. I like the subject too.
F*ckin?amazing things here. I抦 very glad to see your article. Thanks a lot and i am looking forward to contact you. Will you kindly drop me a e-mail?
This is a topic that’s close to my heart… Cheers! Where are your contact details though?