This blog aims to easily deploy a single instance Fortinet FortiManager instance using an ARM template to allow for re-deployment if required.
In my next blog, I will unpack how the Fortinet FortiManager can also be deployed as a FortiManager HA cluster and can have up to a maximum of five units: one primary unit with up to four backup or secondary units. All units in the cluster must be of the same FortiManager series.
The primary unit and the secondary units can be in the same or different Azure location or availability zones. FortiManager HA supports GRS redundancy so the primary unit and secondary units can be in different Azure locations.
Deployment Plan
Deployment Steps
The FortiManager can easily be deployed via the Marketplace or via a template as explained below.
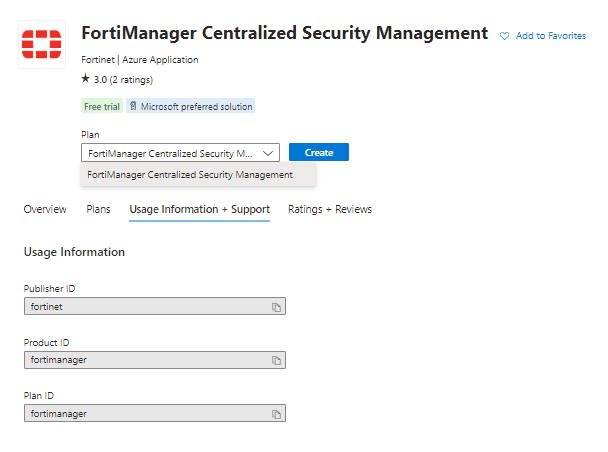
Step 1 - Enable the Marketplace product
Register the marketplace product on your target subscription.
Go to Marketplace > search for FortiManager Centralized Security Management,
Go to the Usage Information + Support tab >
Copy the Publisher ID, Product ID, Plan ID and paste into the script below and then execute,
az vm image terms accept `
--publisher fortinet `
--offer fortimanager `
--plan fortimanager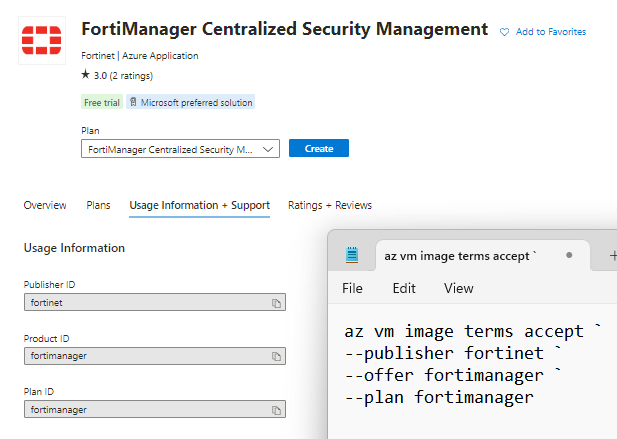
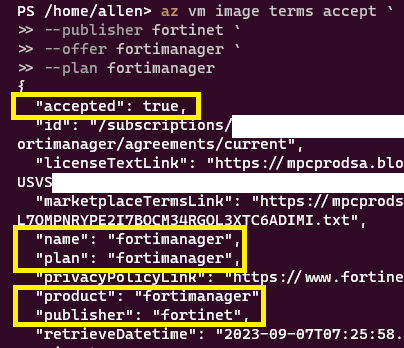
Verification:
The following output will show accepted = true
Step 2 - Custom Template
You have the choice of deploying your FortiManager via the Azure Portal or using the custom template below and thus saving the json files for redeployment.
Click on the button to create your custom template

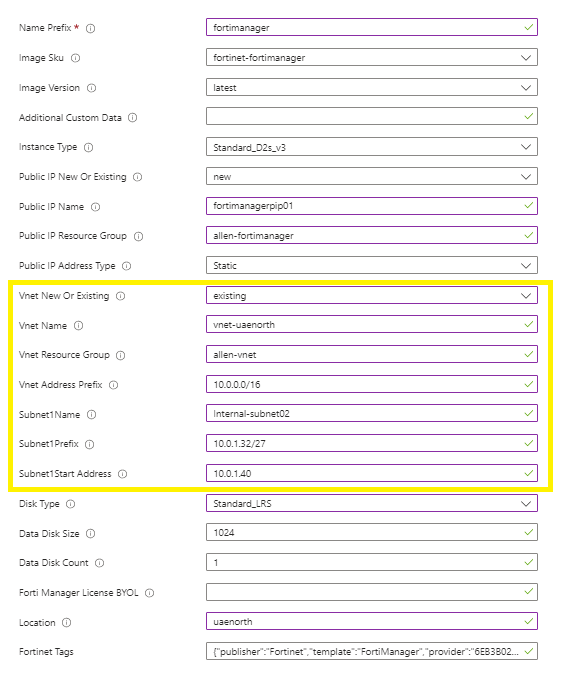
Basic tab:
Populate the subscription and resource group and region fields,
Add your secure Admin username and password,
Select a prefix for your instance,
Image sku is pre-populated,
Image version is “latest”,
Additional custom data can be left blank,
Select your instance sku type,
Select whether you want to add an optional public ip address if you want external access or none,
Select your public ip name,
Select your public ip resource group name,
Select the public ip address type as static,
Select whether you are adding the FortiManager to an existing or new vnet,
Select your Disk Type,
Add your Forti Manager BYOL license,
staying on the Basics tab,
click on Edit template and download > Save,
click on Edit parametes and download > Save,
Review & Create,
Create
(This allows you to restore your deployment from custom templates when required),
Deployment verification
The following resources should be successfully deployed:

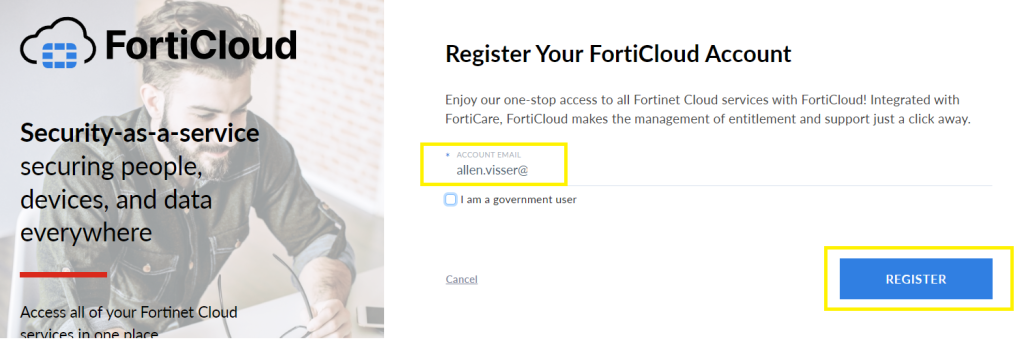
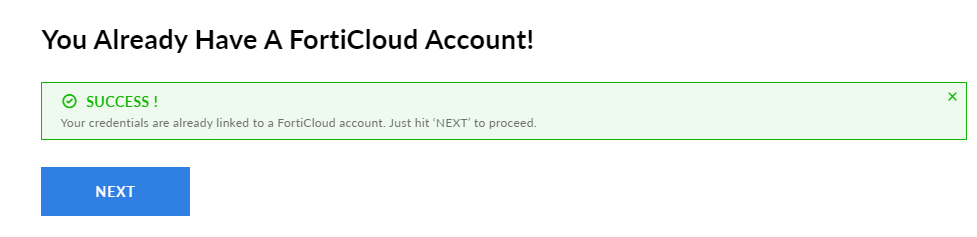
Step 3 - Register a FortiCloud Account
If you dont yet have a FortiCloud account then click on the Register with FortiCloud button,
Enter your email address and click on Register
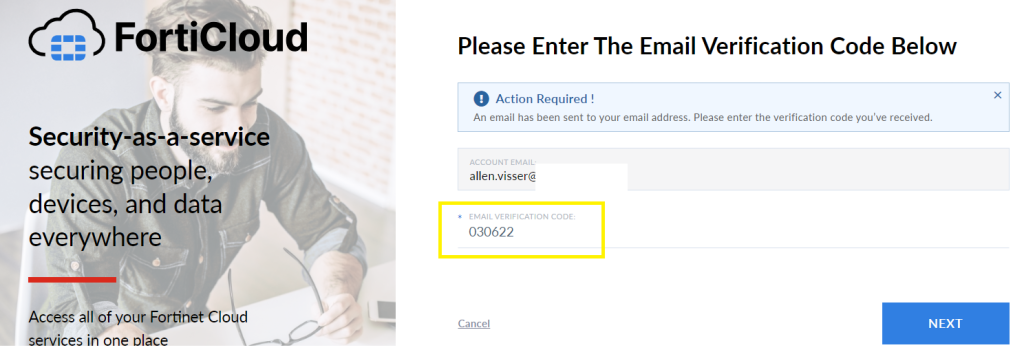
An email will be sent for verification,

Insert the email provided verification code, Next
You will receive an email recognition,
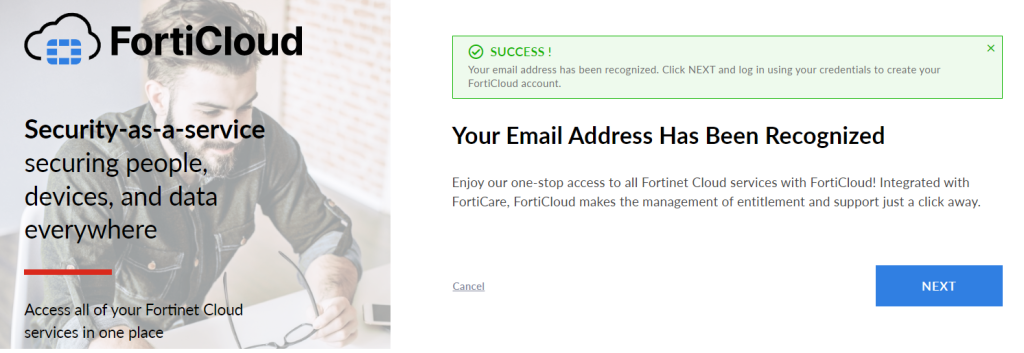
Verify your account by logging into the console,
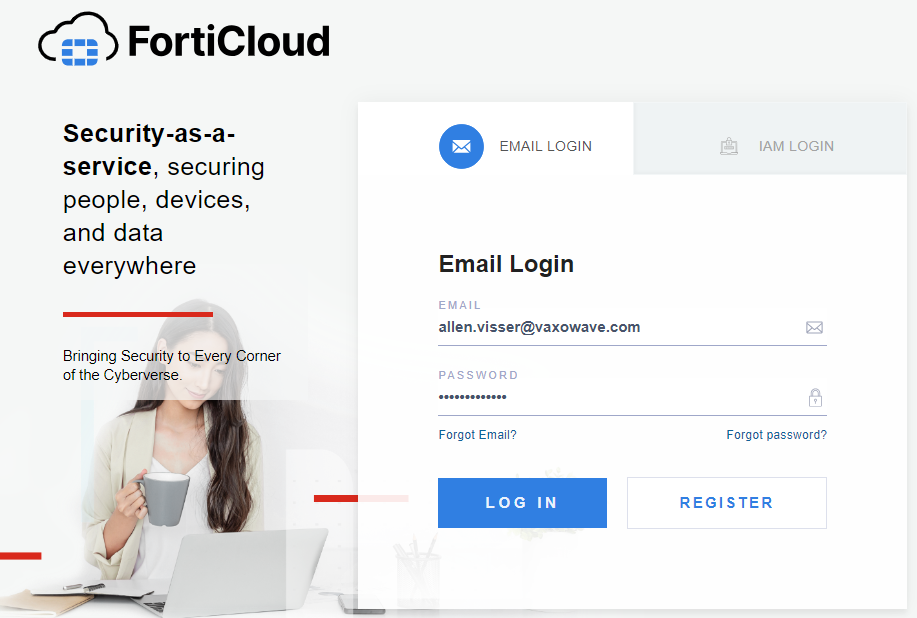
Verification confirmed,
The asset management dashboard should now appear with all your resources,

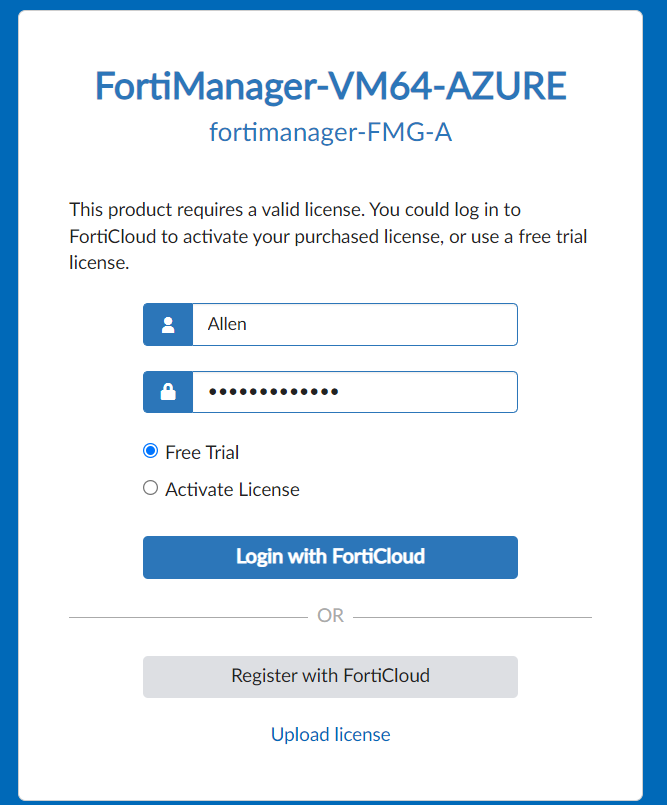
Step 4 - FortiManager login
Login to your FortiManager instance via your browser https://instancepublicip/
Login with the admin credentials you added to the ARM template,
You will have to Upload and Activate your license,
If you have a FortiCloud account then click on Login with FortiCloud
Hello.This post was extremely motivating, especially because I was browsing for thoughts on this topic last Saturday.