1 - Microsoft Purview: Discover and govern Azure SQL Database using Scans
This article outlines the process to register an Azure SQL database source in Microsoft Purview. It includes instructions to authenticate and interact with the SQL database.
Supported capabilities in Microsoft Purview for Azure SQL Database:

When you’re scanning Azure SQL Database, Microsoft Purview supports extracting technical metadata from these sources:
- Server
- Database
- Schemas
- Tables, including columns
- Views, including columns
- Stored procedures (with lineage extraction enabled)
- Stored procedure runs (with lineage extraction enabled)
When you’re setting up a scan, you can further scope it after providing the database name by selecting tables and views as needed.
Known current limitations of the Microsoft Purview Scans:
- Microsoft Purview supports a maximum of 800 columns on the schema tab. If there are more than 800 columns, Microsoft Purview will show Additional-Columns-Truncated.
- Column-level lineage is currently not supported on the lineage tab. However, the
columnMappingattribute on the properties tab for SQL stored procedure runs captures column lineage in plain text. - Data lineage extraction is currently not supported for functions or triggers.
- The lineage extraction scan is scheduled to run every six hours by default. The frequency can’t be changed.
- If SQL views are referenced in stored procedures, they’re currently captured as SQL tables.
- Lineage extraction is currently not supported if your logical server in Azure disables public access or doesn’t allow Azure services to access it.
RBAC Roles
You will require the following RBAC roles to configure Scans so that you can register a source and manage it in the Microsoft Purview governance portal.
Data Source Administrator and Data Reader permissions.
You can verify your Role Assignments by going thru this process: role assignments
Deployment Steps:
Go to Microsoft Purview governance portal home page > Data Map > Collections > Assign permissions to individual subcollections as required.
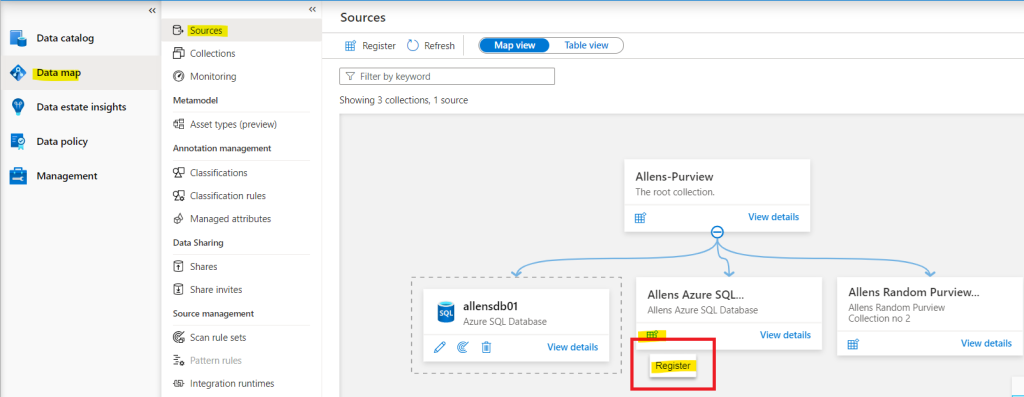
Go to the Data Map > Sources and select a collection and then select the Register icon to register and add a new source SQL database.
Search and select the source > Continue
2 - Azure SQL Database
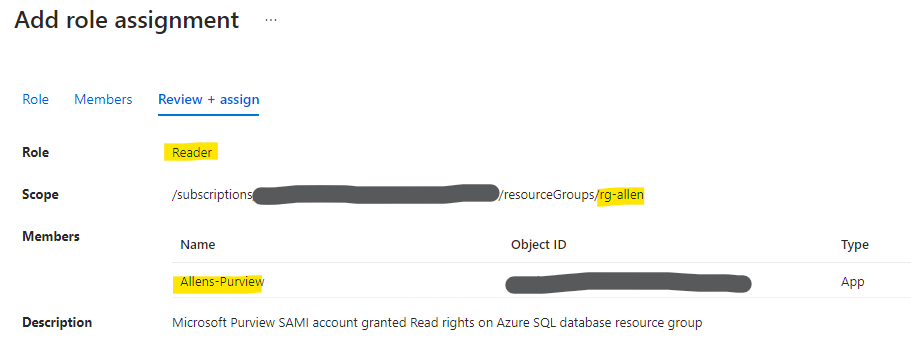
The Microsoft Purview System-assigned managed identity (SAMI) account needs to be granted permissions on the SQL Server / Resource Group / Subscription.
To register a single data source in Microsoft Purview, such as the Azure SQL database, the Microsoft Purview System-assigned managed identity (SAMI) account must be granted the Reader role on the resource or inherited from a higher scope such as resource group or subscription.
Azure Portal > navigate to Azure SQL database resource group > Access control (IAM) > Role Assignments > Add > Reader > Add SAMI for Purview Account > Assign.
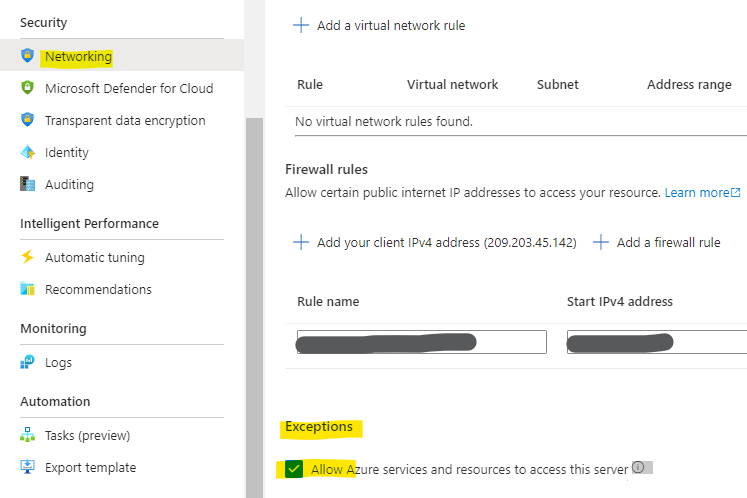
15.1 Azure SQL Server Firewall
Go to SQL Server > Networking > Public Access tab > scroll to be bottom to Exceptions > select Allow Azure services and resources to access this server
15.1 Azure SQL Server Firewall
Go to SQL Server > Networking > Public Access tab > scroll to be bottom to Exceptions > select Allow Azure services and resources to access this server
3 - Microsoft Purview: Scanning SQL database
Running a scan invokes the process of ingest metadata from the registered data sources. The metadata collected at the end of the scan includes technical metadata. This metadata can include data asset names such as table names or file names, file size, columns, and data lineage. Schema details are also captured for structured data sources.
The curation process applies automated classification labels on the schema attributes based on the scan rule set configured. Sensitivity labels are applied if your Microsoft Purview account is connected to the Microsoft Purview compliance portal.
16.1 Configure authentication for a scan
There are 2 prerequisites before we can configure the Purview Scans:
#1 Add the Microsoft Purview SAMI to the SQL database
To scan your SQL data source, you need to add the Microsoft Purview SAMI AD account with db_owner permissions to your databases (I know, db_owner!)
Where do I find this SAMI account?
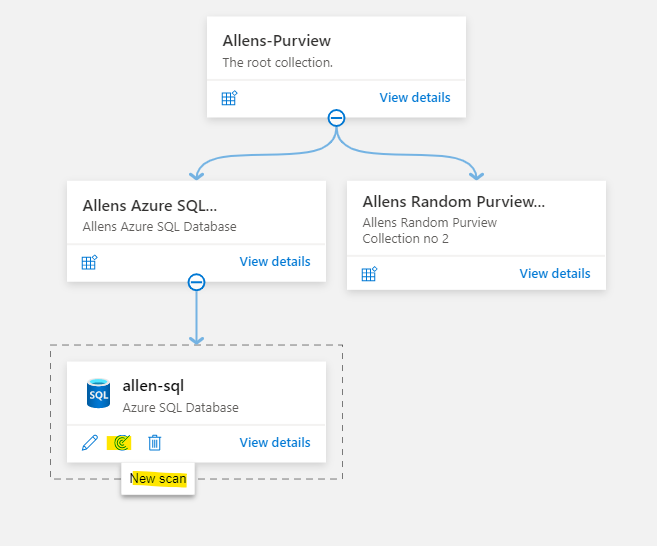
Go to Microsoft Purview governance portal home page > Data Map > Sources > New Scan

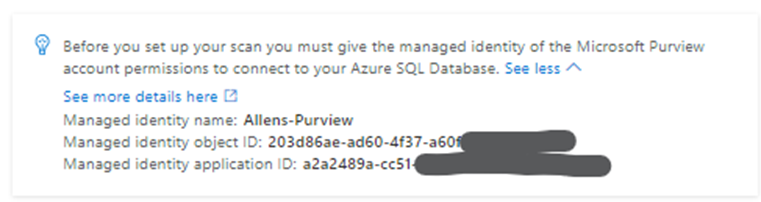
This SAMI is found under the scan section:

I needed to log onto the Azure SQL Server with my AD account to have the permissions to be able to add the Microsoft Purview SAMI AD account to the database. Your Purview account has its own SAMI which is basically your Purview Account name when you provisoned the account. You must create the Purview Azure AD SAMI account in the Azure SQL Database with the exact Purview’s SAMI as a prerequisite for setting up a scan with lineage extraction
Steps : Azure Portal > Navigate to the SQL Server > Login with Azure Active Directory Account > Query Editor >
Use the following SQL syntax to create the Purview Azure AD SAMI account in the database and grant the correct db_owner permissions:
CREATE USER [Allens-Purview] FROM EXTERNAL PROVIDER
GO
EXEC sp_addrolemember 'db_owner', [Allens-Purview]
GO
#The Username is your own service principal or Purview's managed identity.
#2 Creating a database master key
Now we need to create a database master key.
Choose a password for encrypting the copy of the master key that will be stored in the database. (I chose my super hardened sandbox P@ssw0rd)
Go to Query Editor > New Query > Copy and paste the following example into the query window and Run
-- Creates the master key.
  -- The key is encrypted using the password "P@ssw0rd".
  CREATE MASTER KEY ENCRYPTION BY PASSWORD = 'P@ssw0rd';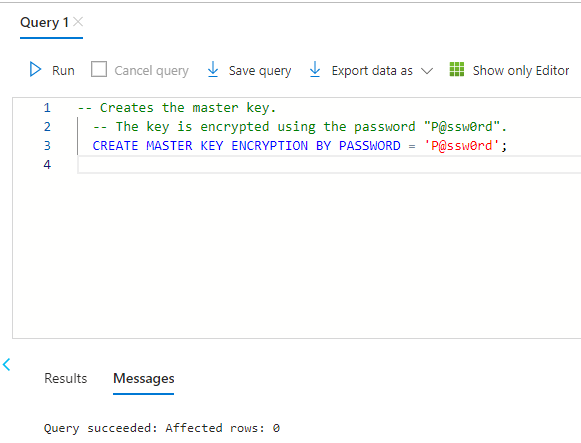
After completing the above 2 steps, we will now be able to setup the Microsoft Purview Scans. 🙂
16.2 Steps to provision the Microsoft Purview scans:
Go to Microsoft Purview governance portal home page > Data Map > Sources > New Scan (Table View) or
Map View
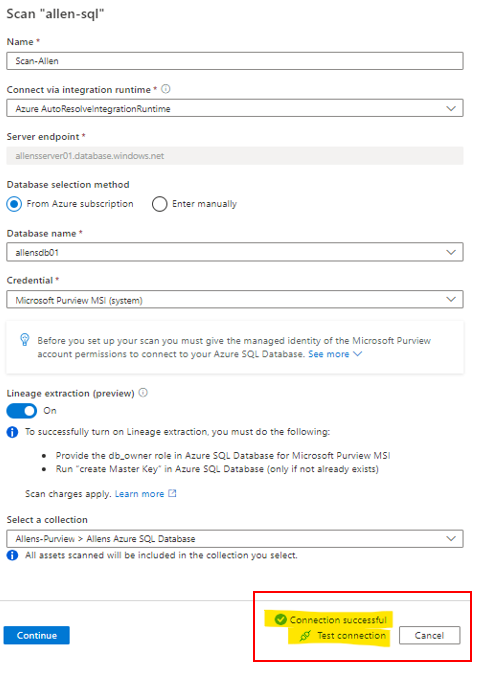
Populate your scan with your bespoke settings and run the Test Connection.
If you have completed the 2 pre configuration steps above, then all should be good > Continue
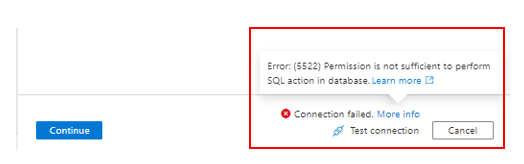
If you have NOT completed the 2 prerequisite steps above, then you are going to be greeted with this painful message, so go back and make sure the 2 steps are completed.
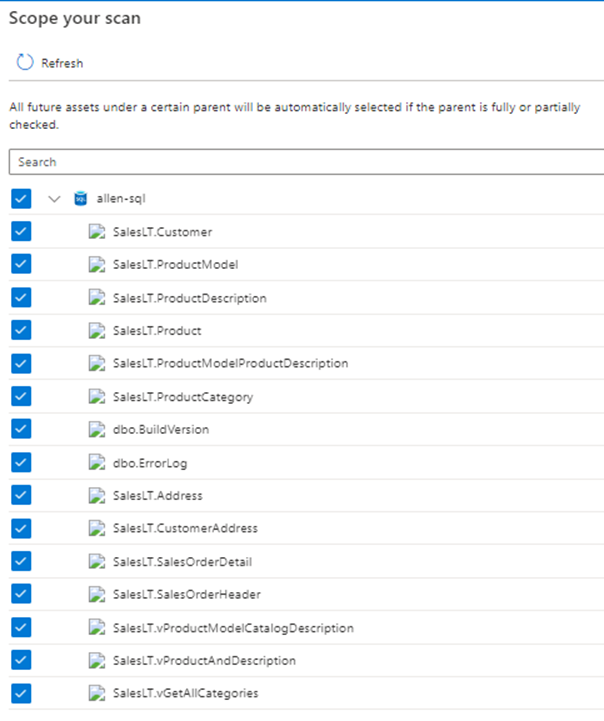
The next step is to Scope your scan > Continue
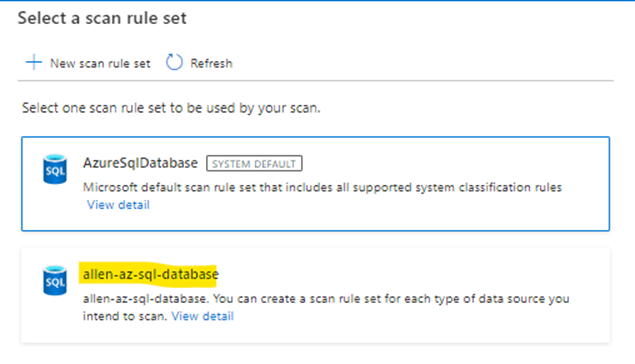
The next step is then to select to run the default System scan or choose to run your customized rule set which would be configured to suite your bespoke business needs.
(At this point in my sandbox both rule sets are identical so im choosing my custom rule set) > Continue
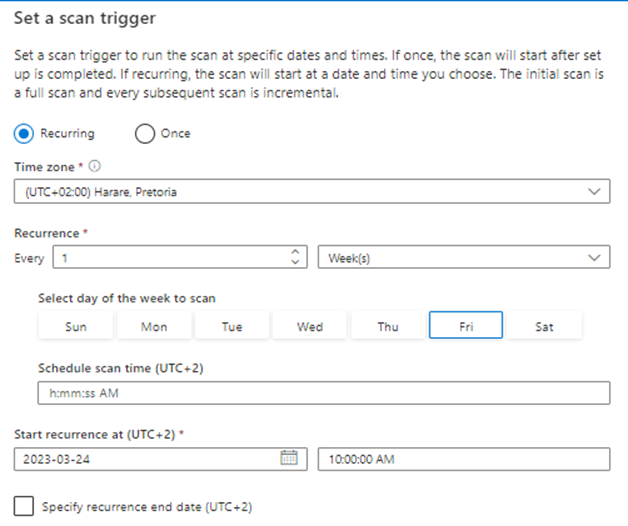
The next step is to configure the scan trigger schedule >
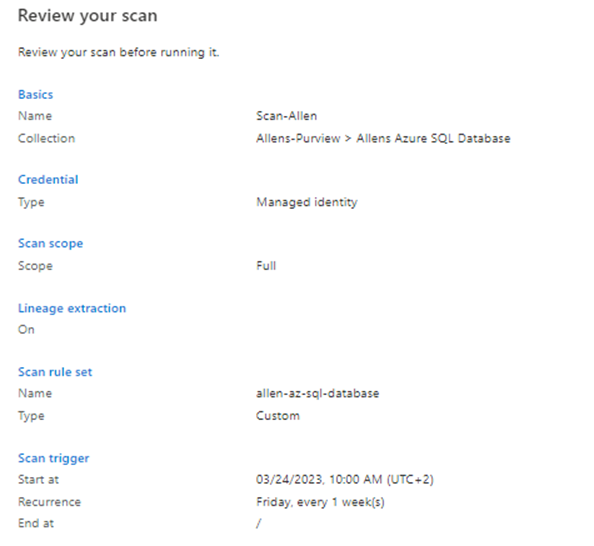
Then Review > Save and Run
Scanning best practices https://learn.microsoft.com/en-us/azure/purview/concept-best-practices-scanning
16.3 Verifying your Microsoft Purview Scan
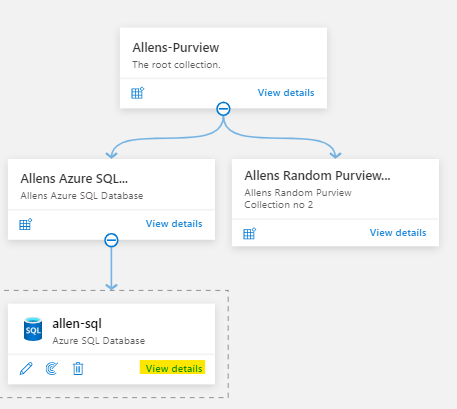
Check the status of a scan by going to the data source in the collection and then selecting View details.
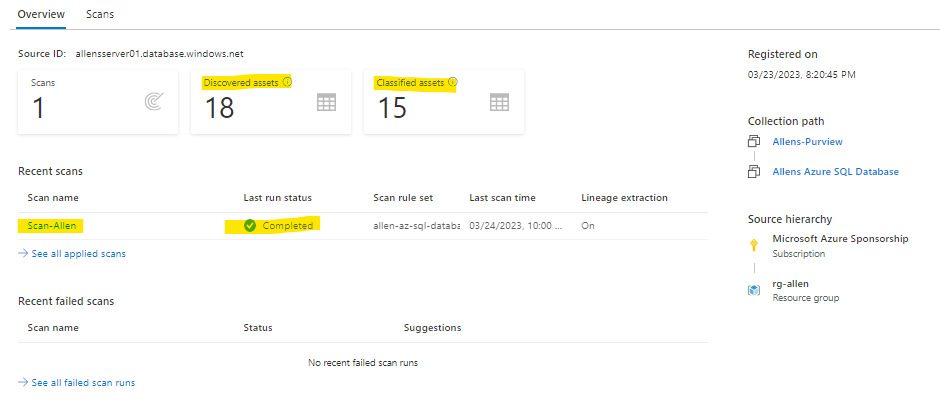
You will see the overview of the scan which shows:
Scan status = completed
Discovered Assets = 18
Classified Assets = 15
To manage / edit your scan just click on the scan name link and manage accordingly

Outstanding post, you have pointed out some good details , I also believe this s a very wonderful website.
What i don’t understood is in reality how you are now not actually a lot more well-appreciated than you may be right now. You’re so intelligent. You already know thus significantly with regards to this subject, produced me in my view believe it from a lot of varied angles. Its like men and women are not interested until it¦s something to accomplish with Woman gaga! Your personal stuffs great. Always take care of it up!
Hello. splendid job. I did not expect this. This is a great story. Thanks!