This recipe shows how to quickly create Azure Alerts that will be triggered for both Linux and Windows virtual machines, by configuring Free Space % alerts using simple and customizable KQL queries.
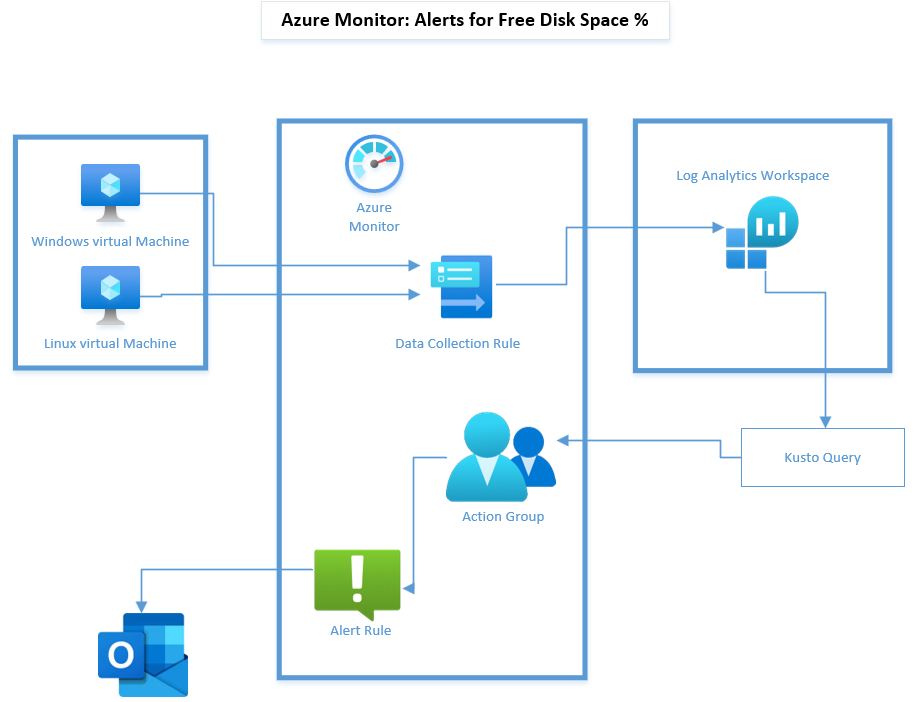
Step 1 - DCR Rules
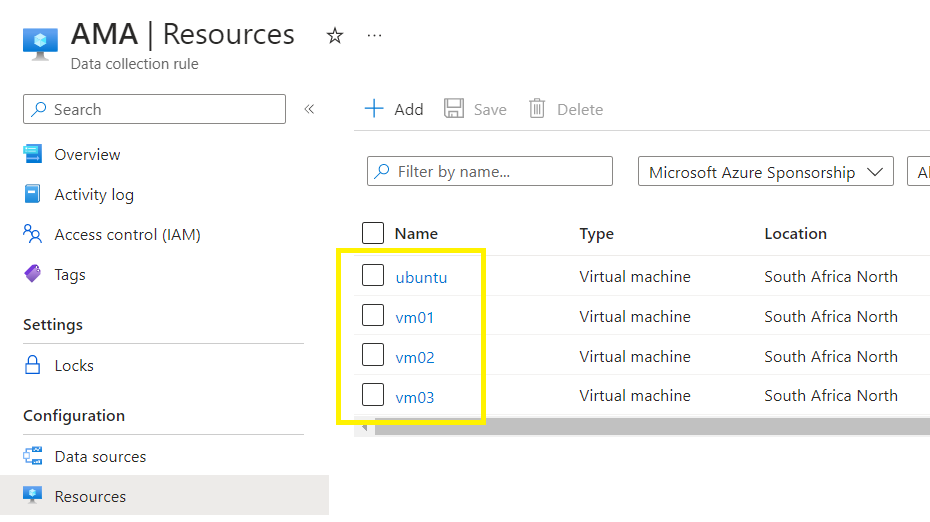
Make sure that your source vms are all reporting to your destination LAW as Resources in your AMA DCR. (Your DCR must be configured with Platform Type: Custom > to support Windows and Linux AMA to a destination Log Analytics Workspace).
Step 2 - KQL Query
Go to your destination Log Analytics Workspace > Logs > and create your custom KQL query > and verify the output. (Ive used a simple metric query for this example which runs against my Windows and Linux vms).
Perf
| where CounterName has "% Free Space"
| where CounterValue < ( 99.00)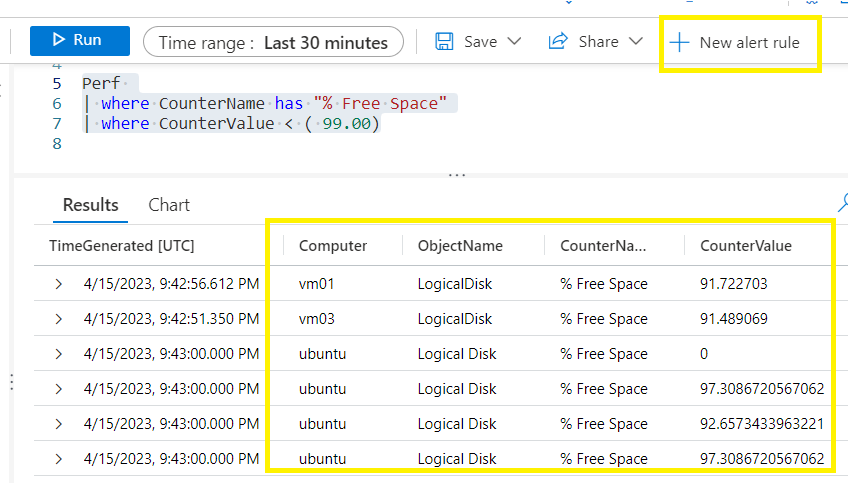
When you are satisfied that your KQL query is correct, then click on New alert rule button on your KQL query.
Step 3 - Alert Rule
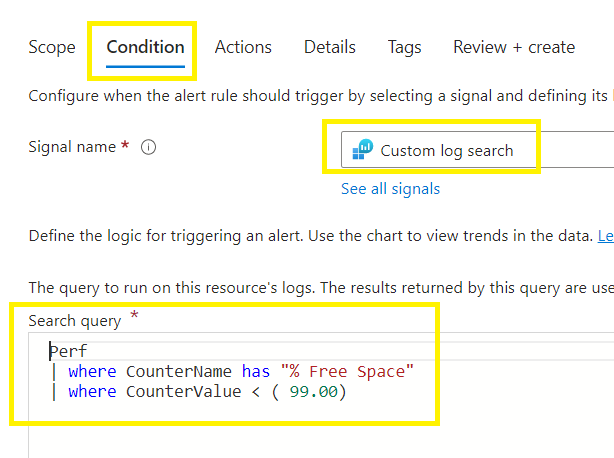
The Condition tab will automatically populate with the same KQL script you created earlier.
The Signal name will show Custom log search
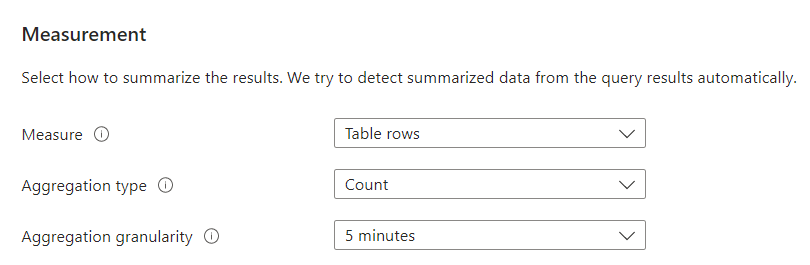
Measurement > (leave settings as default)
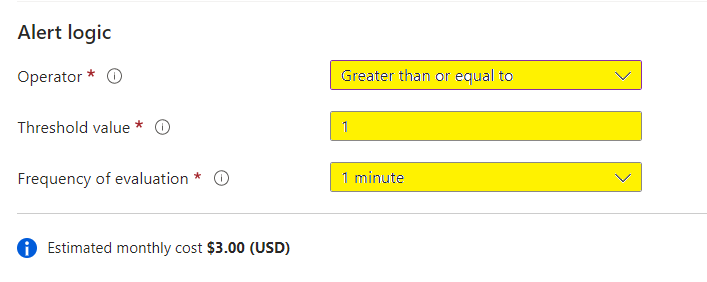
Alert Logic > I have amended the values for my testing purpose. I want an alert triggered when 1 threshold limit is reached at every 5 minute interval.
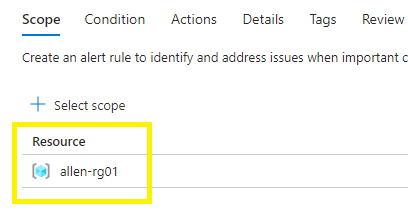
Go back to the Scope tab to change the scope of you need to. (I want all the vms in the resource group to be monitored.)

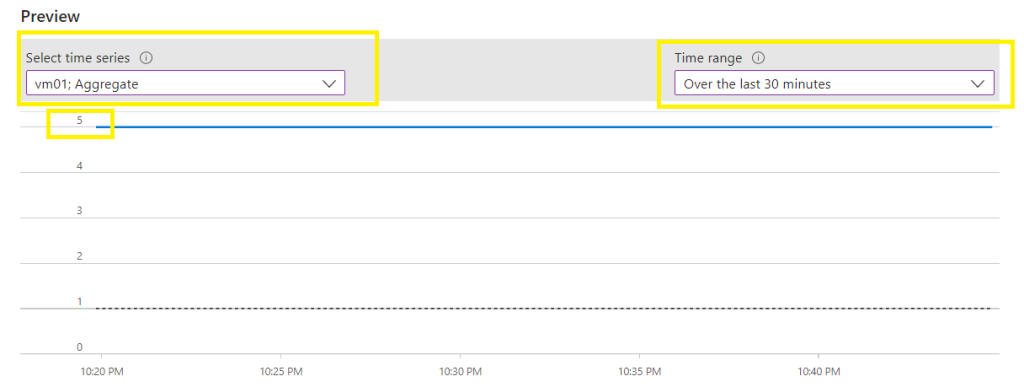
The preview pane will show you the expected rate of triggers per your selected Time range > Next
Actions tab > select / create your destination action group.
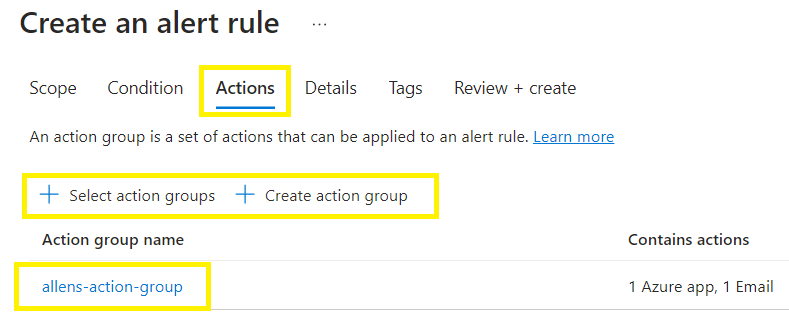
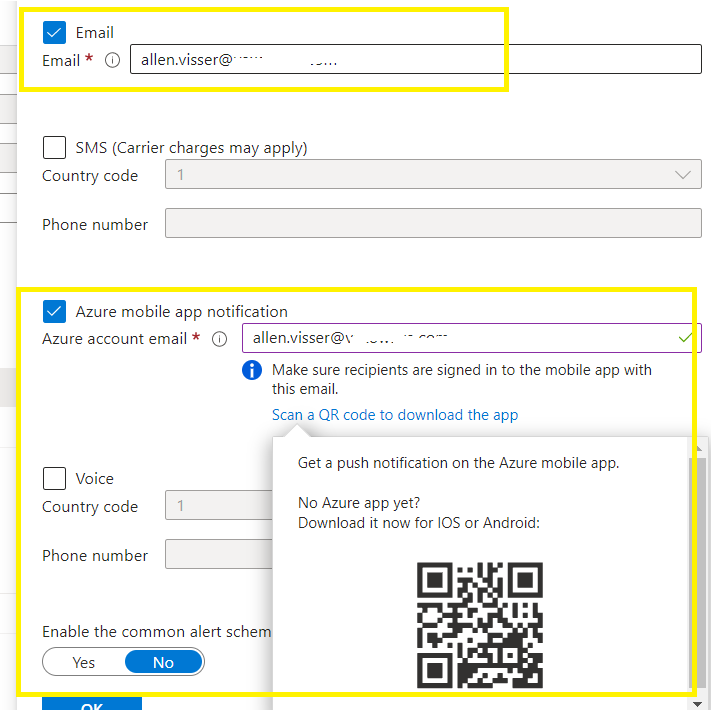
Notifications for the action group:
1. I have configured an email recipient, as well as,
2. Configured the option to receive alerts on my mobile phone. Install the app and login to the tenant.
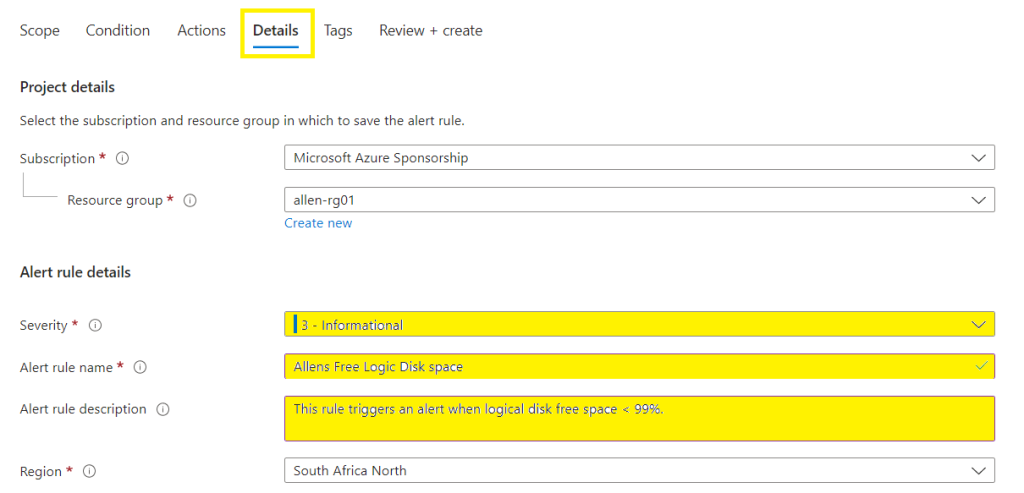
Details tab:
Select the Alert severity, a descriptive Alert Rule Name, optional description > Create
Verification:
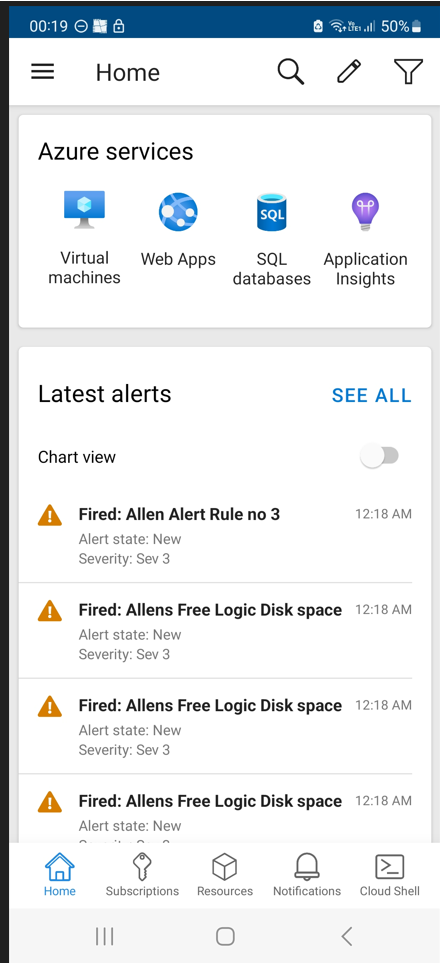
After creating your azure alert > go to Monitor > Alerts > and verify that your alerts has been successfully created.

Depending on what your Alert Logic > Frequency of Evaluation (eg 5 minutes), the recipients should start seeing emails arriving for each vm that has any disks below 99% free space (or as per your bespoke settings).
Step 4 - Notifications
The recipient will receive individual emails generated per vm that has triggered the alerts.

As well as on the Azure mobile app:
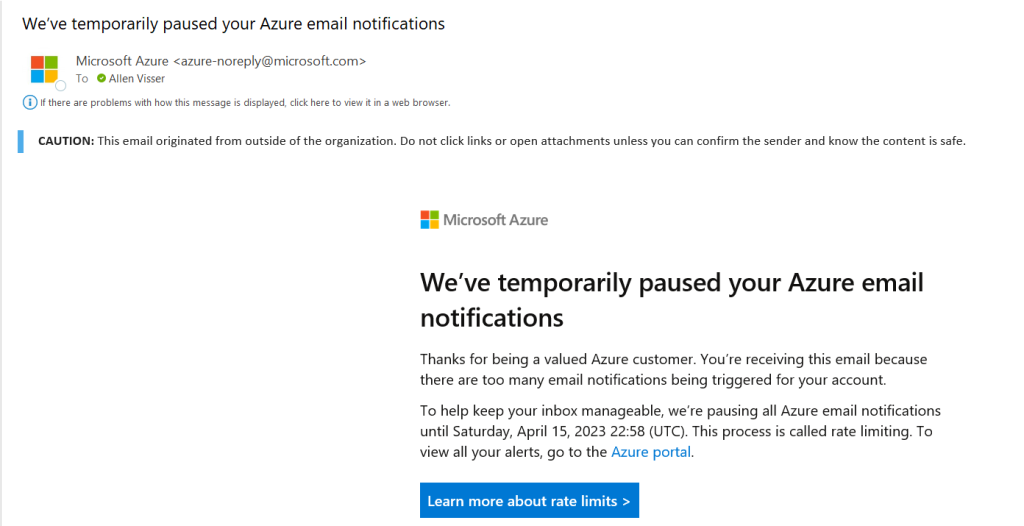
Rate Limits
Be careful not to set your alert frequency to low. Take into consideration the number of alerts that will be generated, so as not to exceed your rate limit.
How to increase your default rate limit?
If you need to increase your rate limit, submit a ticket by following the New Support Request link on your resource’s page in the Azure portal. Remember to include a business justification in the request.
Excellent read, I just passed this onto a friend who was doing some research on that. And he actually bought me lunch because I found it for him smile So let me rephrase that: Thank you for lunch!
Helpful information. Lucky me I discovered your website by accident, and I’m stunned why this coincidence did not took place in advance! I bookmarked it.
Hello there, I found your web site via Google while looking for a related topic, your website came up, it looks good. I’ve bookmarked it in my google bookmarks.
You are my intake, I own few blogs and occasionally run out from to post .
Great content! Super high-quality! Keep it up!
You helped me a lot with this post. I love the subject and I hope you continue to write excellent articles like this.
I’d like to find out more? I’d love to find out more details.
Thanks for posting. I really enjoyed reading it, especially because it addressed my problem. It helped me a lot and I hope it will help others too.
You helped me a lot by posting this article and I love what I’m learning.
How can I find out more about it?
May I request that you elaborate on that? Your posts have been extremely helpful to me. Thank you!
You’ve the most impressive websites.
May I have information on the topic of your article?
Sustain the excellent work and producing in the group!
The articles you write help me a lot and I like the topic
I appreciate the effort put into making this blog so inspiring. Great job!
I really appreciate your help
whoah this blog is great i love reading your articles. Keep up the good work! You know, many people are looking around for this info, you can aid them greatly.
What抯 Happening i am new to this, I stumbled upon this I have found It positively helpful and it has aided me out loads. I hope to contribute & help other users like its helped me. Great job.
Hello.This post was really remarkable, especially because I was investigating for thoughts on this topic last Sunday.
Everyone loves what you guys are up too. This type of clever work and exposure! Keep up the great works guys I’ve included you guys to our blogroll.
Its not my first time to pay a quick visit this
web page, i am visiting this web site dailly and take nice data from here everyday.
My site :: vpn special coupon code 2024
It’s best to take part in a contest for top-of-the-line blogs on the web. I will advocate this website!