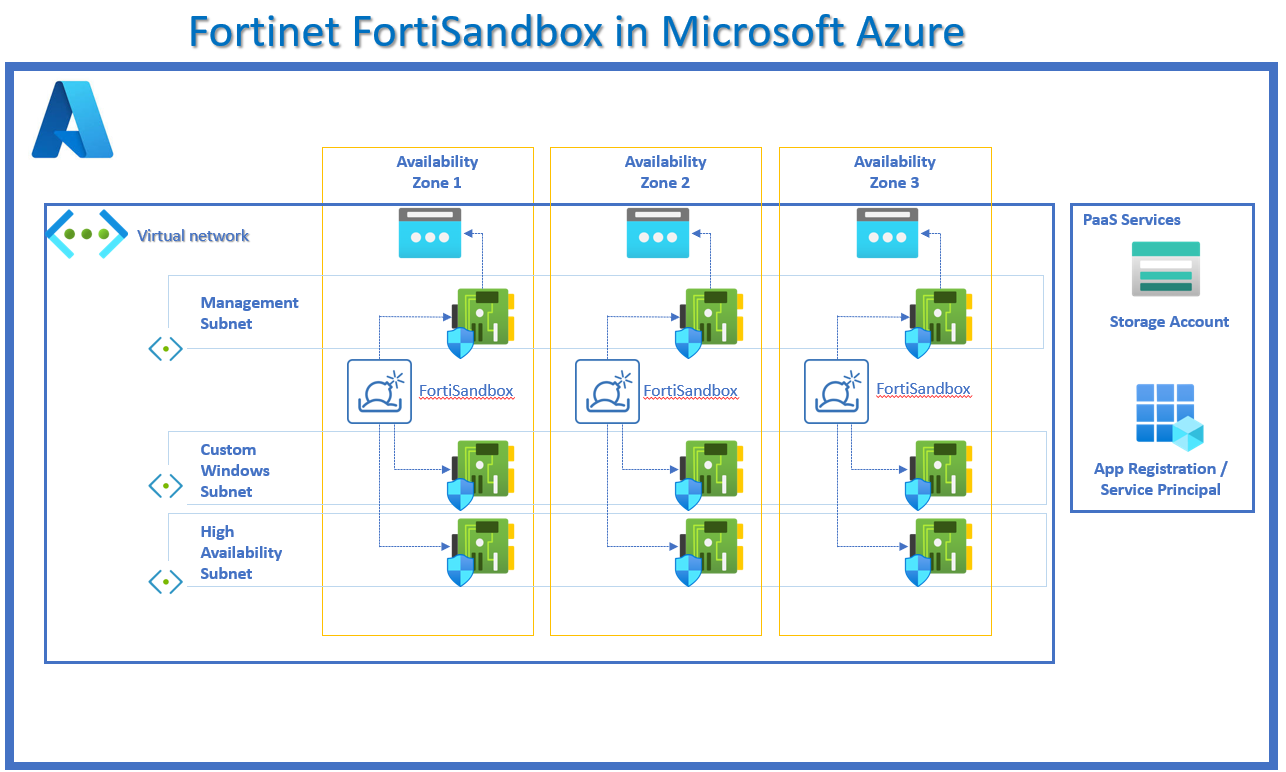
This blog aims to simplify the deployment of the Fortinet FortiSandbox virtual machines in advanced mode. This blog details the deployment of 3 virtual machines (not in a load balanced cluster), across 3 availability zones for high availablity as part of a business BCDR plan.
In my next blog I will unpack the ICAP integration between OPSWAT and FortiSandbox.
Deployment Plan
Step 1 – New Resource Group
Step 2 – Enable the Marketplace product
Step 3 – Virtual Network Infastructure
Step 4 – Create a storage account
Step 5 – Create an Azure Service Principal
Step 6 – Assign a Role to your Service Principal
Step 7 – Template Deployment
Step 8 – Login Credentials
Step 9 – Applying a BYOL license
Step 10 – Uploading the rating and tracer engine
Step 11 – Importing Azure settings into FSA
Deployment Steps
Step 1 - New Resource Group
Provision your resource group container for your FortiSandbox related resources.
$ResourceGroupName = "allen-fortisandbox"
$location = "uaenorth"
New-AzResourceGroup `
-Name $ResourceGroupName `
-Location $location `
-Tag @{CustomerName="Customer01";  AutoShutdownSchedule="None"; Stack="FortiSandbox";  Environment="sandbox";}
Step 2 - Enable the Marketplace product
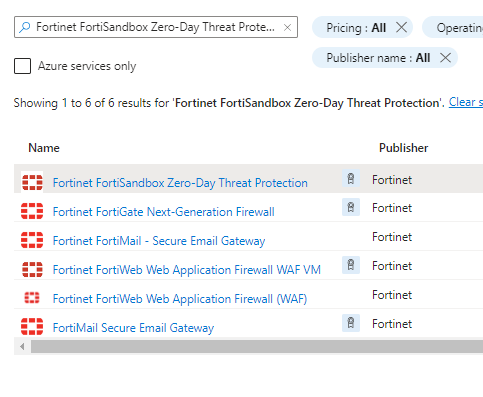
Register the marketplace product on your target subscription.
Go to Marketplace > search for Fortinet FortiSandbox Zero-Day Threat Protection
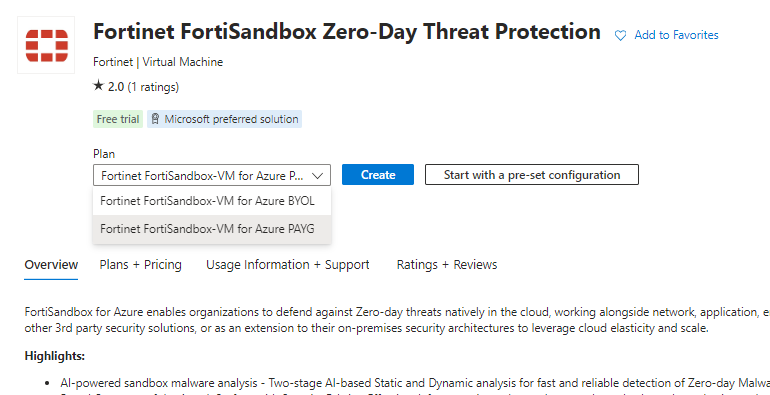
Open the home page and choose your license plan,
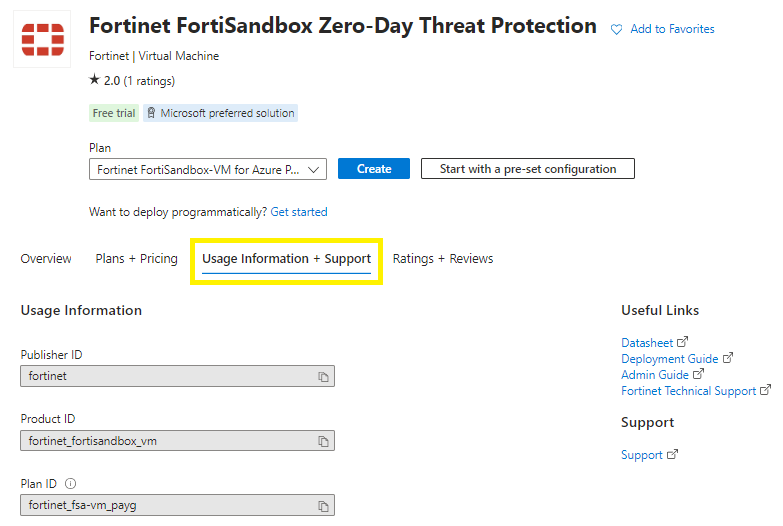
Go to the Usage Information + Support tab >
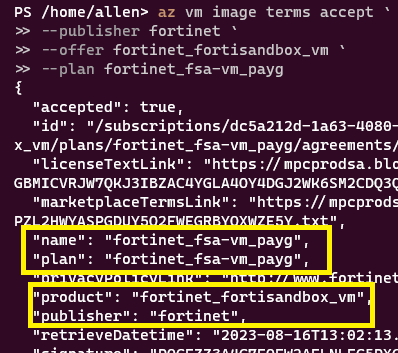
Copy the Publisher ID, Product ID, Plan ID and paste into the script below and then execute,
az vm image terms accept `
--publisher fortinet `
--offer fortinet_fortisandbox_vm `
--plan fortinet_fsa-vm_payg
Verification:
The following output will show accepted = true
Step 3 - Virtual Network Infastructure
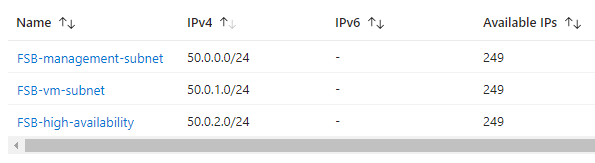
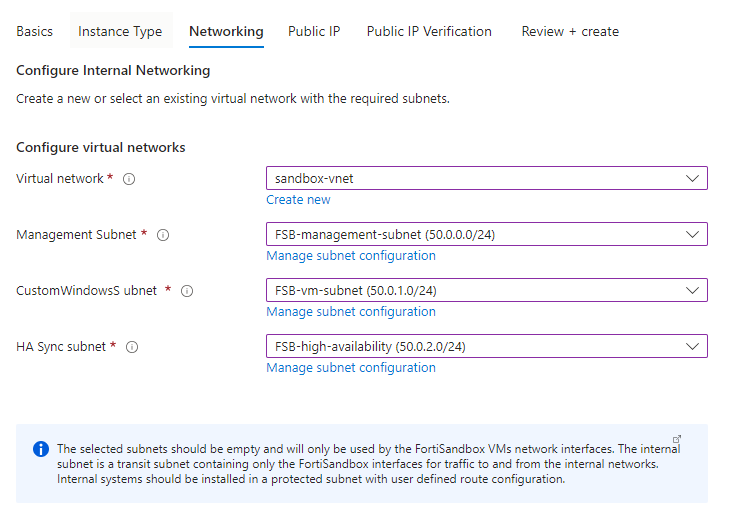
Your FortiSandbox resources will be deployed into a virtual network which will require 3 subnets,
1 x subnet for management,
1 x subnet for custom windows / vms,
1 x HA subnet,
Step 4 - Create a storage account
Create a storage account which will be used post deployment for importing Azure settings into FortiSandbox,
New-AzStorageAccount `
-ResourceGroupName allen-fortisandbox `
-Name allenfortisandbox01 `
-Location uaenorth `
-SkuName Standard_LRS
Step 5 - Create an Azure Service Principal
Create a unique Azure AD Service Principal using a simple process here.
Your service principal will be used for importing Azure settings into FortiSandbox post deployment,
Step 6 - Assign a Role to your Service Principal
Once you have created your Fortinet FortiSandbox specific service principal, then assign a role to the service principal as per the PoLP applying the Zero Trust Model.
Select your scope > subscription or resource group > IAM > grant Contributor role to the service principal,
Step 7 - Template Deployment
Click on the Deploy to Azure button to open your custom deployment template:

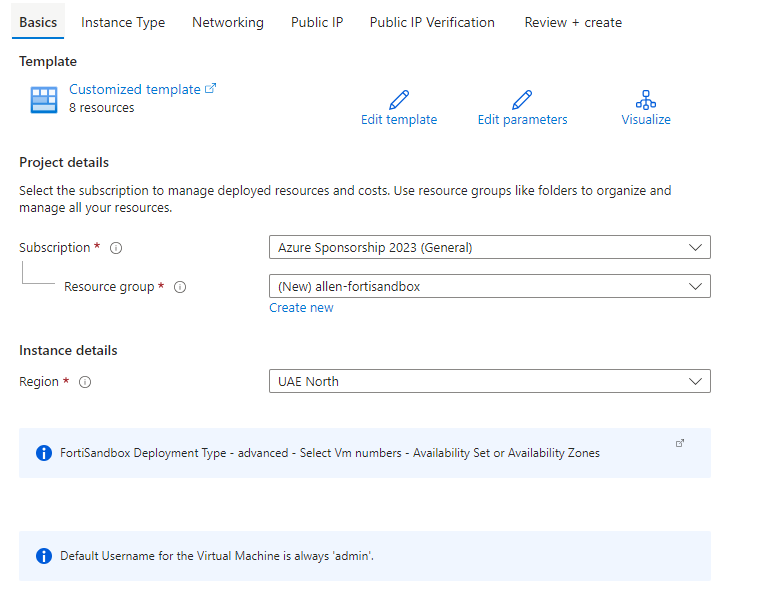
Basic tab:
Complete the Subscription, Resource Group and Region fields,
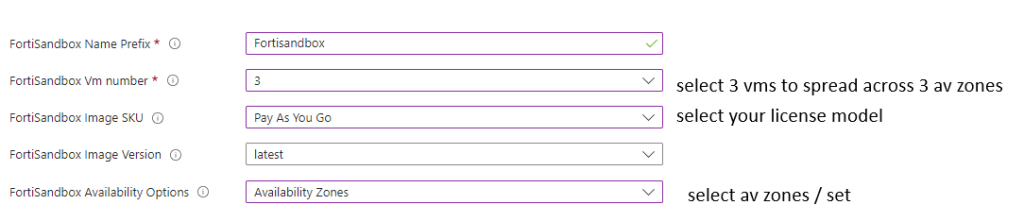
Select your FSB name prefix,
Select the number of FSB vms,
Select your FSB license model,
Select image version,
Select your availability options,
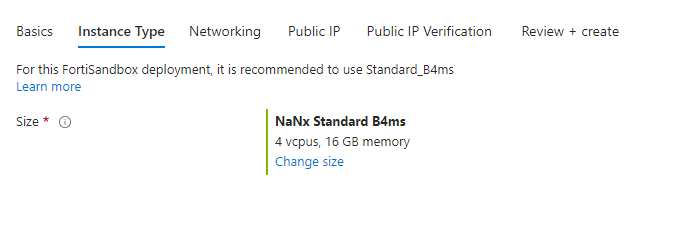
Instance tab:
Select your SKU size,
Networking tab:
Select your destination virtual network with three subnets,
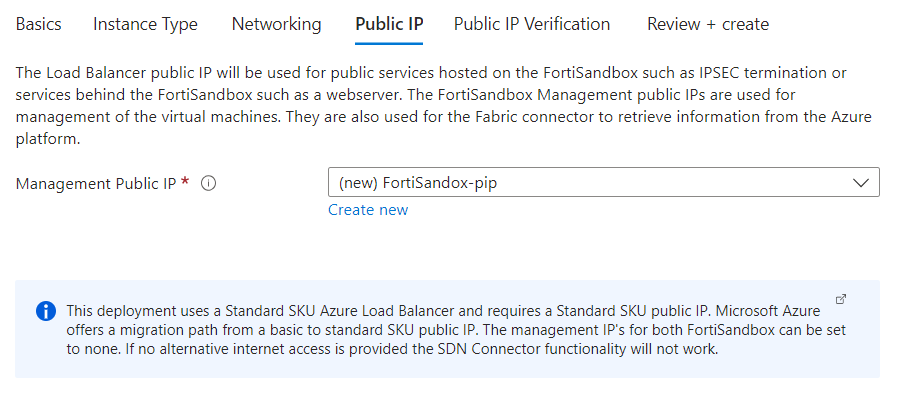
Public IP tab:
Create a new standard public ip for your load balancer,
Review & Create
Create
Step 8 - Login Credentials
You will have noticed that at no point during the template deployment where you prompted to input login credentials.
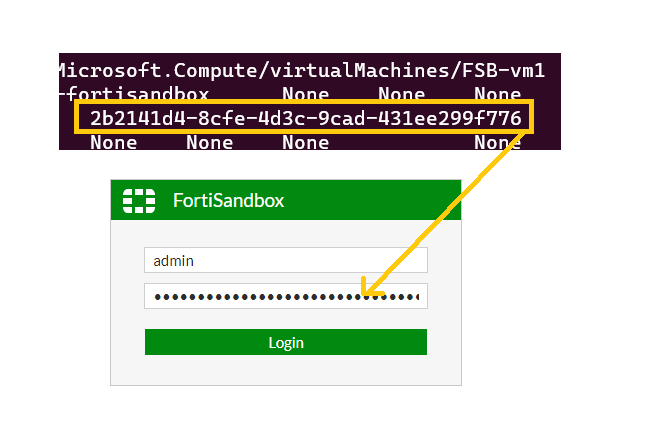
The default login username for the FortiSandbox appliances is “admin”
The vmID will become your login password for each virtual machine instance,
Thus, you will need to extract the vmID from the Sandbox instances by performing the following steps:
Open your cloudshell and run the command below to get the vmID:
az vm list --resource-group "<resourcegroupname>" --output tsv
Grab a public ip address from the virtual machine and login via a browser,
logon to the public ip address https://publicipaddress:443
The default username is “admin” and then pasting in the vmID as the password > Login,
Once you have logged in, you will be greeted with a Change Your Password credential box,
Change your password > OK > and login again when prompted,
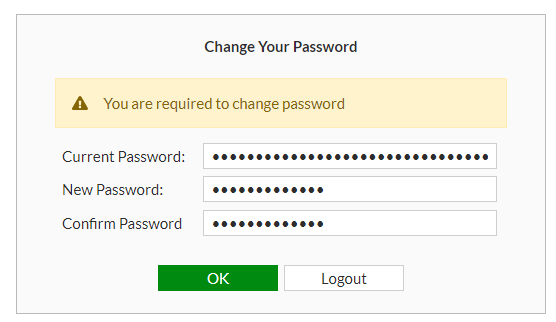
Login again with your new password when prompted,
Step 9 - Applying a BYOL license
In your Dashboard > click on Status > scroll down to Licenses > click on Windows VM >
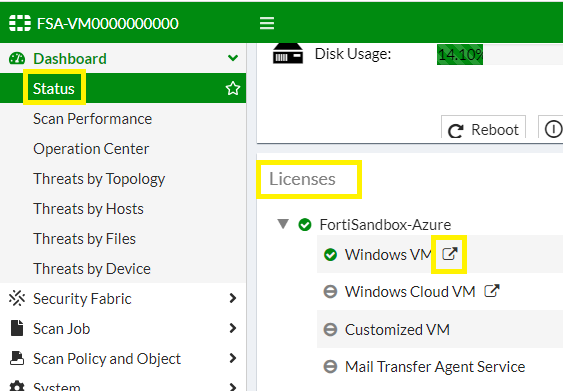
Upload License by selecting Upload Package File > Select File button > Submit
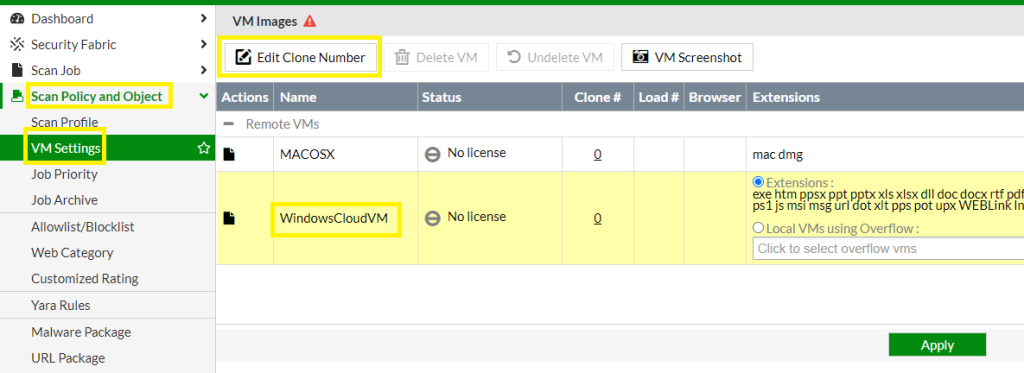
Now go to Scan Policy and Object > VM Settings and select the WindowsCloudVM,
Click Edit Clone Number to assign a clone number and enable the Windows Cloud VM > Apply
The Azure FortiSandbox will fetch the licensing information which can take up to three hours.
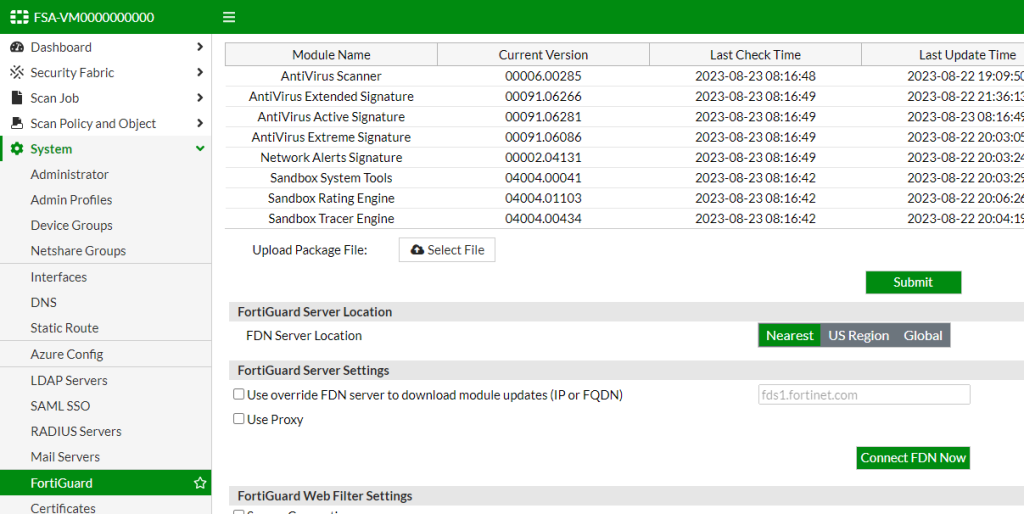
Step 10 - Uploading the rating and tracer engine
Go to System > FortiGuard > Upload .pkg file, click Choose file and locate the rating or tracer engine to be uploaded,
Step 11 - Importing Azure settings into FSA
You need to complete step 10 – upload the rating and tracer engine before performing this procedure.
Grab the service principal and storage account details from earlier and populate the list below,
Go to System > Azure Config > Configuration Wizard > switch to client id dropdown > complete the fields and Test Connection
FortiSandbox v3.2.0 and higher supports service principal and Azure account authentication methods

Once your Test is successful > Submit
–The End–
I hope this blog made your life easier in the deployment of your FortiSandbox instances across 3 availability zones in Azure.
My next blog will detail the ICAP integration between OPSWAT and FortiSandbox.
Hey there! I’m at work browsing your blog from my new apple iphone! Just wanted to say I love reading through your blog and look forward to all your posts! Carry on the outstanding work!