
The aim of this blog is to simplify the deployment of the Fortinet FortiManager HA on Azure. This solution enhances the availability of the FortiManager platform by deploying instances across multiple Availability Zones. The FortiManager HA failover process still requires manual intervention and is not automated.
FortiManager provides automation-driven centralized management of your Fortinet devices from a single console.
Deployment Plan
Step 1 – Register with FortiManager
Step 2 – Programmatic enablement of Marketplace products
Step 3 – Template deployment
Step 4 – Virtual IP (VIP) configuration
Step 5 – License Activation
Step 6 – Configuring the FortiManager HA
Monitoring HA status
Deployment Steps
Step 1 - Register with FortiManager
Make sure that you have registered for a FortiCloud Account before continuing. Register at https://fortimanager.forticloud.com/ if you do not already have an account.
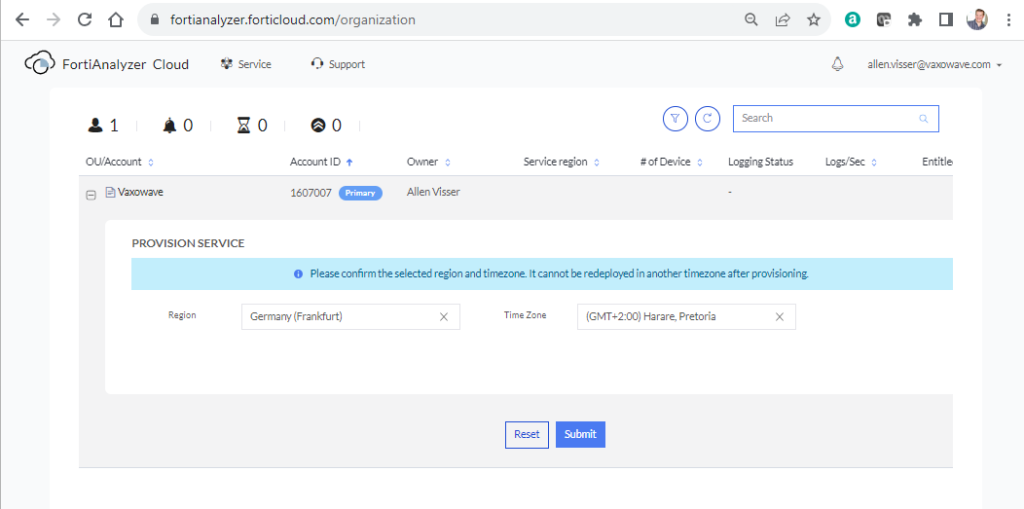
After registration and logged in,
Select the FortiManager SaaS region (this cannot be changed later), Submit,
Step 2 - Programmatic enablement of Marketplace products
Programmatic deployment will be enabled at a subscription level,
Go to Azure Marketplace > search for your product > FortiManager ,
Select the FortiManager Centralized Security Management
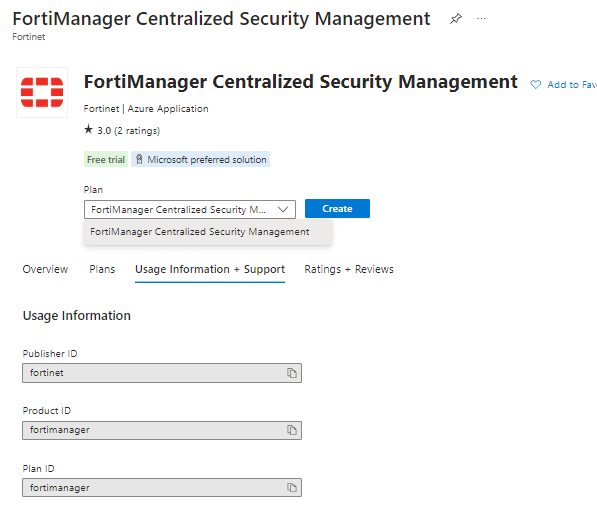
Go to the Usage Information + Support tab,
copy the Publisher ID, Product ID, Plan ID and paste into the script below.
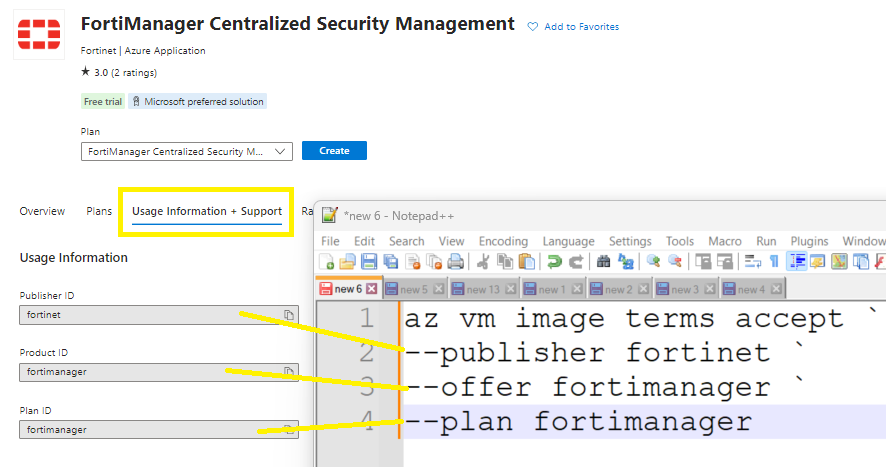
az vm image terms accept `
--publisher fortinet `
--offer fortianalyzer `
--plan fortianalyzer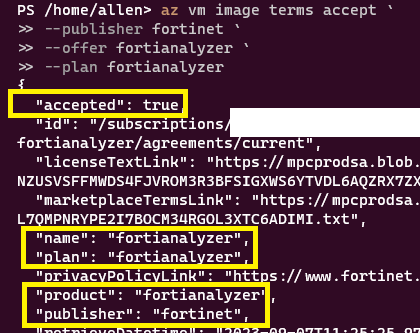
Step 3 - Template deployment
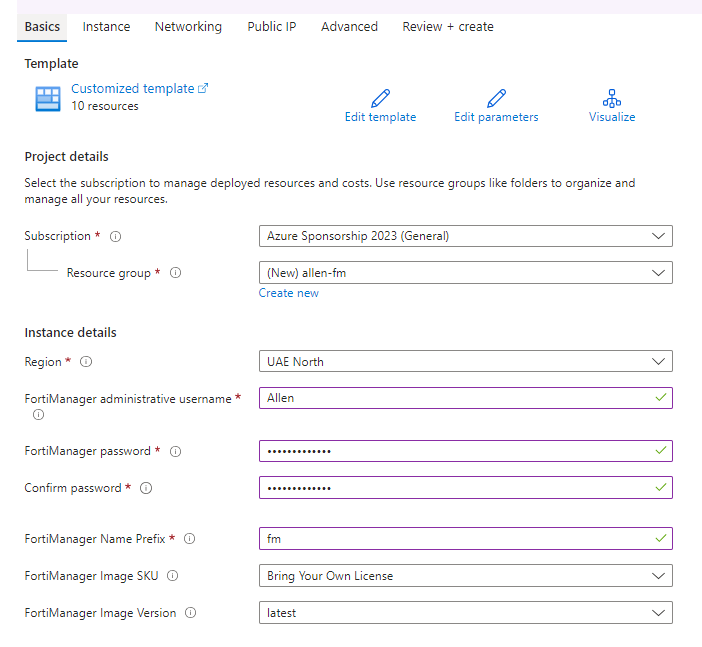
The deployment template can be run by clicking on the blue button,

Basic tab:
Populate the subscription, resource group and region fields,
Populate your admin credential fields,
Select a FortiManager prefix naming convention,
The FortiManager Image SKU can only be BYOL since a license is required,
Select the latest FortiManager image,
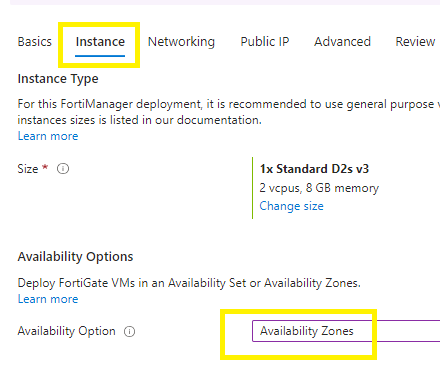
Instance tab:
Select your vm sku size,
Select your availability options = availability zones,
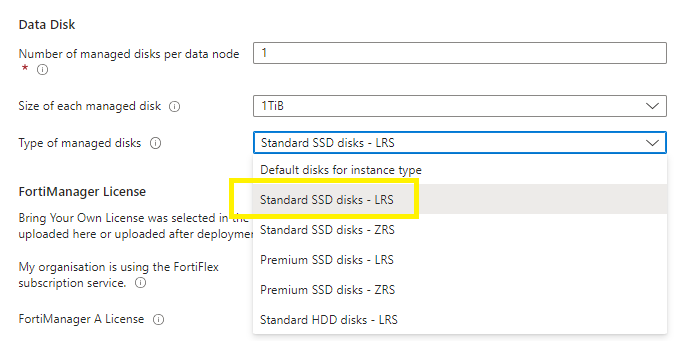
Data Disk:
Select your number / default of data disks,
Select the size / default data disks,
Select the type of managed disks,
FortiManager Licenses:
Here you need to add your BYOL licensing details for the 2 instances you will be deploying,

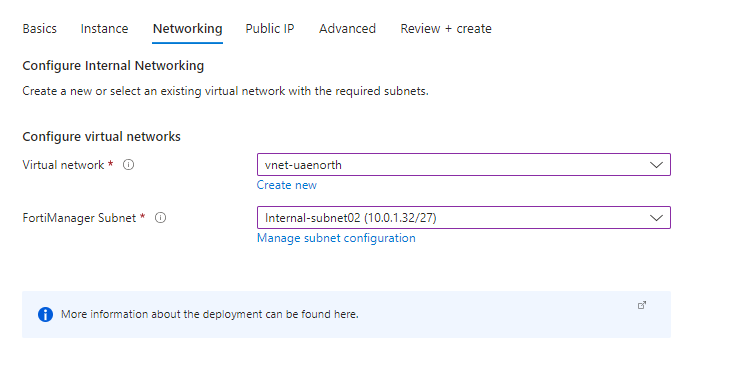
Networking tab:
Select your target virtual network and subnet,
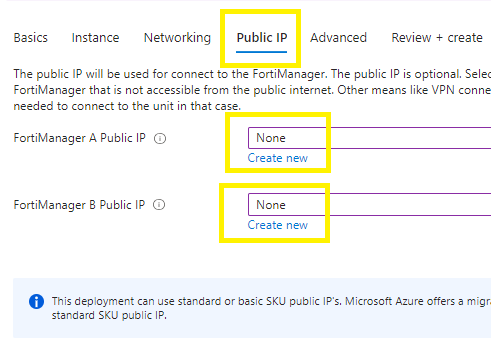
Public IP tab:
You have the option to select your type of ip address that will be used as a VIP.
I have select none for both instances.
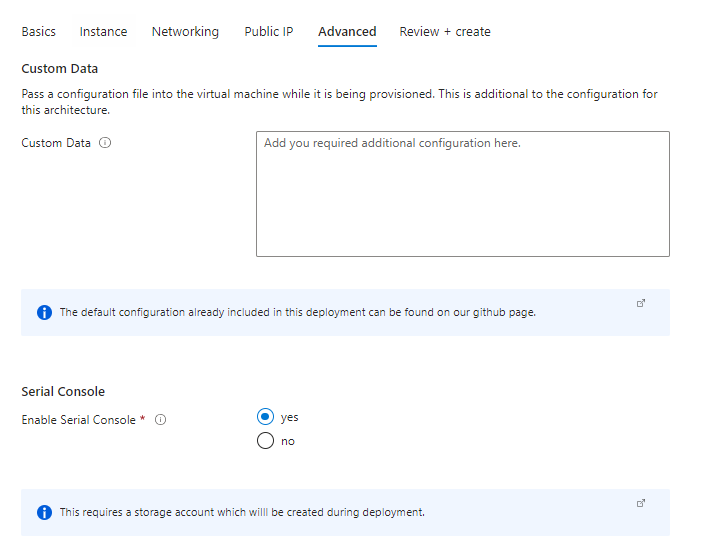
Advanced tab:
Select these options as per your requirement,
Review & Create,
Create
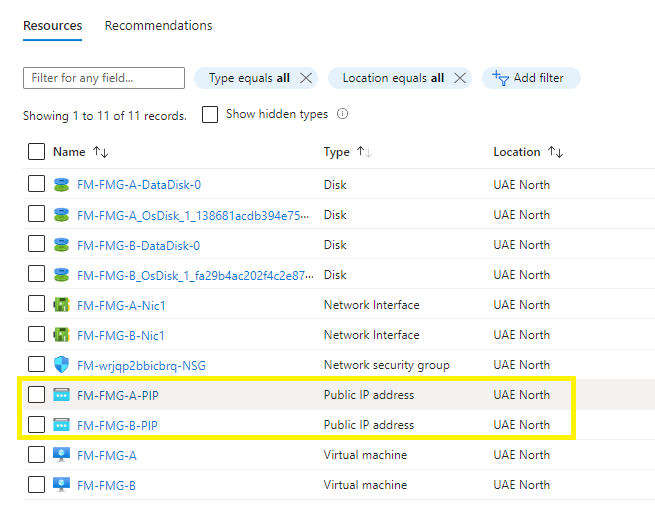
Verification
You should find the following resources deployed in your portal (minus the public ip addresses if you chose none),
Step 4 - Virtual IP (VIP) configuration
With regards to your VIP, you have the option to either allow the HA traffic to traverse the public internet, hence deploy a public IP address, or alternatively, if you prefer to keep the HA traffic private and not publicly exposed, then configure a 2nd internal IP address.
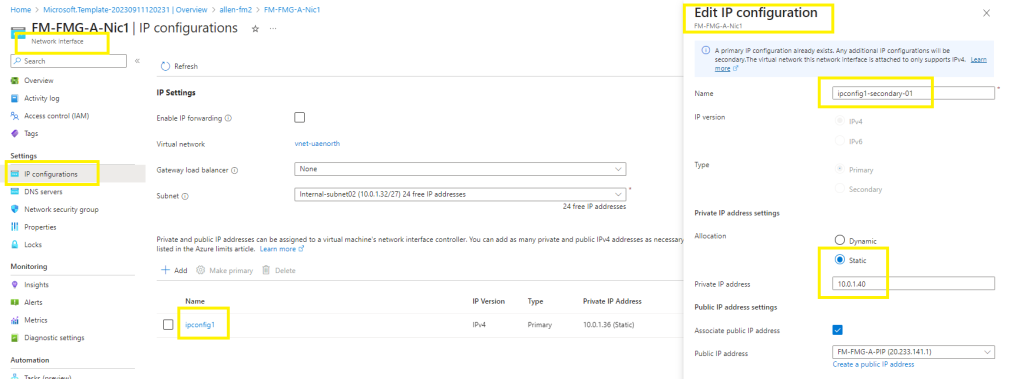
Option 1 – Adding a second private / internal IP address to the network interface of your virtual machines. This will be used as the virtual IP of the FortiManager HA.
#1 Begin by verifying an available ip address in your target subnet.
#2 on each vm, go to Networking > network interface > ip configurations >
#3 select the network interface > edit the configuration by adding a unique name for the secondary internal ip address on the network interface,
#4 Assign a available IP address on the subnet,
Option 2 – Adding a public IP address to your virtual machines.
Ensure that public IP SKU is Basic and that the Tier is set to Regional,
Provision the public IP resources in the same Azue location as that of the FortiManager instances,
The External VIP is assigned to an instance when its mode transitions
to primary by the fazutil, to call Azure APIs from within the instance.
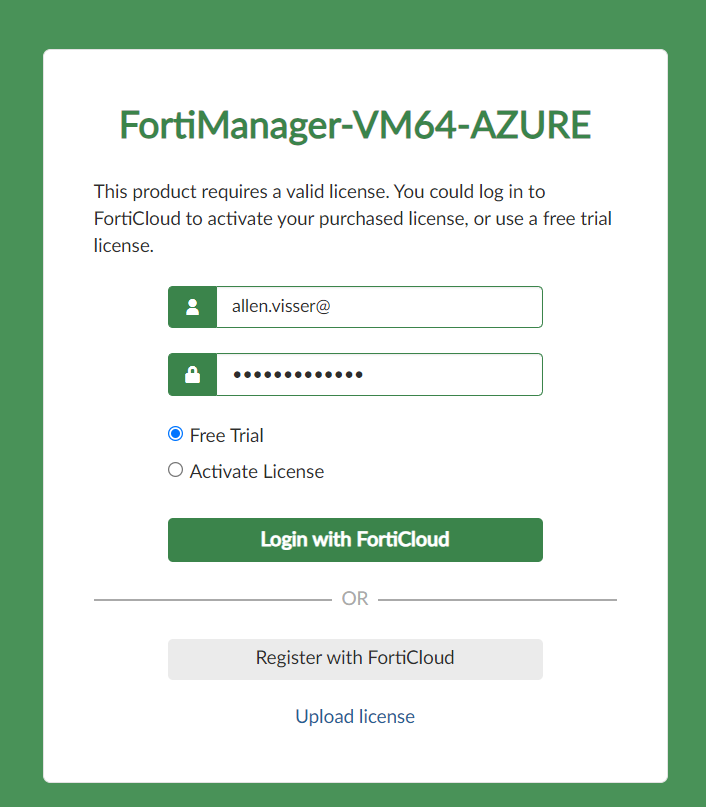
Step 5 - License Activation
Using your browser, connect to the FortiManager vm public ip address https://publicipaddress/,
Upload your license and Activate license,
Step 6 - Configuring the FortiManager HA
Follow the instructions here
High Availability CLI configuration:
Primary FortiManager configuration
config system ha
  set mode primary
  set clusterid 10
  set password xxx
  config peer
    edit 1
      set serial-number FortiManager B serial number
      set ip FortiManager B IP address
    next
  end
end

Secondary FortiManager configuration
config system ha
  set mode secondary
  set clusterid 10
  set password xxx
  config peer
    edit 1
      set serial-number FortiManager A serial number
      set ip FortiManager A IP address
    next
  end
end
Monitoring HA status
You can follow this guide to monitor your FortiManager HA status:
–I hope this blog helped simplify your FortiManager deployment. Good luck —