The aim of this blog is to easily configure a proactive email notification platform to notify you at least 30 days before your key vault based secrets expire, or if any other key vault secrets statuses changes.
Key vault secrets consists of all keys, certificates, and secrets,
Status changes are defined as:
About to expire < 30 days,
Has already expired,
A new version is available.
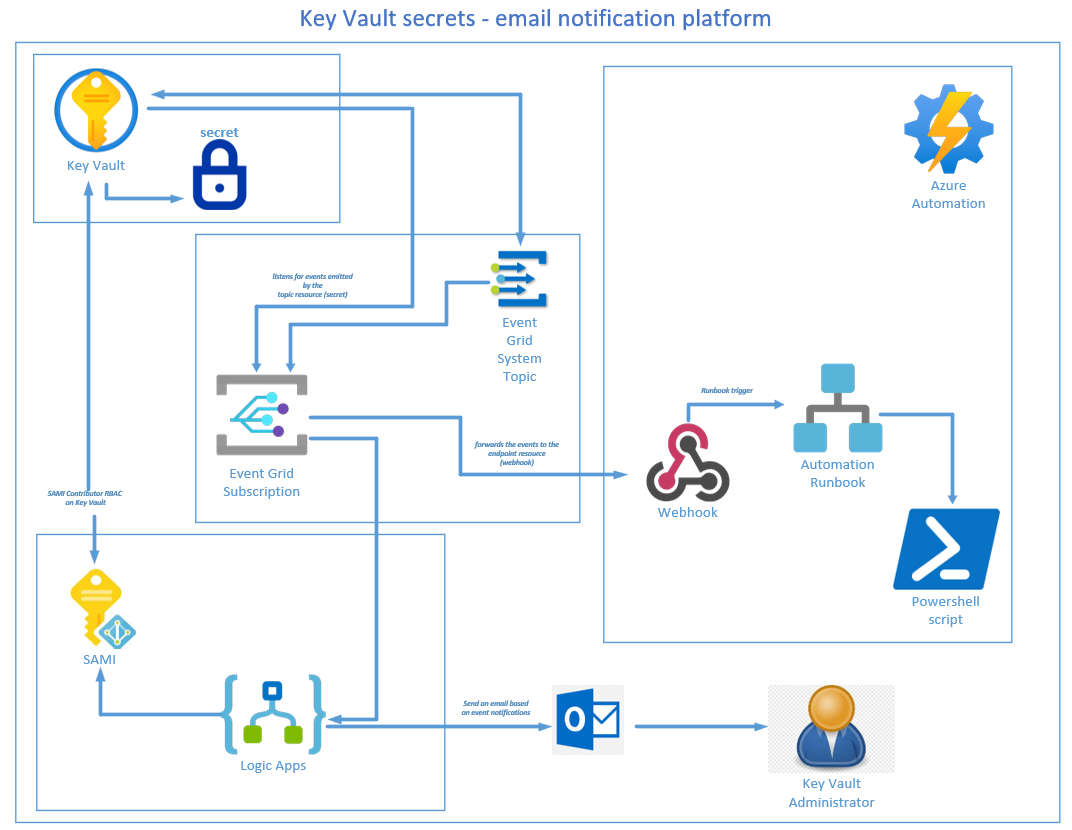
Deployment Plan:
Step 1 – Create an Automation account
Subscription to Key Vault events and route events to Automation.
Step 2 – Create a Runbook
Step 3 – Create a webhook
Step 4 – Create Event Grid System Topic
A system topic resource is associated to an azure resource which allows customers to subscribe to events emitted by that resource.
Step 5 – Create an Event Grid subscription
Event Grid uses event subscriptions to route event messages to subscribers based on resource (key vault) topics. When one of the secrets in the key vault is about to expire, Event Grid is notified of the status change and makes an HTTP POST to the endpoint.
Step 6 – Create a Logic App
Events can be pushed through the Azure Event Grid to event handlers such as Azure Functions, Azure Logic Apps, or a Webhook. A web hook then triggers an Automation execution of a PowerShell script.
Deployment Steps:
Part 1 - Configure cryptographic key auto-rotation in Azure Key Vault
You my follow my blog here to configure key rotation or configure certificate auto-rotation here
Part 2 - Monitoring Key Vault with Azure Event Grid
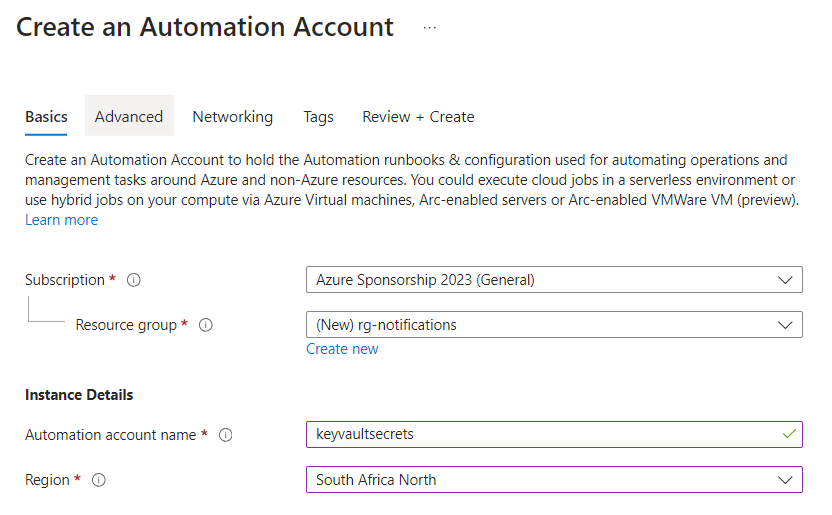
Step 1 - Create an Automation account
Basic tab:
Complete the subscription, resource group, provide a unique automation account name and region > Next
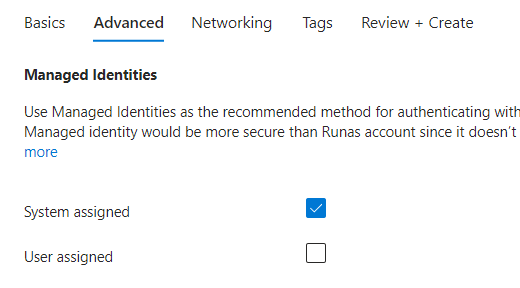
Advanced tab:
Enable the resource specific System Assigned Managed Identity,
(this will be used later for granting PoLP access),
Next,
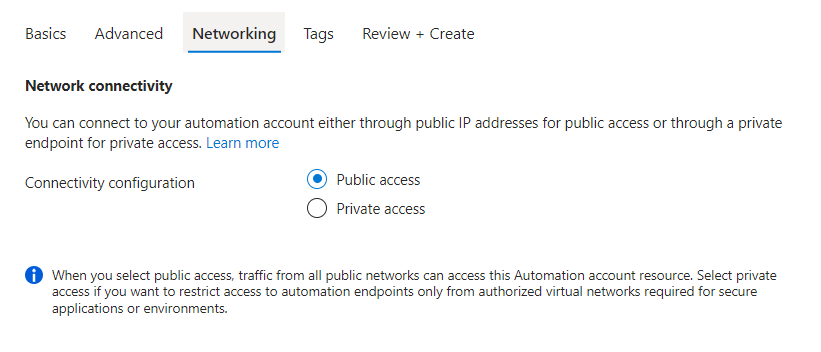
Networking tab:
Select your choice of public or private access > Next,
Tags tab:
Populate your tags,
Review and Create tab:
Review your configs and Create.
Step 2 - Create a Runbook
Open your new Automation Account and select Runbook,
Click on + Create a runbook,
Create a descriptive runbook name,
Select PowerShell as the runbook type,
Select a runtime version not in preview,
Enter a description,
Create,

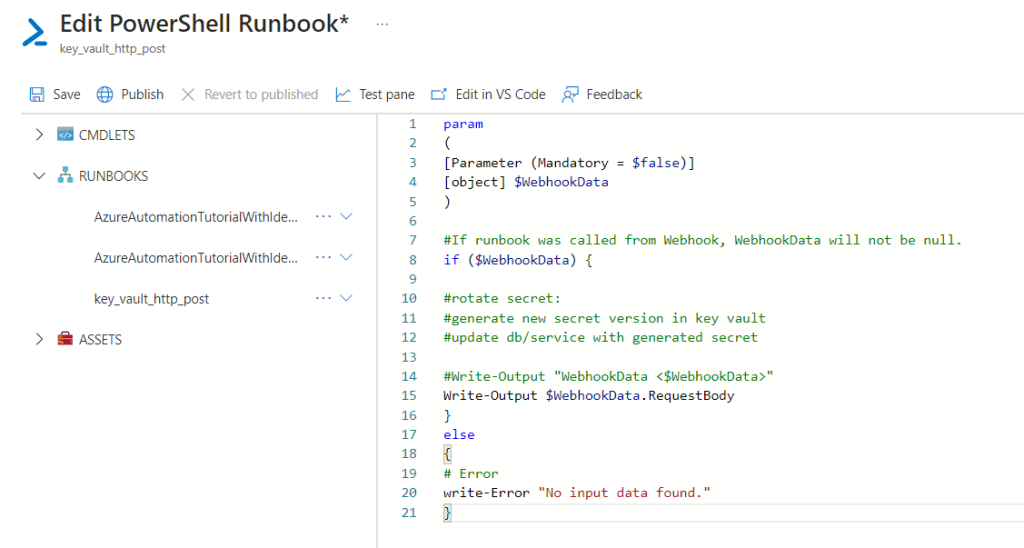
Select the Edit button,
paste the following code:
param
(
[Parameter (Mandatory = $false)]
[object] $WebhookData
)

#If runbook was called from Webhook, WebhookData will not be null.
if ($WebhookData) {

#rotate secret:
#generate new secret version in key vault
#update db/service with generated secret

#Write-Output "WebhookData <$WebhookData>"
Write-Output $WebhookData.RequestBody
}
else
{
# Error
write-Error "No input data found."
}
Select the Save button,
Select the Publish button > Yes,
(This action will return the result of the POST request received)

Step 3 - Create a webhook
Create a webhook to trigger your newly created runbook.
Select Webhooks from your newly published runbook,
Select Add Webhook,
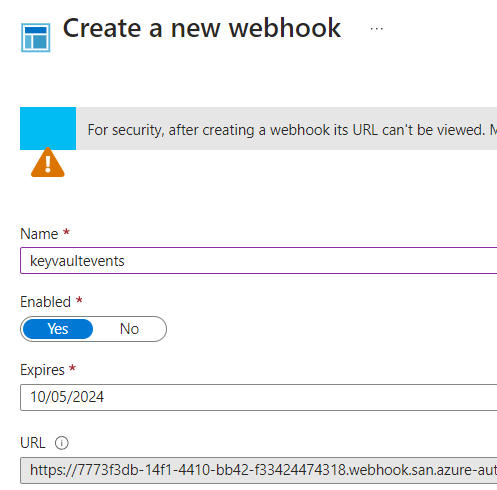
Create new Webhook,
Name the webhook, set an expiration date, and copy the URL,
Important!! –You will not have access to view the URL after you create it. Make sure you save a copy in a secure location where you can access it for the remainder of this guide
OK,
Select Parameters and run settings and then select OK. Don’t enter any parameters,
The Create button will be enabled > Create,
Step 4 - Create Event Grid System Topic
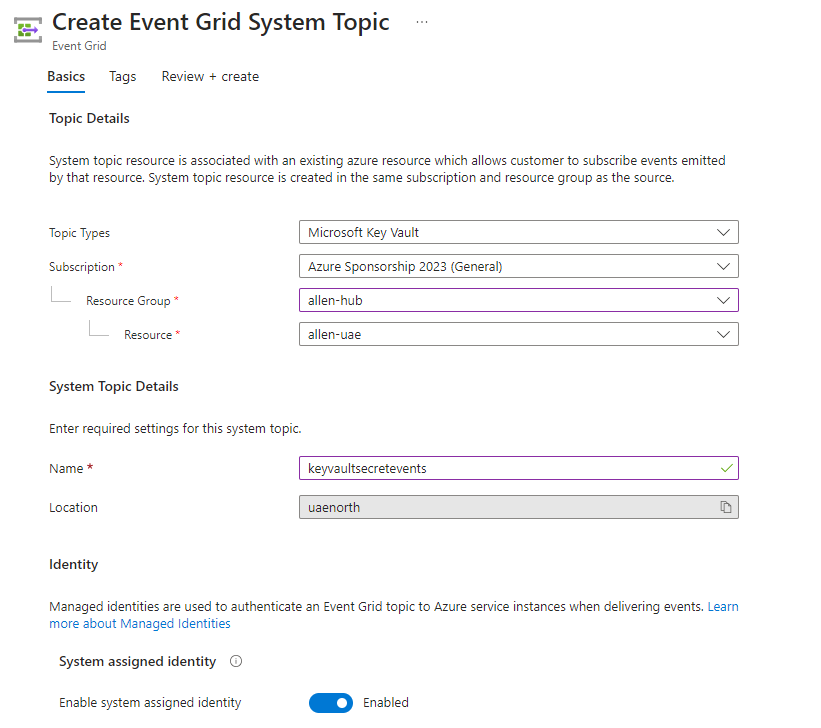
A system topic resource is associated to an azure resource (key vault) which allows customers to subscribe to events emitted by that resource (key vault secrets in this context). A system topic resource is created in the same subscription and resource group as the source.
Basic tab:
Topic type > is your source resource (key vault in this blog),
Populate the subscription, resource group fields,
The resources is your intended source key vault for monitoring,
Provide a descriptive System Topic name and location,
Enable the System Assigned Managed Identity,
Next,
Tags tab:
Populate your tags,
Review and Create tab:
Review your configs and Create.
Step 5 - Create an Event Grid subscription
An event subscriptions listen for events emitted by the topic resource (key vault secrets in this context) and then sends /forwards the events to the endpoint resource (webhook)
Register resource provider
To view all currently registered resource providers for your subscription:
Get-AzResourceProvider -ListAvailable | Where-Object RegistrationState -eq “Registered” | Select-Object ProviderNamespace, RegistrationState | Sort-Object ProviderNamespace
To register a resource provider
Register-AzResourceProvider -ProviderNamespace Microsoft.EventGrid
Go to your source key vault and select the Events tab,
Select the +Event Subscription button,
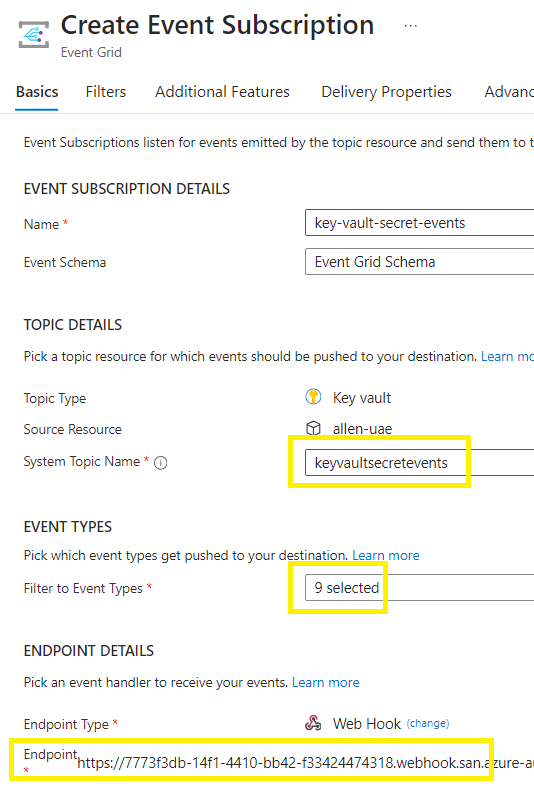
Create a descriptive name for the subscription,
Choose Event Grid Schema,
Topic Resource should be the source key vault you want to monitor for status changes,
System Topic Name > enter the name of the Event Grid System Topic you created earlier,
For Filter to Event Types, leave all options selected (9 selected).
For Endpoint Type, select Webhook,
Choose Select an endpoint,
paste the webhook URL here from the previous step
Select Confirm Selection on the context pane,
Select Create,
Verification
Verify that your Event Grid subscription is properly configured.
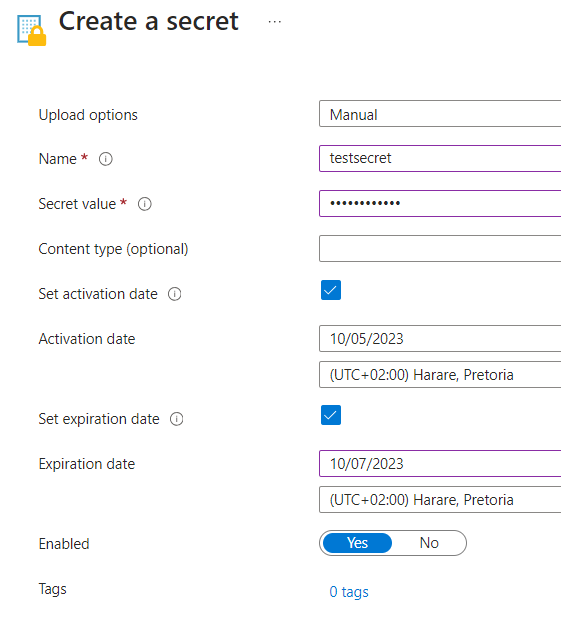
Go to key vault and create a new secret with expiration date < 30 days,
Create,
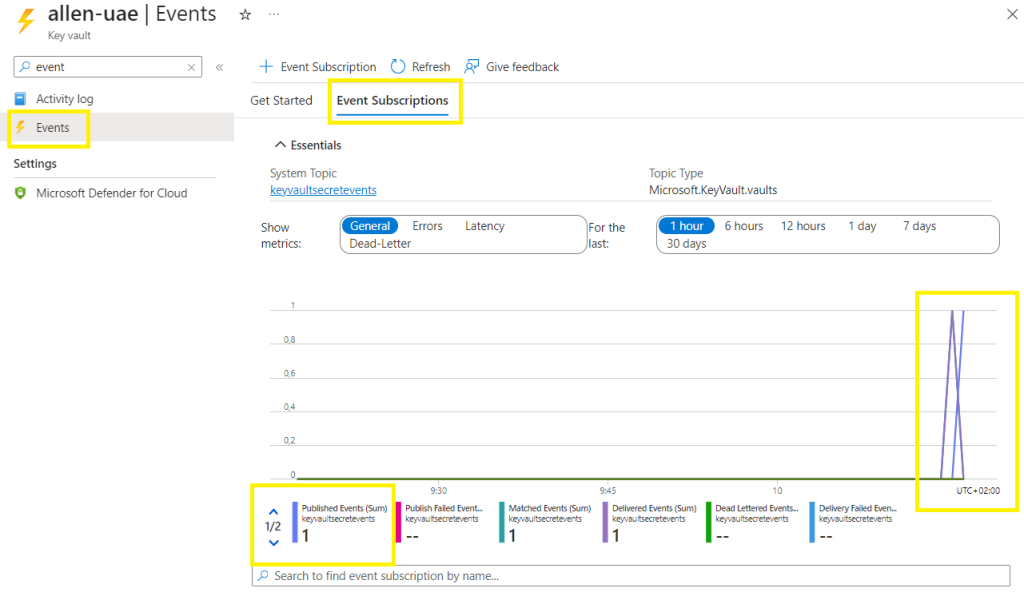
Go to your key vault,
Go to Events > select the Event Grid subscription you created,
You should see a single event generated in your subscription
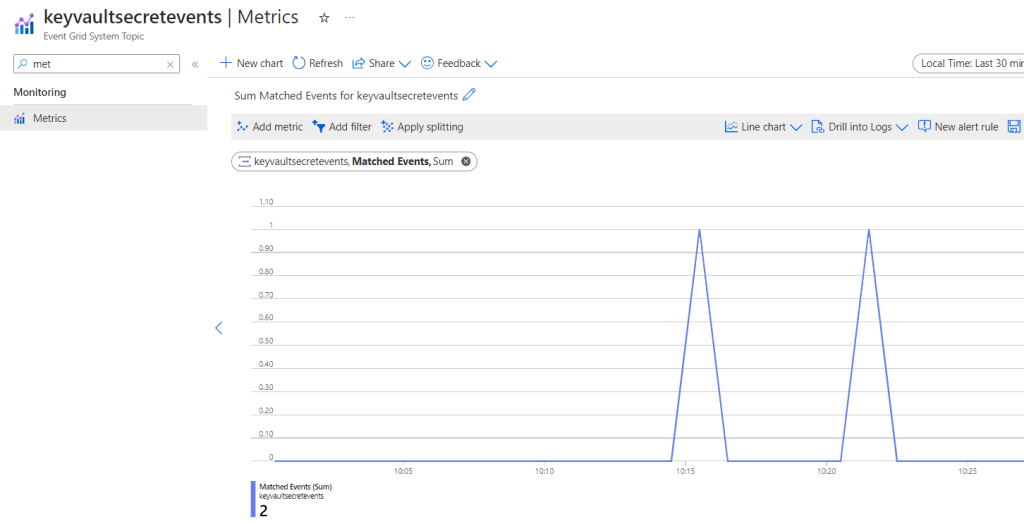
Go to Event Grid System Topic,
Metrics > Filter on Matched Events,
You will see the 1 event for your System Topic.
Go to your Automation account,
Select the Runbooks tab, and then select the runbook you created,
Select Jobs, you will find the completed jobs.

Select the Webhooks tab,
Confirm that the “last triggered” time stamp is within your triggered time period of when you created the new secret.
The result confirms that Event Grid made a POST to the webhook with the event details of the status change in your key vault and that the webhook was triggered.

Part 3 - Receive and respond to key vault notifications with Azure Event Grid
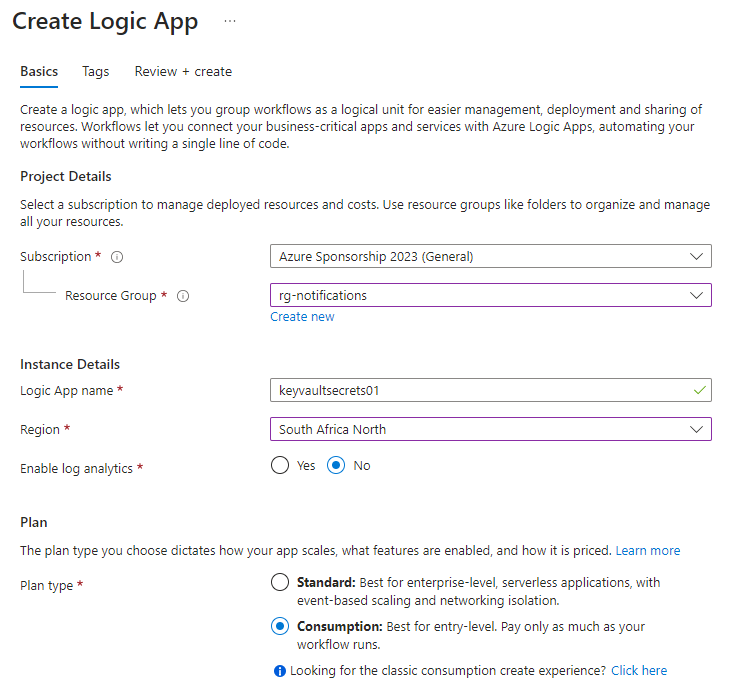
Step 6 - Create a Logic App
Basic tab:
Completed the subscription, resource group fields,
Create a unique logic app name,
Complete the region field,
And whether you want to enable log analytics,
Select your desired plan,
Tags tab:
Populate your tags,
Review and Create tab:
Review your configs and Create.
Open your new Logic Apps > go to Identity,
Enable the System Identity,
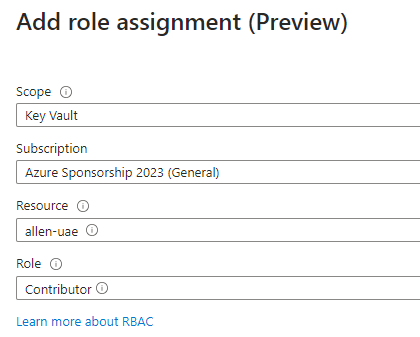
Click on the role assignments button,
Add a role assignment,
Apply the principle of least privilege by scoping down to only the key vault,
Save (and wait minute for refresh)
Create a Logic App with an Event Grid handler and subscribe to an Azure Key Vault “SecretNewVersionCreated” events:
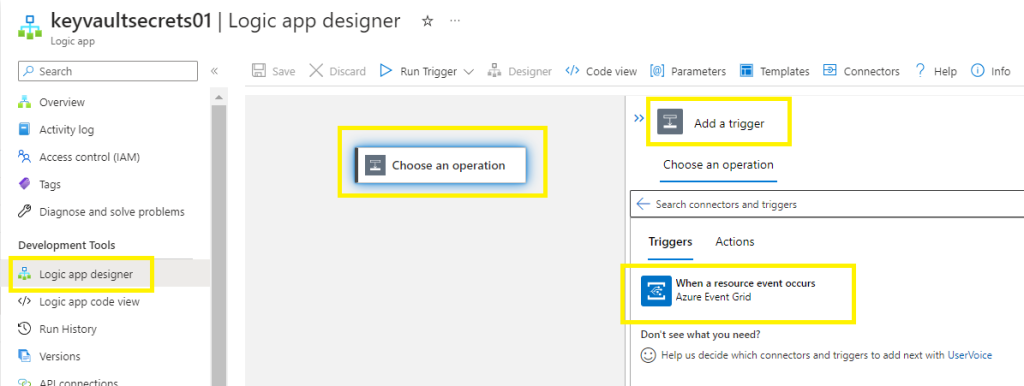
Open your new Logic Apps > go to Logic app designer,
Select a blank logic app,
Add a trigger > select event grid,
Select the icon when a resource event occurs,
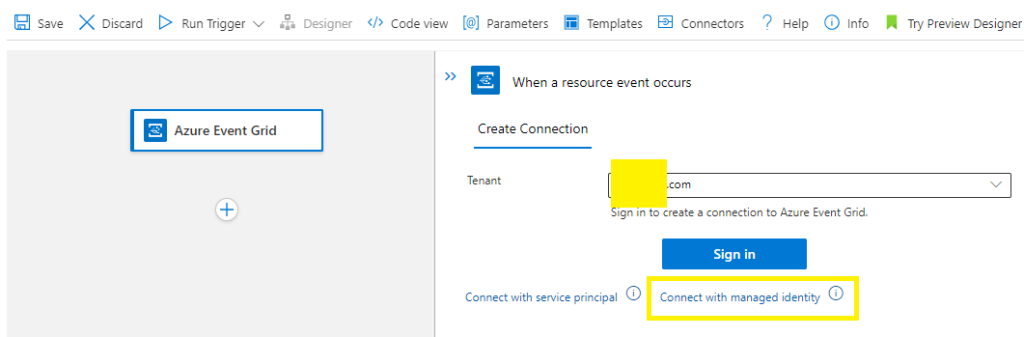
Create Connection >
Select your tenant,
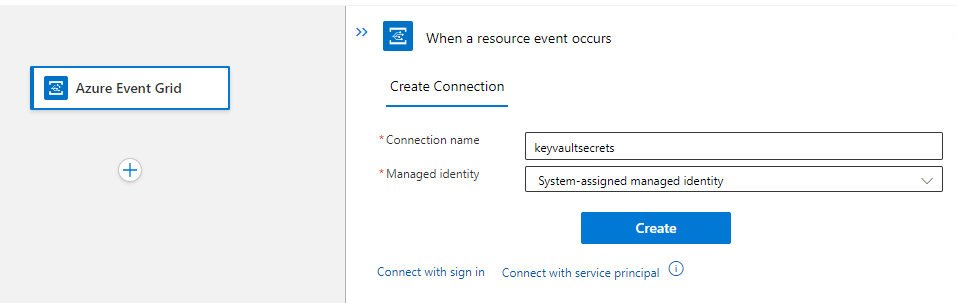
Select whether you are using a service principal or managed identity,
Add a custom connection name,
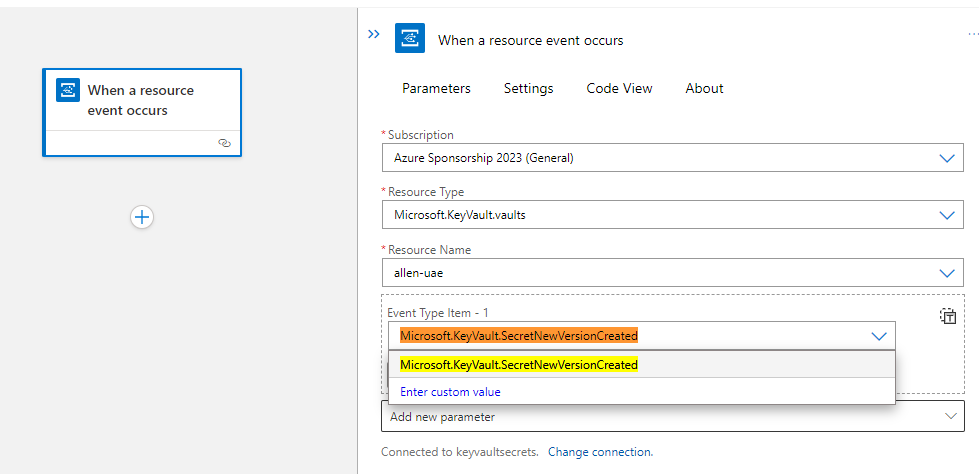
In the resource event occurs screen:
Enter your required subscription, resource type and Resource Name,
-Resource Type = Microsoft.KeyVault.vaults
-In the Event Type Item – 1 block, add = Microsoft.KeyVault.SecretNewVersionCreated,
Save,
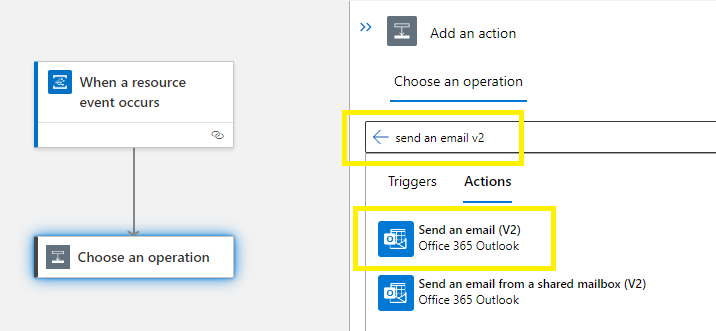
Select +Add an action >
Search for Email based on your email provider,
find and select the matching connector > Office 365 Outlook,

Select the Send an email (V2) action,
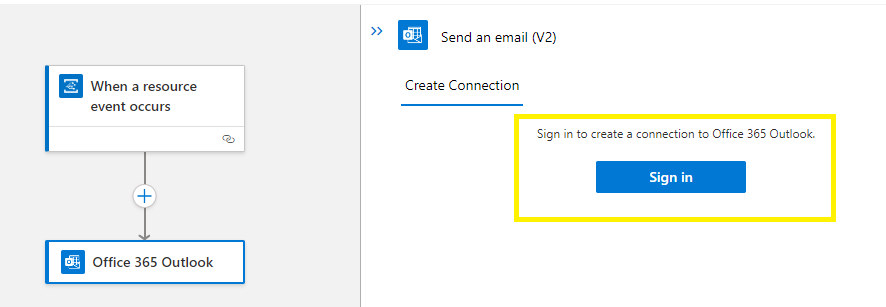
Sign in with the persistent email account that will be used to send the event notifications.
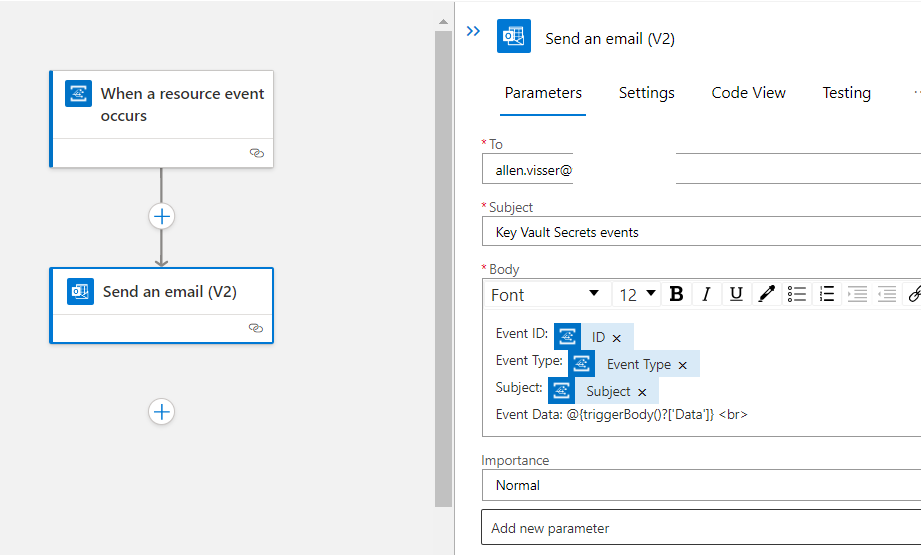
Building your email template:
To: Enter the email address to receive the notification emails. I suggest using a distribution group,
Subject: Create a custom, identifiable email subject header,
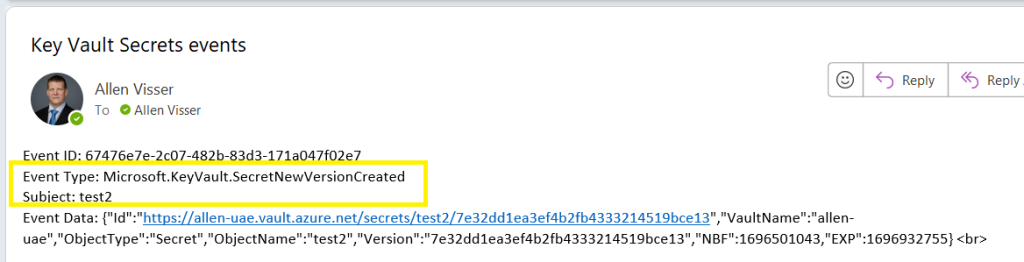
Body: Write the text for your email. Select JSON properties from the selector tool to include dynamic content based on event data. You can retrieve the data of the event using
Event Data: @{triggerBody()?[‘Data’]}
Select Save (top left),
Verification
On your key vault > Events > Event Subscriptions. Verify that a new subscription created:

Go to your key vault, select Secrets, and select + Generate/Import,
Create a new secret with an expiration date within 10 days,

When the secret is created, an email will be received at the configured addresses.
–I hope this blog helped simplify the deployment of your key vault secrets change notification platform —