
I have chatted to several clients who believe that because their Azure Firewall is a FWaaS offering, Azure is actively backing up their Azure Firewall and their associated Azure Firewall Policy configurations. However, this assumption is incorrect.
Azure Firewall is Microsoft Azure’s cloud-native firewall-as-a-service (FWaaS) solution, operating within the Shared Responsibility Model (SRM). As per this model, Azure handles backing up the FWaaS infrastructure, while clients are responsible for backing up their customized configuration stored in their Firewall Policy.
By default, Azure does not automatically back up the Firewall Policy configuration which contains your organization-specific firewall rules and settings. Therefore, it’s imperative for clients to consistently back up these configurations to maintain data integrity.
I have written this blog to demonstrate a simple method of implementing a Logic App to back up an Azure Firewall and Firewall policy configurations. The configuration will be stored in an Azure Resource Manager (ARM) template within Azure Storage. Subsequently, this file can be utilized for restoring your Firewall and Firewall Policy configurations which is demonstrated in the blog.
Deployment Plan
Step 1 – Template Deployment
Step 2 – Logic App System Assigned Managed Identity (SAMI)
Step 3 – API Connection
Step 4 – Logic App Designer
Step 5 – Verification
Step 6 – Test Recovery
Step 7 – Notifications
The deployment will provision three resources, namely:
#1 Storage Account: A storage account with a container will deployed, in which to store the blob backups,
#2 Logic App: The Logic App has a default schedule to run every three days to store the Azure Firewall and Azure Firewall Policy templates,
#3 API Connection: An API connection to Azure Blob Storage is created for the Logic App.
Deployment Steps
Step 1 - Template Deployment
Click the Deploy to Azure blue button below to deploy the template.

Populate the template with the following details:
Playbook_Name: a custom descriptive name of your Logic App,
Storage Account Name: name of the Storage Account to store the Azure Firewall backups,
Firewall_Name: the name of the source Azure Firewall to backup via the Logic App,
Firewall_Policy_Name: the name of the Azure Firewall Policy to backup via the Logic App,
Subscription_ID: subscription ID that hosts the Azure Firewall and Azure Firewall Policy to backup,
Resource_Group_Name: Resource Group name that contains the Azure Firewall and Azure Firewall Policy to backup,
*do not edit any values in the last 2 text boxes,
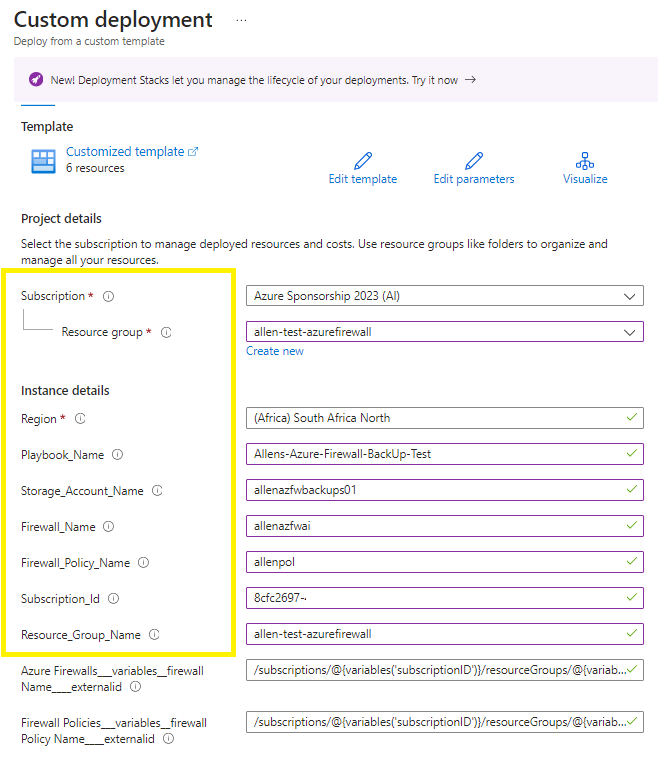
Two new resources will be created:
Logic App,
Storage account,

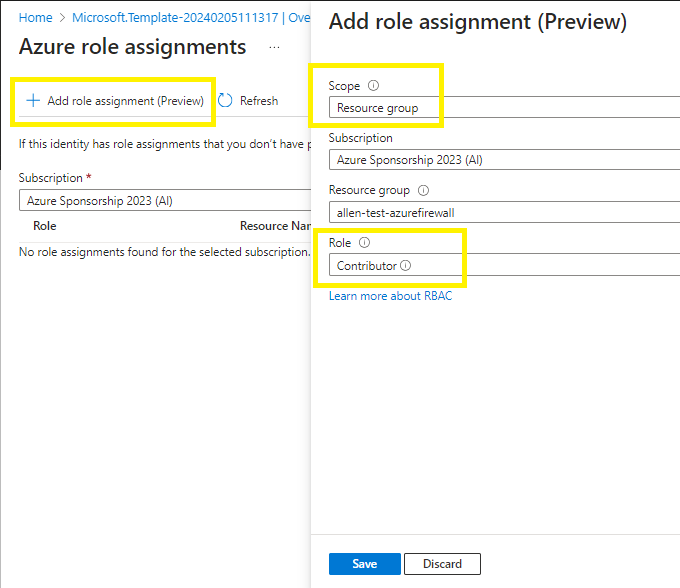
Step 2 - Logic App System Assigned Managed Identity (SAMI)
You need to configure the RBAC role permissions and scope of the Logic App System Assigned Managed Identity (SAMI) following the Principle of Least Privilege (PoLP)
Once the template has deployed all the resources,
Go the Logic App,
Search for identity,
Select the system assigned tab,
Enable the ON pill,
Click on the Azure role assignments button

Select + Add role assignment (Preview),
Minimize the scope of the SAMI > select the resource group container of the Azure firewall and Azure firewall policy,
Minimize the RBAC role permissions of the SAMI > select Contributor role,
Save,
Step 3 - API Connection
Go back to the resource group and select the Storage account that was created by the template,
Copy and save the storage account name and Access key,
Now go to the API Connection that was provisioned by the template,
Initially you will notice a missing key error banner on the overview page.
Let’s fix this.

Go to Edit API connection,
Insert the copied storage account name and access key,
Save
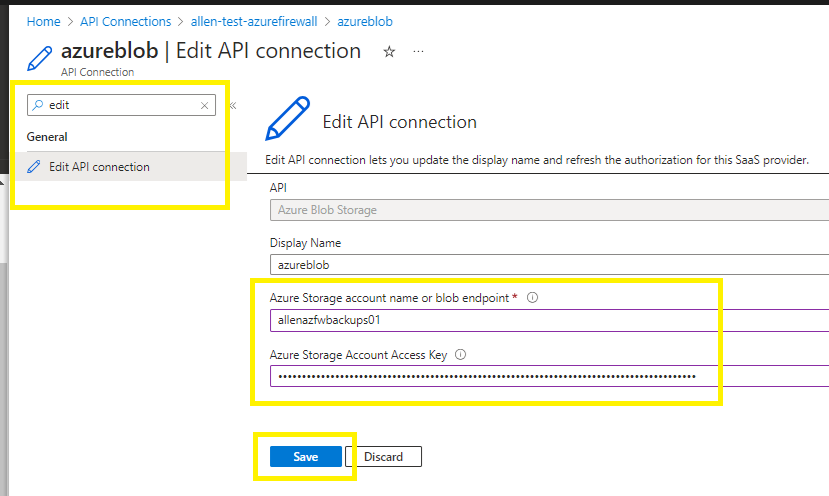
The API connection overview page should now be error free,

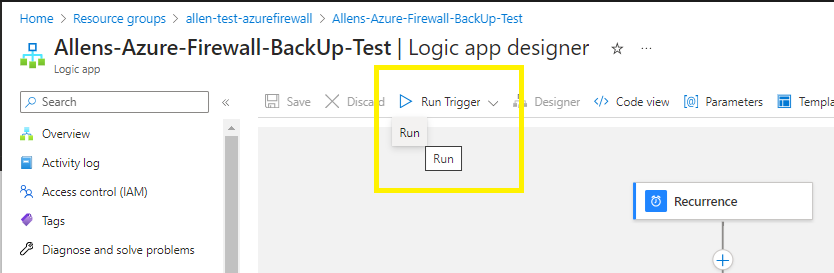
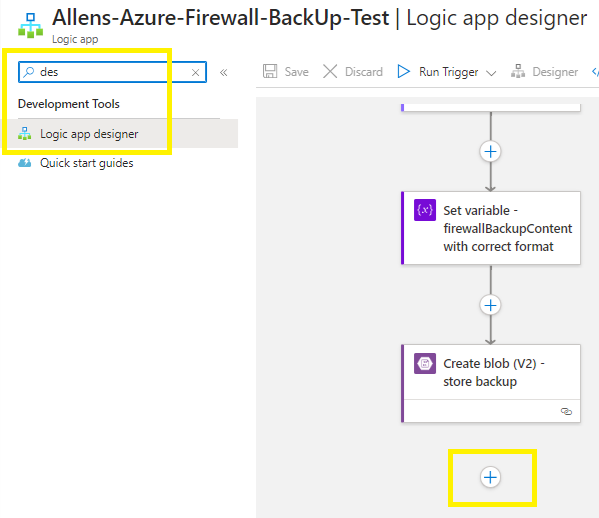
Step 4 - Logic App Designer
Go back to the Logic App,
Run > Run
Step 5 - Verification
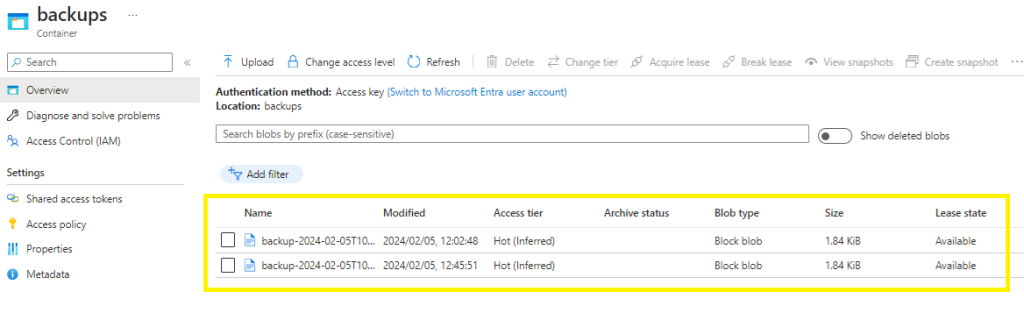
Go to the Storage Account container,
Switch your Authentication method: Microsoft Entra user account (Switch to Access key) to view whether your container has been populated with files,
Step 6 - Test Recovery
Select a backup file from the storage account blob and download the JSON file,

Upload the file to to your Azure Cloud Shell

Run the following command in Azure Cloud Shell:
#set subscription
Set-AzContext -Subscription "8cfc2697-bbbb-cccc-dddd-eeeeeeeeeeee"
$recoveredAzFirewallTestName = "allensRecoveredAzFW02"
$ResourceGroupName = "allen-test-azurefirewall2"
$backupfilepath = "./backup-2024-02-05T10_45_51.9426072Z"
New-AzResourceGroupDeployment `
-name $recoveredAzFirewallTestName `
-ResourceGroupName $ResourceGroupName `
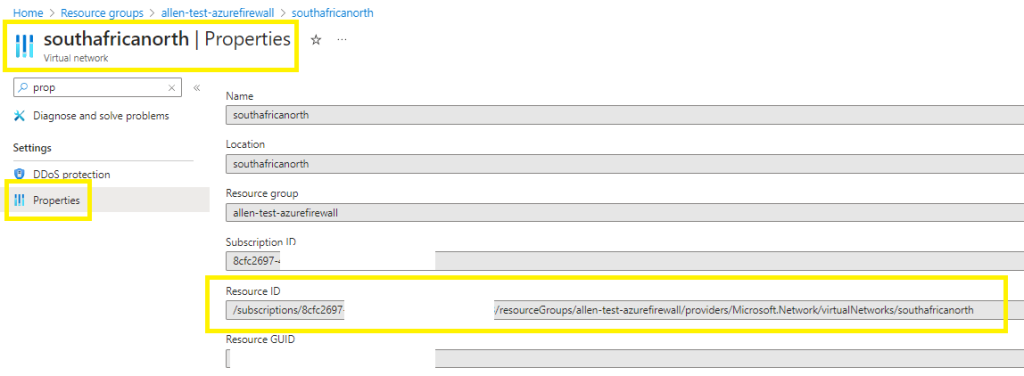
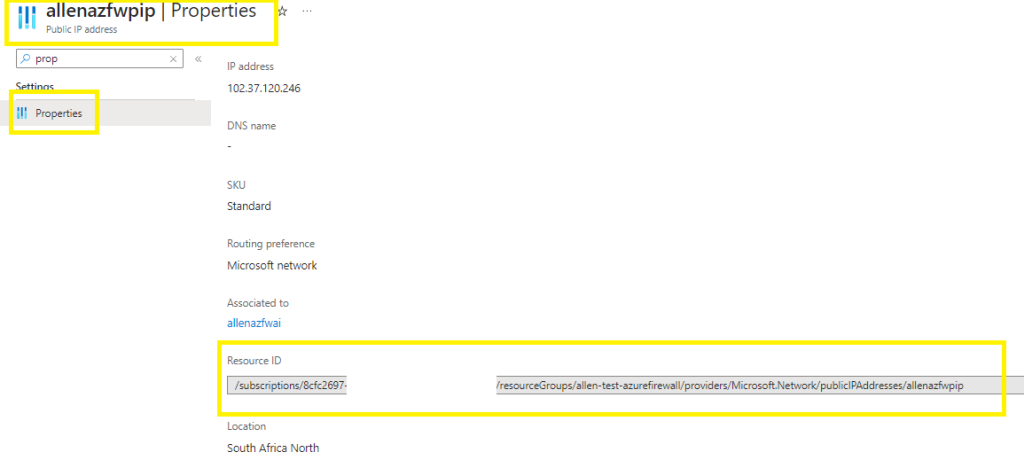
-TemplateFile $backupfilepathYou will be prompted for 3 input values, namely:
Which you will get from the ResourceID of each of the FirewallPublicIP, PublicIP and FirewallVNet resources, namely:
FirewallPublicIP:

And FirewallVNet
And the publicIP resource

This restore command will restore / over-write both the Firewall and Firewall Policy together from the backup even if they have been deleted.
Verify that your ProvisioningState = Succeeded

The Azure Portal deployments will show that 2 new resources have been deployed, namely a new firewall and firewall policy.

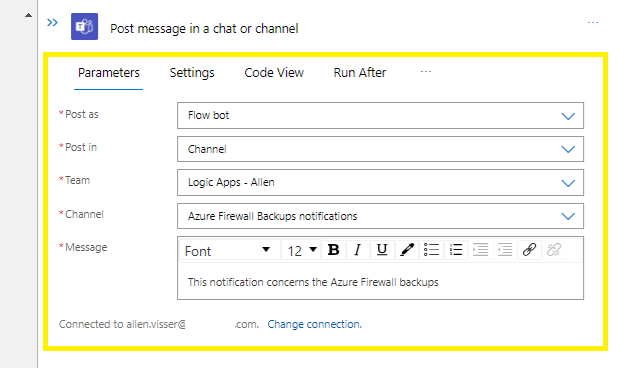
Step 7 - Notifications
Adding Teams notifications
I decided to append Teams notifications onto the default Logic Apps:
Scroll to the bottom,
Add an action,
Search for and select Post message in a chat or channel

Preferably, sign into your Azure tenant with an account that doesn’t require MFA eg an individual user account.
(Im using my account in this sandbox test),

Select a Flow bot,
Post into a distribution Teams Channel,
Select a distribution Team,
Select the Channel name,
Create your custom message,
Save,
Run > Run,
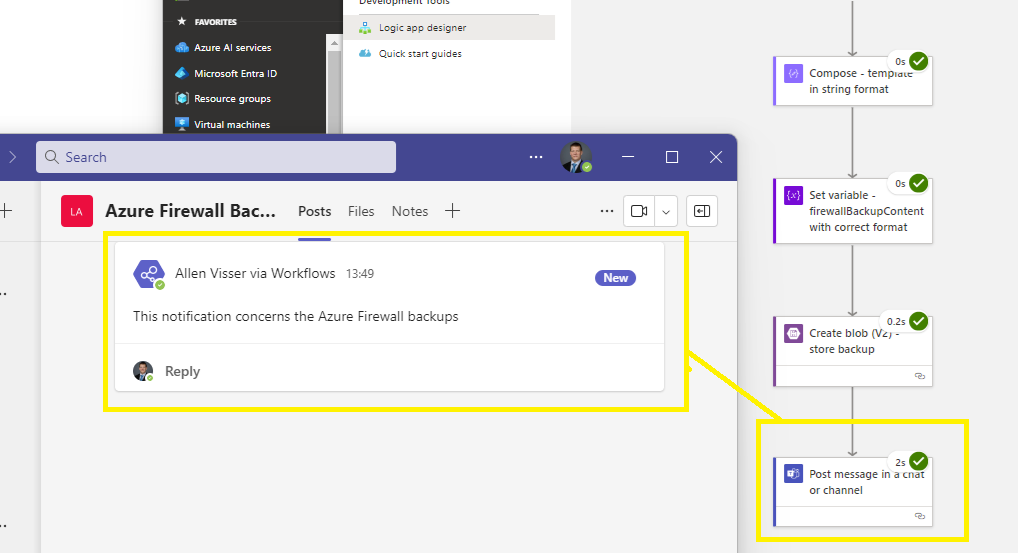
As per configuration, the message has been delivered into the Teams channel for your support team.
–I hope this blog simplified the configuration of your Azure Firewall backup platform–