Synopsis:
In this post we will deploy the initial building blocks of Microsoft Purview.

What will we deploy in this post?
What is Microsoft Purview?
Microsoft Purview is a unified data-governance service that helps you manage and govern your on-premises, multicloud, and software-as-a-service (SaaS) data. You can easily create a holistic, up-to-date map of your data landscape with automated data discovery, sensitive data classification, and end-to-end data lineage. You can also empower data consumers to find valuable, trustworthy data. You can enable data curators and security administrators to manage and keep your data estate secure and empower data consumers to find valuable, trustworthy data.

Access control in the Microsoft Purview
https://learn.microsoft.com/en-us/azure/purview/catalog-permissions
Deployment Steps:
1. Microsoft Purview: Provision Account
1.1 RBAC roles:
To be able to create a Microsoft Purview Account your account must have the role of contributor or owner role, or an administrator of the Azure subscription.
1.2 Enable the required subscription resource providers:
#set subscription context:
Set-AzContext -SubscriptionName "<subscripion name>"

#register providers:

Register-AzResourceProvider -ProviderNamespace Microsoft.Purview

Register-AzResourceProvider -ProviderNamespace Microsoft.Storage

Register-AzResourceProvider -ProviderNamespace Microsoft.EventHub
1.3 Deployment Steps:
Portal > Microsoft Purview accounts > Create
Your Purview Account name will be immutable and globally unique.
Location is the indication of the regions that support the Microsoft Purview deployment which needs not be in the same region as your resources / sources.
Managed Resource Group – you can rename that resource group for charge back or administration purposes, however I have chosen to keep all the Microsoft Purview related resources in the same single resource group.
Basics Tab

Networking Tab

I have chosen All Network because i want to test connectivity to on premises data sources.
By choosing this option:
Configuration tab
Configure an Event Hubs namespaces to programmatically monitor your Microsoft Purview account using Event Hubs and Atlas Kafka.
Skip over this tab for now as we will provision the two Event Hubs in the next steps > Next > Create
We will create 2 Event Hubs at a later stage:
1. To send and receive Atlas Kafka topics messages and
2. Event Hubs to receive messages from Microsoft Purview

2. Microsoft Purview: Governance Portal
The Microsoft Purview governance portal is used to access and manage Microsoft Purview.
There are two ways to open the Microsoft Purview governance portal:
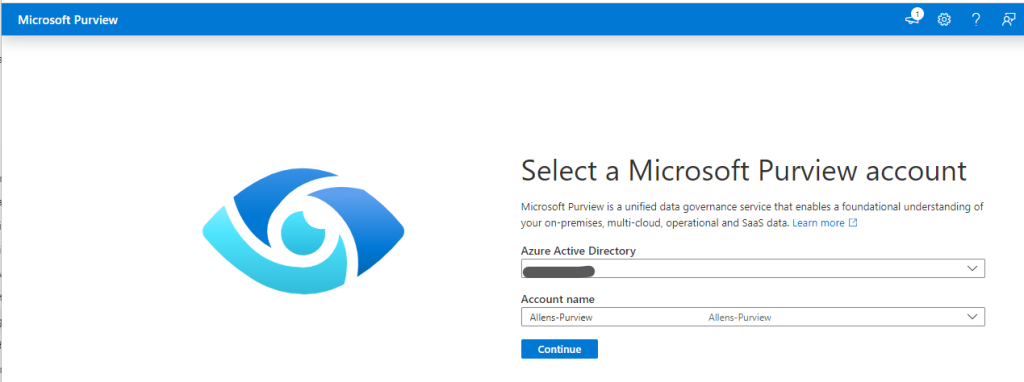
- Browse to https://web.purview.azure.com select your Microsoft Purview account name, and sign in to your workspace.

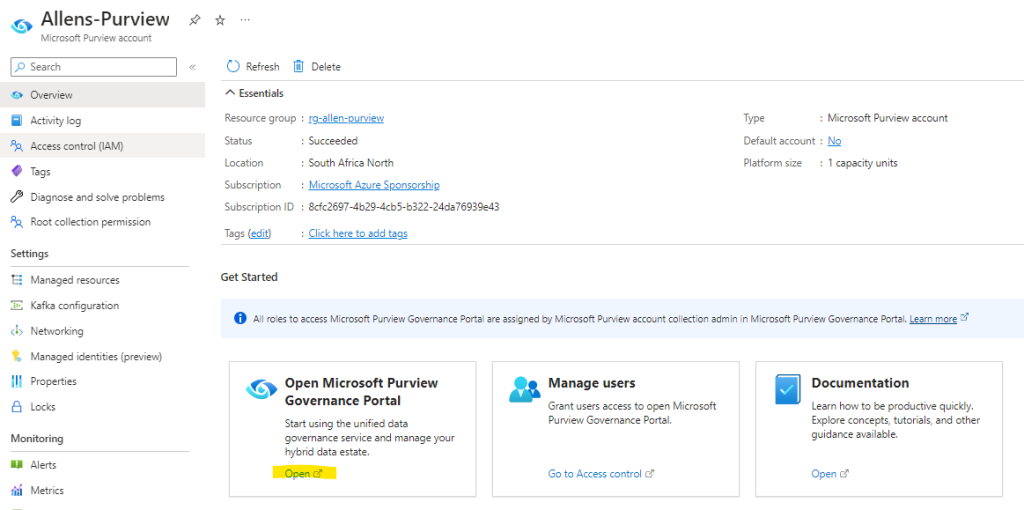
- Or from the Azure Portal > Microsoft Purview accounts > select your account > select the “Open Microsoft Purview governance portal” tile on the overview page.

3. Microsoft Purview: User-assigned managed identity (UAMI)
Create a user-assigned managed identity (UAMI) that will enable your new Microsoft Purview account to authenticate directly with resources using Azure Active Directory (Azure AD) authentication. In this context, the Microsoft Purview User-assigned managed identity (UAMI) will authenticate to the Azure Key Vault.
3.1 Create the User-assigned managed identity (UAMI) which will be added to Microsoft Purview.
Go to Portal > Managed Identities > Create the UAMI.

3.2 Add User-assigned managed identity (UAMI) to Microsoft Purview:
In the Microsoft Purview portal > select your account > go to Managed identities (preview)
Under User assigned tab > search for your new UAMI specifically created for Purview > Add
(Following the Zero Trust Model, I want this UAMI only used for Purview and nowhere else to avoid lateral movement, hence the deliberate UAMI-Purview naming convention).

Verification to confirm that my UAMI has been assigned to my Purview account.

3.3 Add User-assigned managed identity (UAMI) to Microsoft Purview Governance Portal
Now you need to attach the same UAMI inside the Microsoft Purview governance portal
Inside the Governance Portal > go to Management > Credentials > New > Create
4. Microsoft Purview: System-assigned managed identity (SAMI) for scans
If you’re using the Microsoft Purview system-assigned managed identity (SAMI) to set up scans, you won’t need to create a credential and link your key vault to Microsoft Purview to store them. For detailed instructions on adding the Microsoft Purview SAMI to have access to scan your data sources, refer to the data source-specific authentication sections below:
- Azure Blob Storage
- Azure Data Lake Storage Gen1
- Azure Data Lake Storage Gen2
- Azure SQL Database
- Azure SQL Managed Instance
- Azure Synapse Workspace
- Azure Synapse dedicated SQL pools (formerly SQL DW)
5. Azure Key Vault
5.1 Azure Key Vault Firewall
In my sandbox, I have enabled Public Access on my Key Vault.

If your Key Vault does not have Public Access enabled, then you have to 2 configuration options to allow access for Microsoft Purview.
Option #1
Microsoft Purview is listed as one of Azure Key Vault’s trusted services, so you can enable access only to Allow trusted Microsoft services, and Microsoft Purview will be included.
Go to > Key Vault > Networking > Firewalls and vnets > tick the Allow trusted Microsoft services to bypass this firewall

Option #2 Private endpoint connections
To connect to Azure Key Vault with private endpoints, follow Azure Key Vault’s private endpoint documentation.
5.2 Microsoft Purview access to Azure Key Vault
Azure Key Vault supports two permission models:
Go to Key Vault > Access Policies > Create > Secrets permissions > select Get and List > Next

Select principal, choose the Microsoft Purview system managed identity > Next > Create


5.3 Link Azure Key Vaults to Microsoft Purview account
Before you can create a Purview Credential, you need to link an Azure Key Vault instance with your Microsoft Purview account.
Go back to the Microsoft Purview governance portal > Management > Credentials > Manage Key Vault connections > New > Provide the Key Vault information > Create.

Confirm that your Key Vault has been successfully associated with your Microsoft Purview account when you get this window after rechecking the Manage Key Vault connections

5.4 Add a secret to Key Vault for Microsoft Purview
To add a secret to the designated Key Vault:
Azure Portal > designated key vault > Secrets
Select on Generate/Import > Manual
Add the secret uniqe name >
Value: Type a value for the secret > Create.

6. Microsoft Purview: Create a new user account
Creating a new Microsoft Purview user account:
Go to the Microsoft Purview governance portal > Management > Credentials > New
- Add the friendly username and description > Authentication method and a Key Vault connection from which to select a secret from.

(Ive used Windows authentication since Im using my AD account but use Basic Auth if you are not using AD credentials.)
Verification of newly created Microsoft Purview user account

Microsoft Reference
There may be noticeably a bundle to find out about this. I assume you made certain good points in options also.
Greetings from Los angeles! I’m bored to tears at work so I decided to check out your blog on my iphone during lunch break. I really like the knowledge you present here and can’t wait to take a look when I get home. I’m shocked at how quick your blog loaded on my phone .. I’m not even using WIFI, just 3G .. Anyhow, great blog!
Spot on with this write-up, I truly suppose this web site needs far more consideration. I’ll most likely be once more to learn rather more, thanks for that info.