During my time as an Azure Architect, I have had to migrate a number of Windows Server 2003 virtual machines into Azure. Often these servers hold vital business information that the client could ill afford to lose due to regulatory or compliance reasons and often the software has deprecated and cannot be rearchitected.
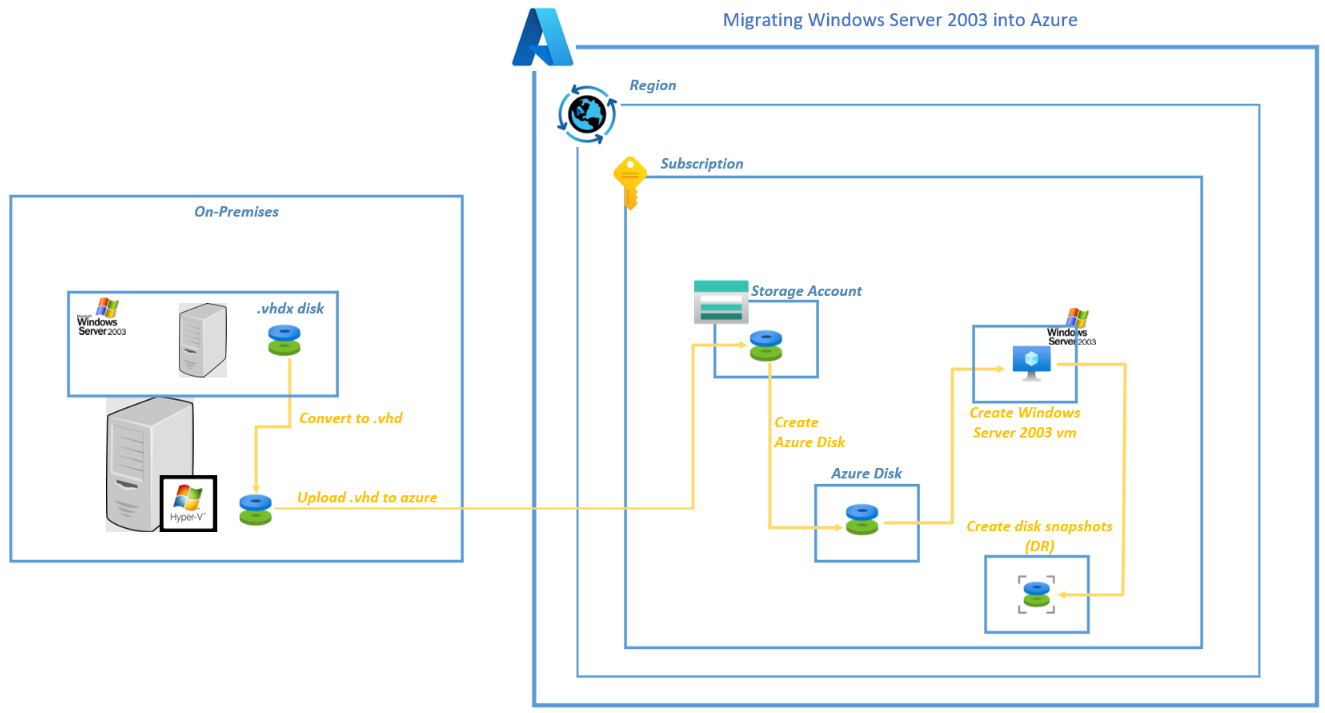
The aim of my blog is to describe the process of easily and quickly migrating those random Windows Server 2003 virtual machines into Azure cloud for safe keeping.
Prerequisite
Verify the generation of the guest server:
On the home screen of your Hyper-V host you will see the generation of your guest virtual machine,

Deployment Plan
Part 1 – Create your destination Storage Account
Part 2 – Prepare your Windows Server 2003 Server
Step 1 – Backup the Windows Server 2003 vm before preparing the vm for migration!
Step 2 – Install the Hyper-V Integration Services
Step 3 – Ensure Remote Desktop is enabled on the Windows Server 2003 virtual machine
Step 4 – Convert your Windows Server 2003 vm hard disk
Step 5 – Upload your Windows Server 2003 vm hard disk
Step 6 – Create an Azure Disk
Step 7 – Provision your Azure-based Windows Server 2003 virtual machine
Step 8 – Backup Windows 2003
Deployment Steps
Part 1 - Create your destination Storage Account
Create a Storage Account with a blob container (into which your Windows Server 2003 Azure compliant hard disk will be copied later),
Part 2 - Prepare your Windows Server 2003 Server
Step 1 – Backup the Windows Server 2003 vm before preparing the vm for migration!
Step 2 – Install the Hyper-V Integration Services
Download and install the integration services onto the Windows Server 2003 virtual machine from https://archive.org/download/Hyper-V_vmguest/vmguest.iso
(You will need to reboot if the services are installed),
After completion, execute the disk again to receive this confirmation message,

*I would normally recommend running wuauclt.exe /updatenow to ensure all your updates are installed but this service has been decommissioned. 🙂
Step 3 – Ensure Remote Desktop is enabled on the Windows Server 2003 virtual machine
Go to My Computer > r/click > properties > Remote > select Enable Remote Desktop on this computer > OK

Shut down the Windows Server 2003 guest vm that you plan to migrate to Azure,
Step 4 – Convert your Windows Server 2003 vm hard disk
Go to the Hyper-V host > select the target Windows Server 2003 vm > Settings >
Select the Hard Drive > click on Edit >
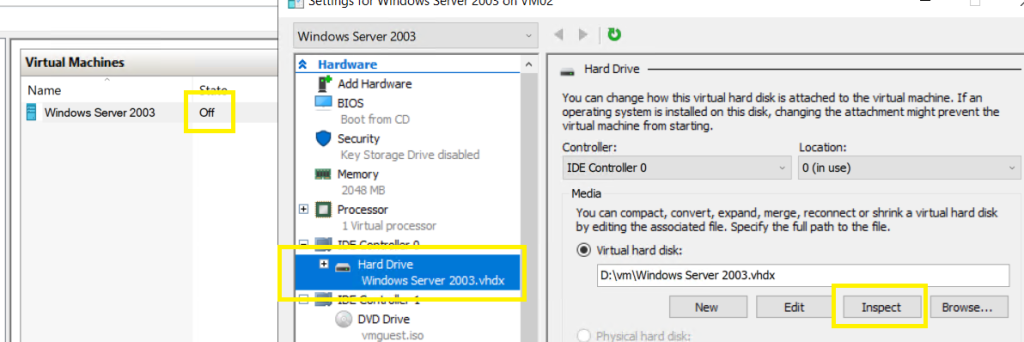
Locate Disk > Next,
Choose Action > Convert > Next,

Choose Disk Format > select VHD > Next,

Select a Fixed size,

Configure Disk > select browse > Create a new folder called “Azure” into which an Azure-compliant copy of the Windows Server 2003 vm disk will stored,

Point the new disk to your new “Azure” folder with a disk name > Next,

Summary > verify your settings > Finish,


Step 5 – Upload your Windows Server 2003 vm hard disk
Now open Azure Storage Explorer on the HyperV host:
Connect to the destination Storage Account created earlier and browse to your container,
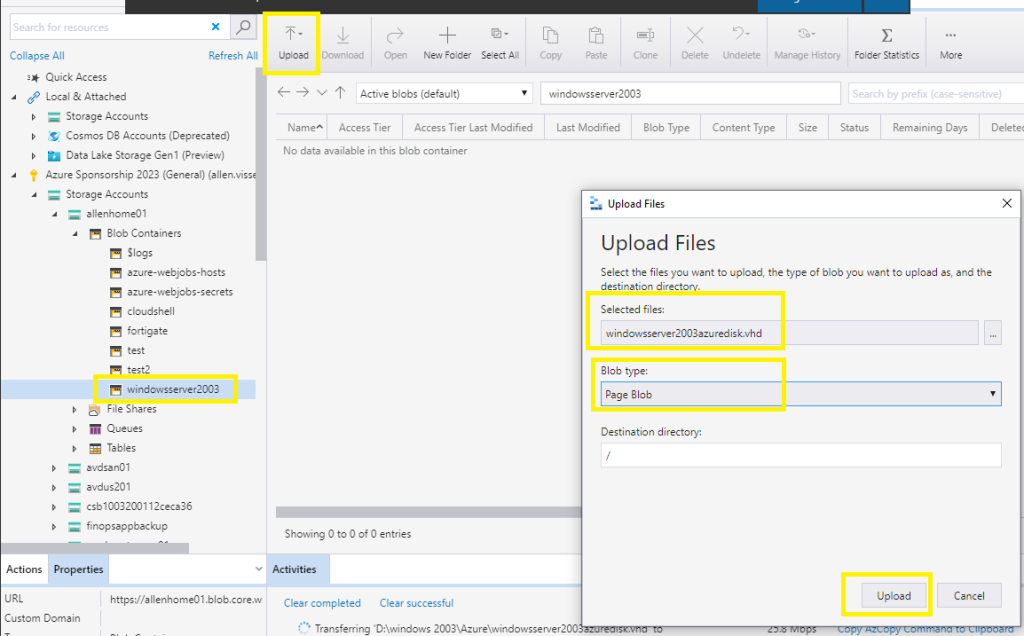
Click on upload,

Upload files,
Browse and select your new .vhd file,
Blob type > select Page blob (this is recommended for vhd / vhdx files),
Upload,
The upload process will appear in your Activities section,
Step 6 – Create an Azure Disk
You will need to grab the Source blob url from the vhd source blob URL,

Go to your Azure Portal > Azure Disk > Create >
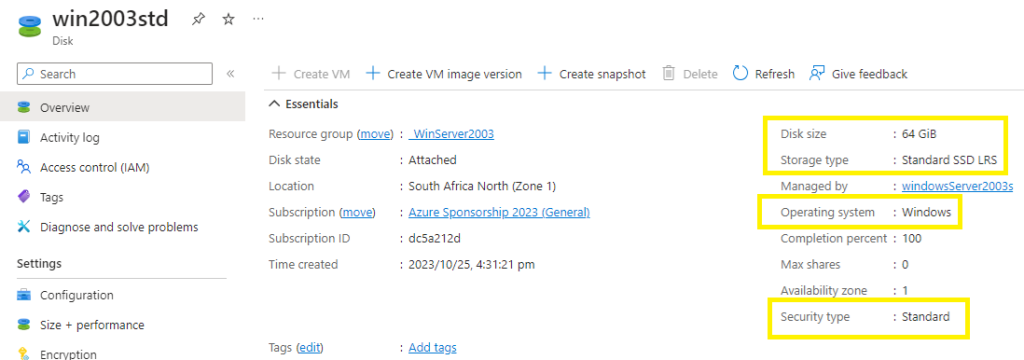
Complete the Subscription, Resource Group, unique Disk Name, Region and Availability Zone,
Source type = select source blob > browse >
OS type = Windows,

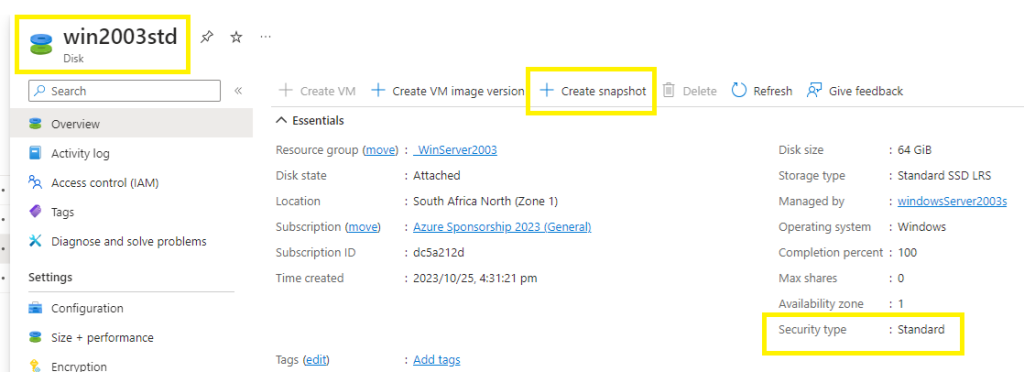
Security Type must be STANDARD
Select the vm generation based on the generation information collected earlier (prerequisites)
And architecture according to your HyperV settings,
Select a disk size that will accommodate your vhd disk size,
Next,

Encryption tab:
Select your encryption method,
Network tab:
Select your network tab,
Advanced tab:
Select your options,
Tags tab:
Select your tags,
Review & Create,
Create,
Step 7 – Provision your Azure-based Windows Server 2003 virtual machine
Select your new disk > +Create VM

Basics tab:
Complete the required fields,
Select your license type / model,

Disks tab:
Select your key management,
Networking tab:
Select where you want to place the virtual machine,
Management tab:
Patch orchestration not applicable,
Monitoring tab:
Configure a custom storage account to send boot & guest diagnostic logs,
Advanced tab:
Complete selections as required,
Tags tab:
Select your tags,
Review & Create,
Create,
Verification
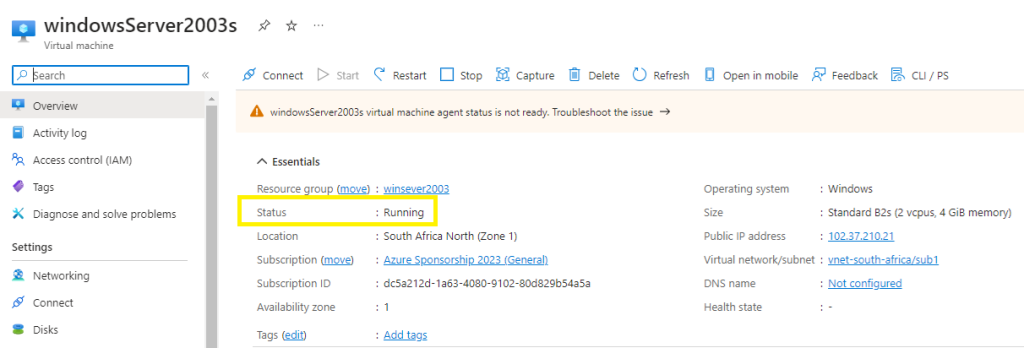
Go to the Azure Portal > Virtual Machines > search for your newly deployed Windows Server 2003,
You will notice the persistent virtual machine agent status is not ready. The Azure VM agent and extensions do not support Windows Server 2003.
Perform an mstsc login to the Windows Server 2003 to verify connectivity:

Step 8 – Backup Windows 2003
Since the Azure VM agent and extensions do not support Windows Server 2003, how do we backup the virtual machine?
Go to the disk you created earlier in Azure portal > Disks > select the disk > +Create a snapshot and configure accordingly.
–I hope you found my blog simplified and easy to follow to accelerate the next time you encounter a client with a Windows 2003 Server that needs to be migrated into the cloud for safe keeping–
Let’s spread the love! Tag a friend who would appreciate this post as much as you did.