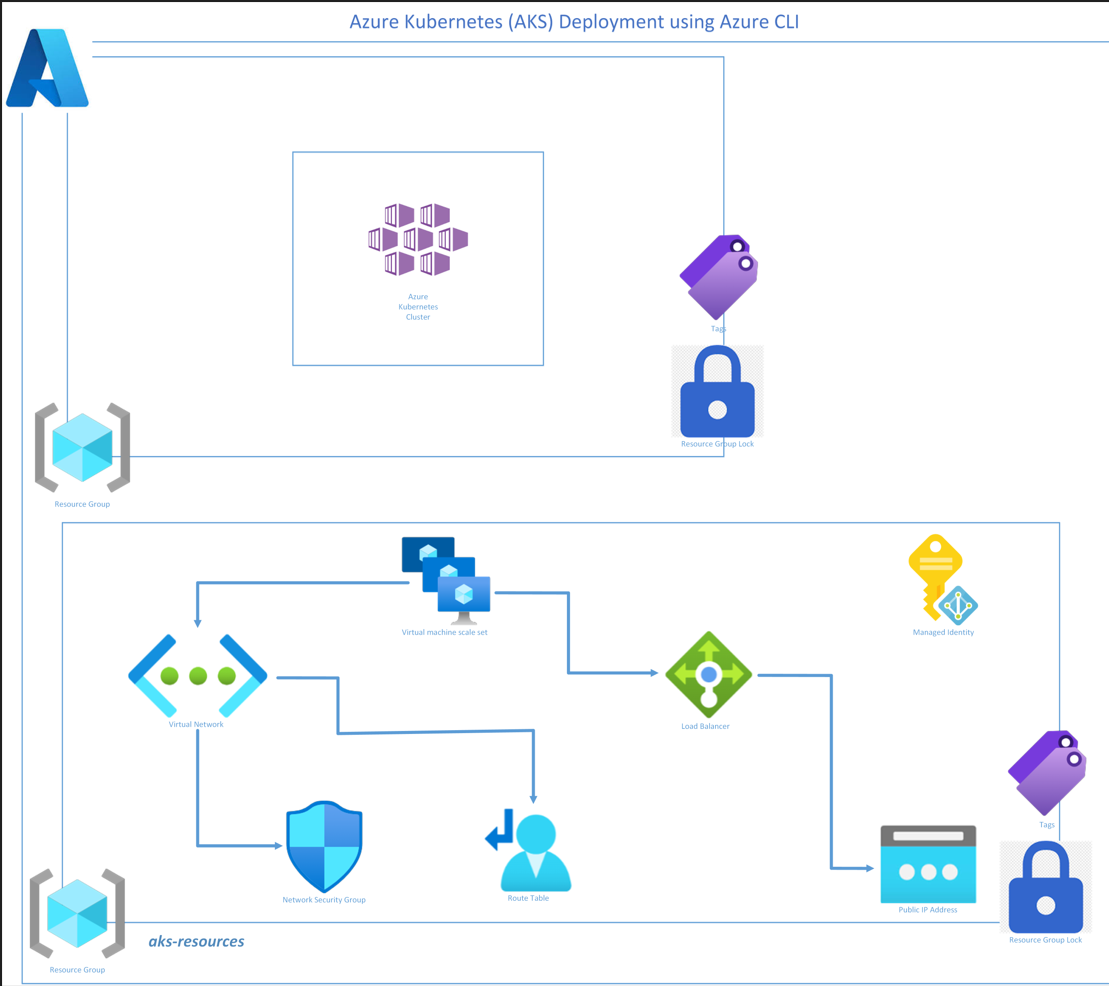
The aim of my blog is to provide a level 100 walkthru on how to quickly and easily deploy an Azure Kubernetes Service (AKS) using Cloud Shell, in 3 easy steps. The cloud shell offers you the option of applying tagging and resource group locks as well as a customzing the k8s node resource group name, to align with your organizational naming conventions.
Azure Kubernetes Service (AKS) simplifies the deployment of a managed Kubernetes cluster in Azure by offloading the operational overhead to Azure. As a hosted Kubernetes service, Azure handles critical tasks, like health monitoring and maintenance. When you create an AKS cluster, a control plane is automatically created and configured. This control plane is provided at no cost as a managed Azure resource abstracted from the user. You only pay for and manage the nodes attached to the AKS cluster.
Step 1 – Create Resource Group
Create the resource group container for your AKS resources, along with the option of tagging.
resourceGroupName="allen-sandbox-aks"
location="southafricanorth"

az group create \
  --name $resourceGroupName \
  --location $location \
  --tags "CustomerName=Customer01" "AutoShutdownSchedule=None" "Environment=sandbox"
You may optionally configure a lock on your resource group:
#set optional resource group locks
#lockName=”Locked by Allen”
#lockLevel=”CanNotDelete”
#lockNotes=”This sandbox resource has been locked”
#resourceGroupName=”allen-sandbox-aks”
az lock create \
–name “$lockName” \
–lock-type “$lockLevel” \
–notes “$lockNotes” \
–resource-group “$resourceGroupName” \
–force
Step 2 – Create AKS cluster
#This will create a 2nd resource group for your resources, according to your bespoke naming convention:

#Create an AKS cluster with managed Microsoft Entra integration and Azure RBAC for Kubernetes Authorization

resourceGroupName="allen-sandbox-aks"
resourceGroupName2="allen-sandbox-aks-resources"
name="AllensAKSCluster"
az aks create -g $resourceGroupName -n $name --enable-aad --enable-azure-rbac --node-resource-group $resourceGroupName2 --tags "CustomerName=Customer01" "AutoShutdownSchedule=None" "Environment=sandbox"
Step 3 – Enable Azure RBAC on an existing AKS cluster
#Add Azure RBAC role for Kubernetes Authorization into an existing AKS cluster

resourceGroupName="allen-sandbox-aks"
name="AllensAKSCluster"
az aks update -g $resourceGroupName -n $name --enable-azure-rbac
–I hope this blog helped you deploy your AKS cluster in 3 easy steps–

Please tell me more about this. May I ask you a question?
Thanks for posting. I really enjoyed reading it, especially because it addressed my problem. It helped me a lot and I hope it will help others too.
I really appreciate your help
Thank you for writing this article. I appreciate the subject too.
Thank you for sharing this article with me. It helped me a lot and I love it.
Thanks for your help and for writing this post. It’s been great.
Good web site! I truly love how it is easy on my eyes and the data are well written. I am wondering how I could be notified whenever a new post has been made. I’ve subscribed to your RSS which must do the trick! Have a nice day!
The articles you write help me a lot and I like the topic